How to Recover Deleted Files After Upgrading to Windows 11
Does Updating to Windows 11 Delete Files
Upgrading to Windows 11 will automatically transfer all your files and data, but it's still recommended to back up your files before upgrading to avoid potential issues like program conflicts, hardware incompatibility, or insufficient memory that might lead to Windows 11 installation failure and data loss.
This guide provides effective methods to recover deleted files after upgrading to Windows 11, allowing you to undelete files with or without a backup.
Recover Deleted Files After Windows 11 Upgrade with Data Recovery Software (Without Backup)
If you've experienced a file deletion issue during or after upgrading to Windows 11 and didn't back up your files beforehand, you can recover lost data using a professional file recovery tool. This tool can help you retrieve deleted files.
Deep Data Recovery is a competent data recovery utility that enables you to recover over 1000 types of file types at a high recovery rate, allowing you to easily recover deleted files on Windows 11 in various complex situations.
Qiling Deleted File Recovery Software
- Restore permanently deleted files after emptying the Recycle Bin
- Recover deleted files from various storage devices, including SD cards, USB drives, hard disk drives (HDD), solid-state drives (SSD), pen drives, and external hard drives, to retrieve lost data.
- If you've lost data on Windows 11, Windows 10, Windows 8, Windows 7, Windows XP, or Vista, There are ways to retrieve lost data on these operating systems.
Step 1. Launch Deep Data Recovery, select the desired file types, and click "Next" to initiate the recovery process.

Step 2. To proceed, select the precise file location and click the "Scan" button.

Step 3. After the process, select the "Deleted Files" and "Other Lost Files" folders in the left panel to find the deleted files. You can apply the "Filter" feature or click the "Search files or folders" button to narrow down the search.

Step 4. Click the "Recover" button and save the restored files – ideally, it should be different from the original one.
Retrieve Deleted Files from Windows File History (Need Backup)
To recover deleted files in Windows 11 without using software, you can utilize the built-in File History feature, which automatically scans and saves changes to files in the Desktop, Documents, Videos, and Downloads folders to a local or external hard drive at a set frequency, allowing you to recover deleted files.
Once you've turned on File History, you can restore deleted files from the backups by following these steps: simply go to the File History folder, find the file you want to restore, and click on it to open it. If the file is not in the File History folder, it may have been deleted permanently and cannot be restored. If you're unable to find the file, you can also search for it using the search bar in File Explorer.
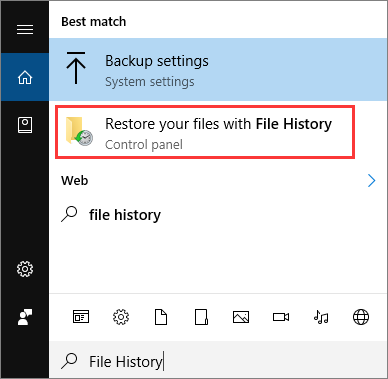
Step 1. Look for File History in the Search box and choose "Restore your files from File History".
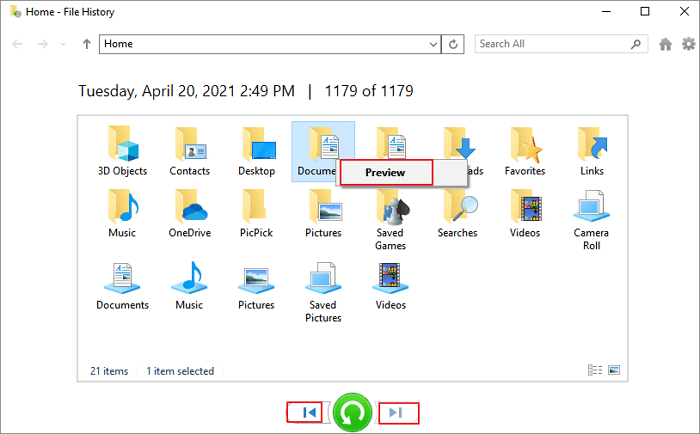
Step 2.The File History window will open, displaying all the backup files and folders. If there are multiple backup versions, you can switch to a different one by using the left and right arrows at the bottom of the window, allowing you to recover from the most completed version.
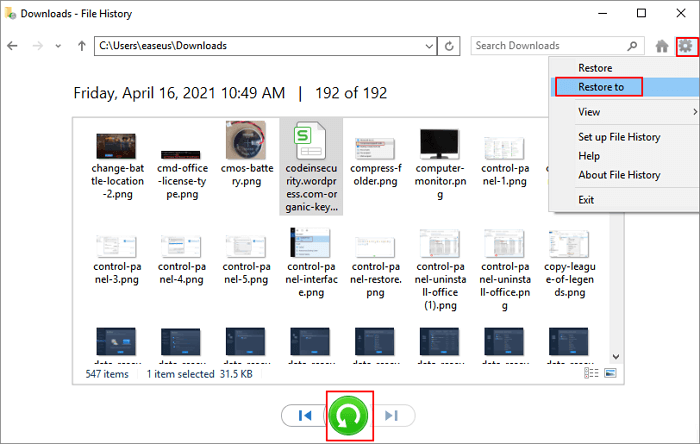
Step 3. To restore the selected file, first preview it, then click the green arrow. Alternatively, click the gear icon near the top right corner and select "Restore to" to save the file to a specific location.
Restore Lost Files from Previous Versions (Need Backup)
You can restore deleted files and folders, or revert a file or folder to a previous state.
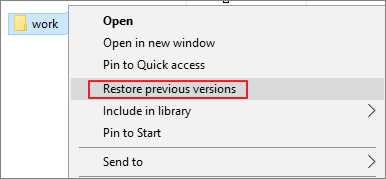
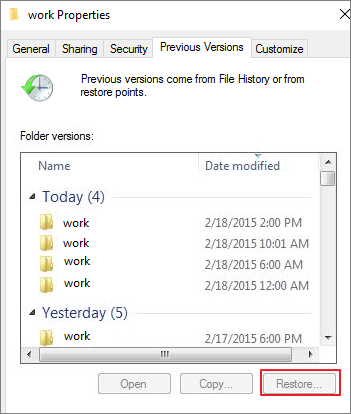
Step 1. To recover lost files, right-click the folder that contained the lost files, select "Restore previous versions" from the context menu, and if the folder is at the top level of your drive, right-click the drive itself and select Restore previous versions.
Step 2. You will see a list of available previous versions of the files or folders that are from File History or from restore points.
Step 3. To select the correct version of a document, click on the dropdown menu and choose the desired version. Once you've selected the correct version, click on the "Open" button to preview it and ensure it's the one you want to work with.
Step 4. Click the "Restore" button to restore a previous version.
Tips for restoring deleted files from a previous version:
- If a file or folder is restored from a backup, the restored version will replace the current version on your computer, and the replacement cannot be undone.
- If the Restore button is unavailable, you can't restore a previous version of the file or folder to its original location, but you can try to open it or save it to a different location.
Quick Tips to Recover Lost Files After the Upgrade to Windows 11
If you've upgraded to Windows 11 and can't find your files, Try these quick fixes to get them back. After upgrading to Windows 11, your files may be nowhere to be found.
1. Check If You Signed in with a Temporary Account
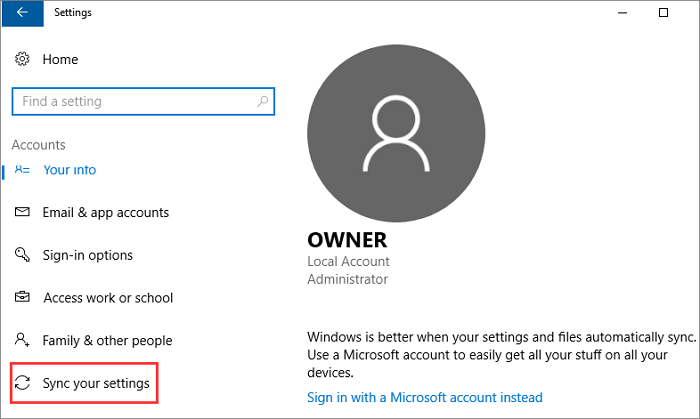
Upgrading to the latest version of Windows 11 may result in signing in with a temporary account and making your files unavailable. To ensure you're using a temporary profile, follow these steps.
To access synced settings, click "Start > Settings > Accounts > Sync your settings". If a pop-up message indicates that you're logged on with a temporary profile, you'll need to reboot your computer and sign in again to access your files.
2. Find Missing Files by Searching
After upgrading to Windows 11, some files may move to a different location. However, you can quickly find lost files using the search function in Windows 11, which offers two ways to do so.
- 1. To search for a specific file or folder on Windows 11, click the Search button and type the name of the file or folder you're looking for. If you can't remember the name, you can also search by file extension, such as typing *.doc to find all files with a .doc extension.
- 2. To search for files on your computer, go to File Explorer by pressing the Windows key + E on your keyboard, and then use the Search tab in File Explorer.
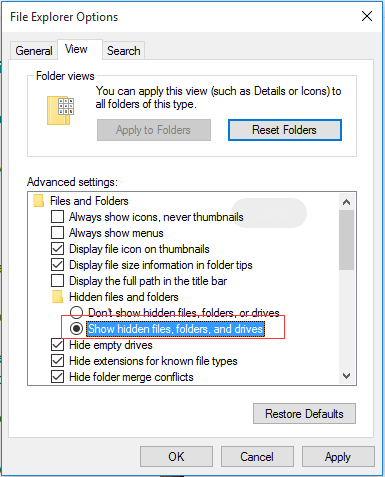
3. Show Hidden Files in File Explorer
After a Windows 11 upgrade, some files or folders may be hidden. To recover and view them, open File Explorer Options, click the "View" tab, and under "Hidden files and folders," select "Show hidden files, folders, and drives".
Or you can show hidden files using CMD:
To remove hidden, read-only, and system attributes from all files and subfolders on a specific drive, follow these steps:
Closing Thoughts
If you encounter a file deletion issue after upgrading to Windows 11, you can use the methods outlined in this article to retrieve your data. Without a backup, this is a common problem for many users. A reliable data recovery tool like Deep Data Recovery can be used to efficiently recover deleted files.
To recover missing and lost files after a Windows 11 upgrade, you can try removing the temporary profile, using the search feature to find files, or showing hidden files in File Explorer.
Related Articles
- Fix Corrupt Master File Table. CHKDSK Aborted Error in Windows 10/8/7
- Netgear NAS Recovery: Safe Software to Restore NAS Data
- How to Delete Files, Folders, and Directories in Linux Using Command
- Top 10 Best Free Data Recovery Software
- 5 Free Excel Password Remover Online to Unprotect Excel Workbook
Did you forget or lose your password to unlock your password-protected e Excel files? Relax! Here, we cover the five most useful online Excel password remover tools to help you unlock password protected excel file online effectively. - Fix 'Pictures Won't Load from SD Card' Error (7+ Solutions)
If pictures won't load from your SD card on your computer, camera, or mobile phone, this page will guide you through troubleshooting the issue, restoring all photos, and making the card work again. We provide 7 solutions to fix the problem, so you can trust us and apply the fixes to get your SD card working properly.