How to Backup OneNote in Windows 10 and How to Restore OneNote from Backup
Applied to OneNote 2020, OneNote 2019, OneNote 2016, OneNote 365
OneNote automatically saves your notes, but it's still a good idea to back up your note files to prevent data loss due to hard drive corruption, viruses, or OS crashes, and you can restore OneNote from backup if needed.
This tutorial covers the process of backing up and restoring OneNote in Windows 10, specifically the desktop version. It provides guidance on how to create a backup of OneNote and, in two ways, how to restore the application from that backup.
How to Backup and Restore OneNote Automatically on Windows 10
To back up OneNote and restore OneNote, use an automated file backup tool like Qiling Backup, which is compatible with Windows 10 and other systems, allowing for easy backup of needed files with just a few clicks.
Qiling file backup software has the following outstanding features.
- Run automatic backup schedule upon time or event
- Support full, incremental, and different backup methods
- To backup OneNote, you can export your notes to various external storage options, including an external hard drive, tape, FTP server, network share, NAS, CD/DVD, or cloud services like OneDrive, Google Drive, and Dropbox. This allows you to preserve your data in case of hardware failure, data loss, or other unforeseen events.
- To optimize disk space usage and maintain data security, consider compressing backup images and encrypting files. Compressing backup images reduces their size, making them take up less space on your disk.
- To ensure a smooth and efficient system recovery process, it's recommended to create a system backup on a USB drive and store the system image on an external hard drive. This way, in the event of a system failure or data loss, you can easily restore the system image from the external hard drive and have your system up and running quickly.
Qiling Backup is a software that not only provides data backup features but also allows for disk cloning, partition cloning, USB drive cloning, and migrating Windows 10 to an SSD without reinstalling.
- Recommendation
- 10Web offers reliable WordPress backup services, providing easy and complete backup solutions to prevent data loss for your website.
To backup OneNote on Windows 10, download a smart file backup program and follow the step-by-step guides to easily backup and restore your OneNote data without any effort.
How to Backup OneNote on Windows 10
Step 1. When you first use Qiling Backup to back up files, click on "File backup" on the "Backup and recovery" page.

Step 2. You can choose to back up pictures, videos, documents, and any other types of files on your computer.

Step 3. To back up files, folders, or directories, follow the paths to locate the items you want to back up, then select them all.
Step 4.You will need to select a backup location to save and retain the backup. This can be an external hard drive, a cloud storage service like Google Drive or Dropbox, or another location on your computer.

Step 5.Qiling Backup allows users to save backup files to various devices, including local hard drives, external USB drives, SD cards, network drives, and NAS drives. It also supports cloud storage through Qiling's own cloud drive. We recommend choosing the cloud drive for greater accessibility, flexibility, and safety.

Step 6. If you're interested in setting up an automatic and intelligent backup schedule for the next file backup task, go to the "Options" setting. There, you can choose to encrypt confidential files, compress the backup image size, or customize a backup scheme to specify when the next backup should start.

Customize an advanced and automatic backup task here:

Step 7. Click "Proceed" to start the file backup process, and your completed backup files will be displayed on the left side in a card format.

How to Restore OneNote from Backup Image
Step 1. Launch Qiling Backup, click "Browse to Recover".
Step 2. To recover your data, go to your backup destination and select the bzf file created by Qiling Backup. This file contains your backed-up data.

Step 3. To recover data, you can choose to restore it to a specific location, such as a new folder or drive, or to its original location, where it was saved before the issue occurred.
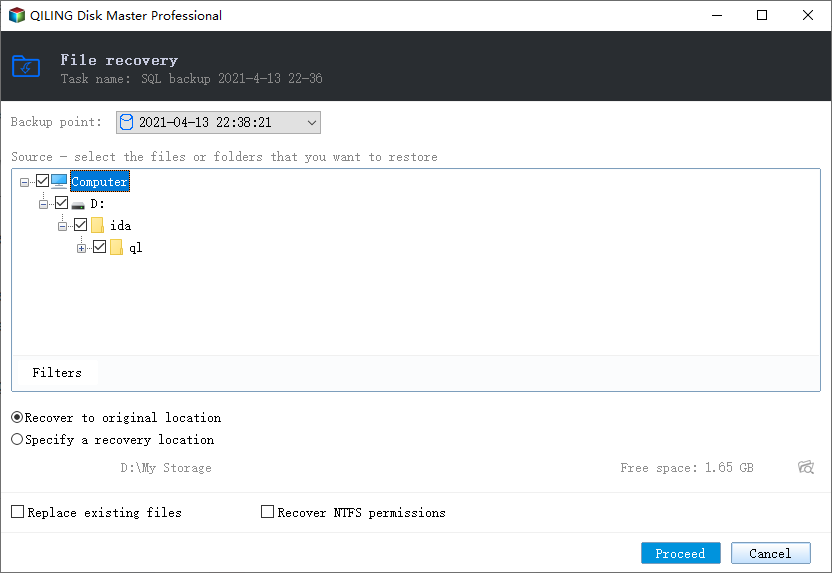
Step 4. Click "Proceed" and the recovery would start.
How to Backup OneNote and Restore OneNote Manually
OneNote can keep manual and automatic backups of your work, taking up the same space as the original files, requiring sufficient storage space.
Backup OneNote with Automatic Backup Feature
Step 1. To access OneNote options, launch the OneNote application, click on "File" in the top left corner, then select "Options", followed by "OneNote Options", and finally click "Save & Backup" to save any changes.
Step 2. On the right, under "Save", click "Backup Folder" > "Modify".
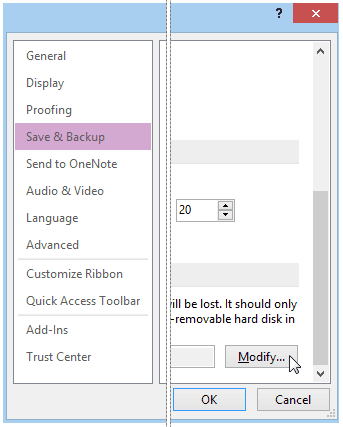
Step 3. In the "Select Folder" option, you can choose to backup OneNote files to a local network location or an external hard drive, ensuring the backup is not stored on the same hard drive as your computer. This helps protect your data in case of a system failure or other issues.
Step 4. 1. Open the Google Maps app on your device.
Step 5. OneNote automatically backs up files weekly, but you can also set more frequent backups by adjusting the Save & Backup settings in the OneNote Options dialog box.
Manually Back Up OneNote
You can run a manual backup when you add or change a lot of information on your laptop that you can't lose.
Step 1.To access the OneNote Options dialog box, click on "File" in the top left corner of the screen, then select "Options" from the dropdown menu. In the OneNote Options dialog box, navigate to the "Save & Backup" section.
Step 2. On the right, under Save, choose "Back Up All Notebooks Now".
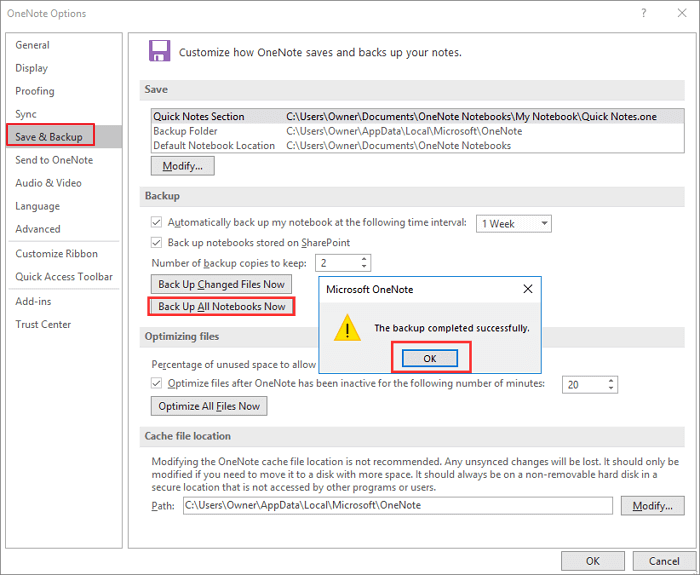
Step 3. Click "OK" when the backup process finishes.
To prevent newer OneNote backups from overwriting older notes, adjust the "Number of backup copies" in the Save & Backup settings within the OneNote Options dialog box to keep a sufficient number of backups.
Restore OneNote from Backup Files
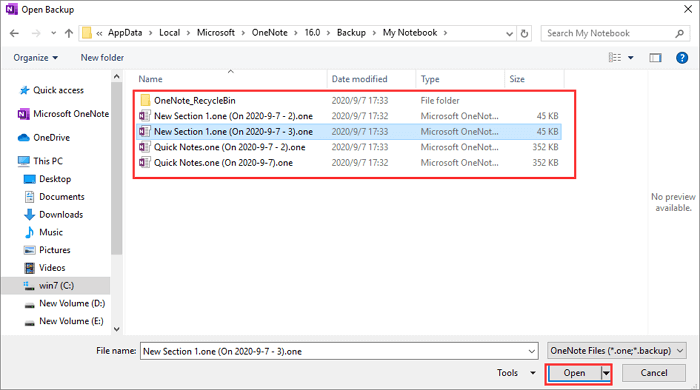
Step 1. Launch OneNote, on the File menu, click "Open Backup".
Step 2. In the "Open Backup" dialog box, double-click the notebook folder that contains the file or files you want to restore. This folder is located in the "Backup" folder.
Step 3. To restore a backup, select one or more backup files to restore, and then click the "Open" button.
Step 4. To restore notes, do either of the following:
- To restore the entire backed-To move a section, right-click its section tab and select "Move" from the context menu. In the Move dialog box, select the destination location for the section and click "Move".
- To restore specific pages from a backed-up section, select the page tabs you want to restore and right-click on them, then choose "Move or Copy".
Step 5. In the Move or Copy dialog box, select the destination and click "Copy".
Step 6. When your notes are restored, right-click the backed-up section and click "Close". Then, re-select your original notebook from the Notebooks list to continue working on it.
Conclusion
You can backup OneNote on Windows 10 using Qiling file backup software, which allows you to schedule backups of OneNote and other files on your computer, in addition to system, disk, or partition backups at a block level, with multiple-platform storage options available.
If you don't want to use a third-party file backup tool, you can use the backup feature in OneNote to save notes by following the steps above.
FAQs About How to Backup OneNote Windows 10
The following are the highly relevant questions about how to backup OneNote. You can read the brief explanations if you also have any of these problems.
Is there a way to backup OneNote?
You can backup OneNote in the following way:
Step 1. Choose "File" > "Options".
Step 2. In the OneNote Options dialog box, choose "Save & Backup".
Step 3. To back up all notebooks, click on the "Back Up All Notebooks Now" option located under the "Save" button on the right-hand side.
Step 4. When the backup is complete, click OK on the notice that appears.
How do I backup and restore OneNote?
To automatically back up OneNote and restore from backup, the simplest way is using Qiling files backup software, which allows you to run an automated backup of your OneNote directories and files and store the backup on a hard drive, external hard drive, USB drive, or cloud storage services like OneDrive, Google Drive, or Dropbox.
Restoring OneNote from a backup with Qiling files backup program is a simple process that can be completed with just one click.
Where are my OneNote files saved?
- The OneNote file backup folder on Windows 10 is located at C:\Users\user name\AppData\Local\Microsoft\OneNote\version\Backup.
- On Windows Vista, the OneNote backup folder is located at C:\Users\user name\AppData\Microsoft\OneNote\12.0\Backup.
How do I transfer OneNote files to another computer?
To quickly transfer OneNote files from one computer to another, you can use free PC transfer software, such as Qiling Disk Master Free, to transfer files, applications, and accounts between computers via a network connection.
Two computers on the same local area network (LAN) can be connected to transfer files and apps, including account settings, without the need for any external storage device.
Related Articles
- Back Up and Restore Outlook 2016 for Mac
- How Long Does It Take to Factory Reset A PC
- Internet Browsers Not Working after Windows Upgrade? Fix It Now!
- Upgrade Hard Disk to Fix 100% Disk Usage Error in Windows 10 & More Tips
- 6 Proven Ways to Fix Windows Update Download Error 0x80248007
If you've encountered the Windows Update download error 0x80248007, don't worry, this guide has got you covered. To resolve this common issue, we'll explore 6 effective solutions that can help you get back on track. Additionally, you'll learn about a useful tool to back up your PC, ensuring your important files and data are safe. With these steps, you'll be able to fix the error and keep your Windows Update running smoothly. - Windows Update Something Went Wrong - How to Fix?
The 'Windows update something went wrong' error message can occur due to several reasons. This issue may arise from various factors, and the article will explore some of the common causes of this problem.