How to Build A PC? Follow A Complete Guide to Do It
Building a PC by yourself can be a fun and rewarding experience, but it requires some knowledge and skills. You'll need to choose the right components, assemble the parts, and install the operating system. With some patience and guidance, you can successfully build a PC that meets your needs and budget.
With skill and careful following of the assembly instructions, you can build a PC and use it for its intended purpose. This article provides a step-by-step guide to building a PC using custom parts, making it easy to follow and complete.
Preparations Before Building a PC
4 key things to do before building a PC
Plan
When planning your workspace, there are two key considerations: determining how you will use your PC and setting up the workspace itself.
You should consider the intended use of your PC when choosing its components. For casual tasks like browsing and using Microsoft Office, older and less expensive parts are sufficient. However, if you plan to use your PC for more demanding activities such as gaming or video editing, you'll need to invest in more robust and up-to-date components to ensure optimal performance.
You also need to make your workspace ready. Set the workstation in a place that will give you much space for movement, with natural light and air. At the very least, the tools you'll want are:
- 1. Desk. Get a desk preferably with a comfortable height for working on.
- 2. Phillips-head screwdrivers are a type of screwdriver that uses a cross-shaped tip to drive screws with a Phillips-head. They come in various sizes, with the most common being #1 and #2. These screwdrivers are widely used in many industries and are a staple in most toolboxes. They are particularly useful for driving screws in applications where a lot of torque is required, such as in construction, automotive, and electronics.
- 3. Zip ties and/or twist ties can be used for cable management by organizing and securing cables and wires, making them easier to route and hide, and reducing clutter and visual noise.
- 4. The PC's case may get dark at the corners, but a flashlight can help illuminate those areas, making it easier to clean and inspect.
- 5. Thermal paste, also known as thermal interface material (TIM), is a substance that helps to improve the heat transfer between a CPU and its cooler. It's usually pre-applied to the cooler, but if you're using a new cooler or upgrading your cooling system, it's a good idea to apply a fresh layer of thermal paste to ensure optimal cooling performance. You can buy thermal paste separately, and it's a relatively inexpensive component.
- 6. You'll need a screw holder or a screw organizer to keep your screws organized and within reach. This will save you time and frustration when working on a project.
- 7. Band-aids (just in case).
Antistatic equipment, such as mats or wrist straps, may be necessary to prevent static electricity from damaging the PC or its components, especially in dry environments or on metal surfaces. However, they are not required if you take precautions to avoid generating static, such as building on a non-conductive surface and avoiding contact with metal objects or carpets. If you're still concerned about static, you can consider investing in antistatic equipment.
Budget
Before starting to assemble parts and components, it's essential to budget and determine the total cost of the build. This will help avoid overspending on attractive parts that may not be necessary or may not fit within your budget. Having a clear budget in mind, such as $2000, will ensure that you have enough funds to complete the build without running out of money mid-way. This approach will help you make informed purchasing decisions and avoid unnecessary expenses.
To stay within budget, set a soft limit (e.g., $150) and a hard limit (e.g., $500), then aim to stay within that range. When purchasing components, be logical and consider long-term investments, such as upgrading to a newer model processor at a discounted price of $120 when you budgeted for a $100 old model, even if it's $20 over budget.
Know the Components to Buy
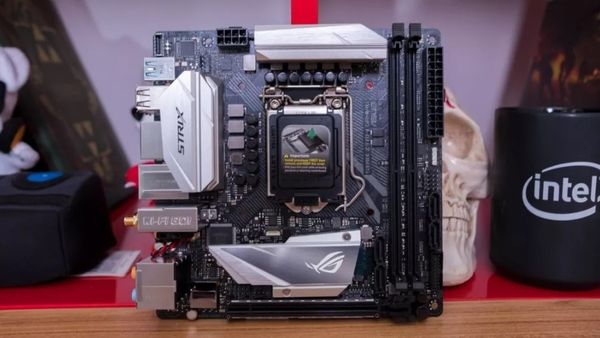
When building a PC, it's essential to understand the components that make up the system. If you've never opened a PC before, the internal parts may seem unfamiliar. However, as you prepare to build your own PC, you're likely already aware of the necessary components, such as the CPU, motherboard, RAM, storage, and power supply. Understanding these components is crucial to ensure a successful build and optimal system performance.
Here's a one-paragraph summary of the components needed for a PC:
- The outer protector is a case that covers all other components.
- The processor, also known as the Central Processing Unit (CPU), is the brain of your computer. It's usually the most expensive component and is responsible for executing most instructions that your computer receives.
- The motherboard is the primary circuit board of a computer, serving as the interface between the processor and all other PC components, connecting and allowing communication between them.
- The Random Access Memory (RAM) is a crucial component of a PC, playing a key role in its performance and memory. Having more RAM enables faster and more efficient processing, ultimately leading to better overall PC performance.
- You can choose between a hard disk drive (HDD) or a solid-state drive (SSD) as your storage driver. While HDDs are more affordable, SSDs are significantly faster and more efficient, but also pricier.
- A graphics card is a component that renders images on a PC, and a dedicated one can enhance gaming or intensive computer use, especially when compared to a built-in or integrated GPU.
- A power supply is necessary for a PC to function, as it converts the electrical power from a wall socket into a format that can be used by the computer's components.
- The PC's components are kept at safe temperatures by the case fans and coolers, which are part of the cooling system.
When selecting PC components, consider their sizes, types, and models. For instance, RAM comes in various capacities such as 4GB, 8GB, or 16GB, while storage options include 256 GB SSD, 500 GB HDD, 1TB HDD, or 512 GB SSD. Similarly, other components like graphics cards can be either Intel or AMD. Research the specific components that suit your PC's intended use and budget to make informed choices.
Acquire or Buying Components
Once you know the parts and components, you can proceed to acquire them, either by dismantling your old PCs and repurposing the parts to build a new PC or by purchasing the necessary components.
When building or upgrading a PC, it's essential to use parts that will serve you well. If you're repurposing old PCs, only use components in good shape to avoid potential issues. On the other hand, if you're buying new parts, research each component thoroughly and know where to purchase them from to ensure you get reliable and efficient hardware.
When researching the component, read online sites, magazines, and consumer reviews to gather information. This is crucial as your PC's performance relies on correctly functioning hardware.
A motherboard should be compatible with your processor, have features like onboard Wi-Fi and Bluetooth, multiple RAM slots or high RAM capacity, and support for graphics cards.
To build a computer, you'll need to source the necessary components, which can be found at local tech stores or online retailers like Amazon, eBay, or the original equipment manufacturer (OEM). Before making a purchase, research the stores and compare prices to ensure you get the best deal. Reviews may provide some guidance on where to buy the components, but further investigation is necessary to find the best option.
You can also consider used parts, especially those listed as "Like New," which are cheaper and do the same work as new ones.
When purchasing components, consider using discounts or after-sales services like free shipping to get a good deal. If sales periods are approaching, such as Black Friday, it might be worth waiting as prices often drop significantly during these times.
To begin assembling the project, make sure you have all the required components and tools before starting. This will save time and prevent any potential delays.
Process: How to Build a PC
Now that you know the type of computer you need and have acquired all the necessary components, you can proceed and build your PC.
The internal layout of a PC can vary slightly depending on the specific model, so it's best to consult the user manual or online resources for detailed information. However, in general, the components are arranged in a way that allows for efficient airflow and easy access for maintenance. To get a better understanding, watching a YouTube video of someone assembling a PC or reading a hardware manual can be helpful in visualizing the internal layout.
To build your PC, start by assembling the components, including the CPU, motherboard, RAM, storage, and power supply. Next, install the CPU onto the motherboard, followed by the RAM and any other components that require the CPU as a reference point.
1. Safety First
To prevent damage from static electricity, it's essential to ground yourself before handling electronics or other sensitive equipment. This can be done by touching a grounded metal object or by using an anti-static wrist strap. By grounding yourself, you can discharge any built-up static electricity and protect the equipment from potential damage.
To prevent damage to computer electronics, wear an antistatic wrist strap/band/cable if you're working with your PC. This device clips onto the PC case and wraps around your wrist, keeping you constantly grounded and preventing electrostatic discharge (ESD).
To build your PC safely, consider the following precautions: touch a large metal body, such as a radiator, to discharge yourself before handling components. Alternatively, build your PC in a room with a bare floor, as carpets can generate static electricity. Additionally, wear rubber-soled shoes instead of socks to minimize the risk of static damage to your components. These precautions can help prevent damage to your PC's components and ensure a successful build.
Leave the components in their antistatic bags until just before installation to prevent static electricity from damaging them.
2. Open the Case
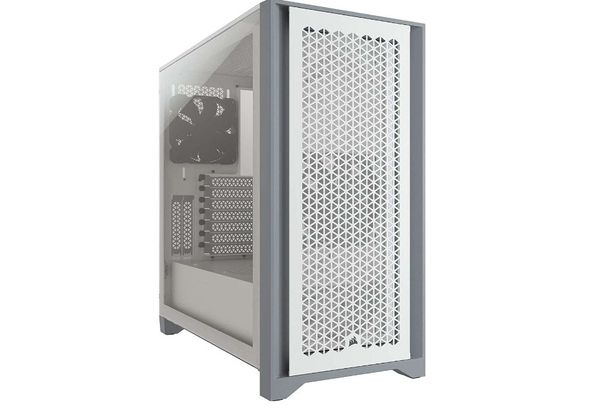
The case you purchased should have a specific layout for the components you have. Open the case and identify the mounting holes for the motherboard, power supply, and any other components you need to install. Make sure you have all the necessary screws and cable ties.
To start installing components in the computer case, you first need to remove the side panel, typically the left one, which provides access to the case's interior. This is done by unscrewing it or sliding it towards the back of the case. Once the panel is removed, you'll be able to see the case's interior and begin installing your components.
Remove any unnecessary items from the case, such as screws, clips, or other small parts, to create a clear working space. If any components are permanently attached, carefully push them aside to access the area you need to work on.
3. How to Install the Power Supply
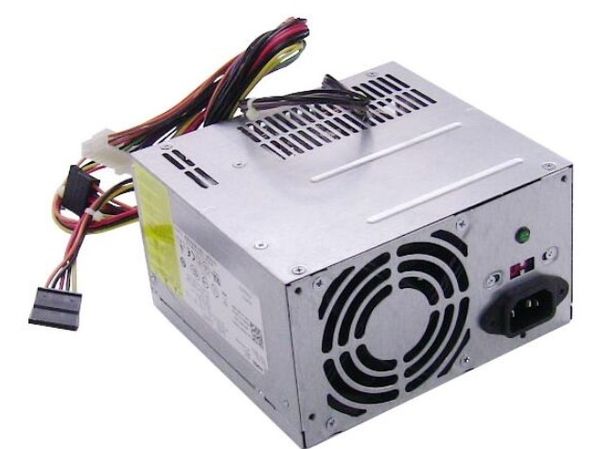
To start assembling your computer, you must first install the power supply unit (PSU). This is a crucial step that ensures the entire system has power. If your case came with a preinstalled PSU, you can skip this step. Otherwise, carefully remove the PSU from its packaging and install it into the case, following the manufacturer's instructions.
The power supply unit (PSU) is typically placed at the rear of the computer case, often in the top or bottom corner. To confirm the correct placement, it's best to consult the PSU's manual.
To install the power supply:
Step 1. Place the power supply in a mounting position, ensuring it's installed with the fan facing down (if specified in the manual) to draw cool air from outside the case.
Step 2. Ensure nothing is blocking the power supply.
Step 3. Screw the power supply appropriately to the case.
Step 4. If you have a modular power supply, connect the required cables to the components. Otherwise, the pre-assembled cables are ready to use.
Step 5. Once you're done installing the power supply, set the case aside for a few minutes to calm the electrostatic discharge. This will prevent any static electricity from damaging your components.
4. How to Install the Processor
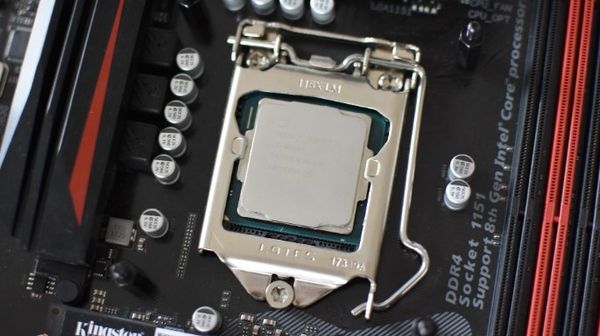
The processor is a key component of the motherboard and the PC, and it's a good practice to install it before the motherboard on the case.
Use these steps:
Step 1. Ensure there's no source of dust or liquid nearby
Step 2. Remove the motherboard from the antistatic bag and place it on a hard, flat, nonmetal surface, such as a wooden desk or the top of its box.
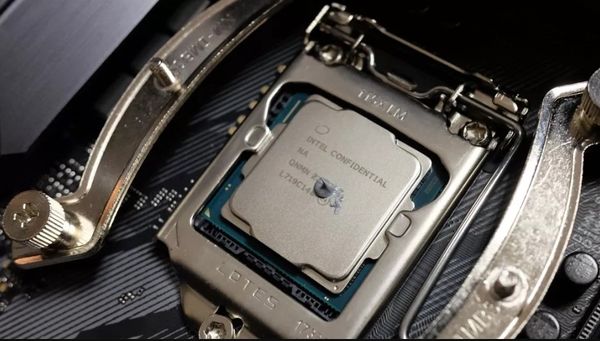
Step 3. To find the processor's spot on the surface of the motherboard, look for the socket, which is usually marked with an "LGA" or "Socket" label. The socket is a square or rectangular hole with pins or contacts on the motherboard. The processor is inserted into this socket and secured with a lever or screw.
Step 4. Attach the CPU to the motherboard, aligning the small golden triangle corner on the CPU with a similar one on the motherboard.
Step 5. Double-check the CPU's alignment and gently push it into place to ensure proper installation, or remove and reseat it if unsure.
Step 6. Once you've installed the CPU, press the retaining arm gently but firmly until it's locked in place.
- Note:
- When installing a CPU, whether it's an Intel or AMD processor, it's essential to exercise great caution. The CPU and motherboard have numerous pins that can be easily damaged if bent, so it's crucial to handle them with care and avoid touching or bending any of the pins.
5. How to Install RAM
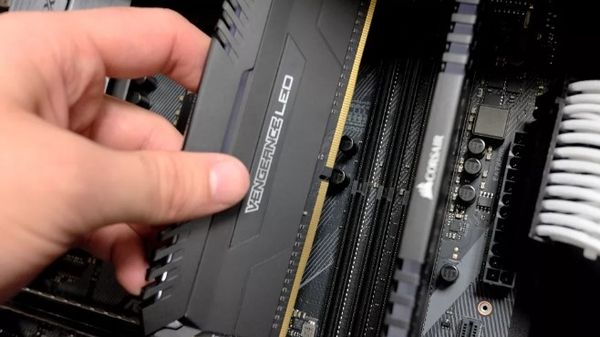
System memory, or RAM, is a crucial component of the motherboard and PC, playing a key role in processing and storing data.
When installing RAM, it's crucial to choose the right slot and direction, as the motherboard usually has two slots for this purpose. This ensures proper installation and optimal performance of the RAM.
Step 1. The placement of RAM sticks in a motherboard depends on the number of slots available and the direction they should be facing, as indicated in the manual. If there's only one slot, the RAM should be placed there, typically labeled as A1. For two sticks, they should be installed in slots A2 and B2, with the manual serving as a guide for the correct orientation.
Step 2. The direction of the RAM stick can be determined by the notch lining its bottom edge, which lines up with a block in the memory slots on the motherboard.
Step 3. To install RAM, push the plastic wings down and outward at the slot on either end of the RAM stick, then place the stick in the slot with it sticking straight up. Once in place, push the RAM down firmly until it clicks into the slot, and you should hear the plastic wings click back in and clamp the stick's ends.
6. How to Install the Motherboard
Installing the motherboard correctly is crucial as it serves as the base for all other components in the case and PC, requiring proper alignment and secure fastening to ensure optimal performance and prevent potential damage.
Step 1. To begin, gather all the standoffs that came with the case and install them accordingly. Most of them should be marked on the case, but this may vary depending on the size of your motherboard. Some cases may even come with standoffs preinstalled, so you may be able to skip this step altogether.
Step 2. The I/O Shield is a protective cover that surrounds the rear ports of a computer, usually included with the motherboard. It prevents dust and other debris from entering the ports and causing damage to the system. The I/O Shield is typically installed before the motherboard is placed in the computer case, and it helps to keep the system clean and free from dust buildup.
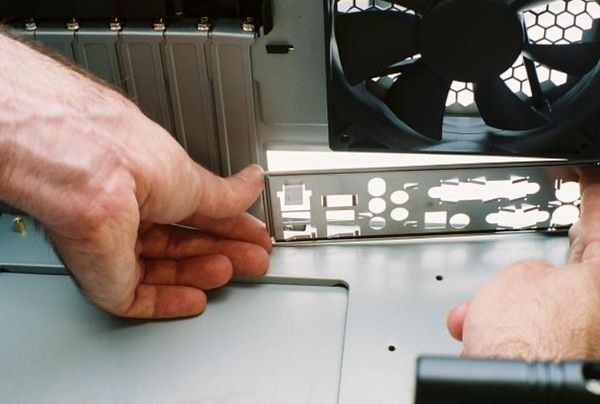
To install the shield, place it into the case's chassis with the right side up. Make sure the motherboard's ports fit through the holes. You may need to apply some force to snap all four corners into place. This must be done before installing the motherboard.
Step 3. To install the motherboard, ensure the holes on the board line up with the standoffs and the ports align with the I/O shield's cutouts. Once in place, screw the motherboard into the insulating standoffs for anchorage.
Step 4. Complete necessary connections:
- Connect the motherboard and CPU's power connection.
- Connect the motherboard's case plugs and buttons.
- Connect the USB headers that connect to your front-facing motherboard ports, such as the USB ports on the front of your computer case. This typically involves attaching the headers to the corresponding ports on the motherboard, and then securing them with screws or clips.
The connections are a combination of pins and cables that match in color or size.
7. How to Install the CPU Cooler
The installation of a PC's CPU cooler varies depending on the specific cooler model, so it's best to refer to the manufacturer's manual for specific instructions. Many coolers come with the processor included in the box.
But in general, here's what you need to do:
Step 1. If you're using a stock cooler, it likely has thermal paste already applied. However, if you're using an aftermarket cooler, apply a small pea-sized amount of thermal paste to the CPU in the center and let it spread. Apply it carefully to avoid any issues.
Don't add too much paste to prevent it from squirting out the sides (socket and surrounding PCB).
Step 2. If your CPU cooler needs it, you may need to remove the other side panel of the case and attach a custom backplate design, which might involve first removing the board's stock backplate.
Step 3. Once the CPU cooler is firmly on top of the processor, press it down gently. Then, line up any retaining brackets/bolts with the cooler's mounting holes on the board.
Step 4. If the cooler has a separate fan, you'll also need to install it. Plug its connector into the CPU cooler port on the motherboard.
8. How to Install the Graphics Card
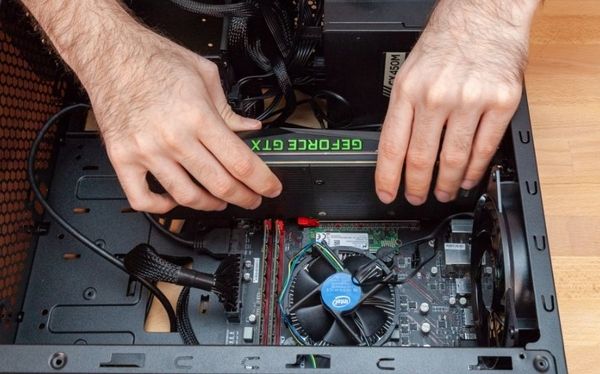
Installing a graphics card is not always necessary, as some systems, such as those with integrated AMD or Intel graphics, may suffice for casual use. However, if you plan to engage in graphics-intensive activities like gaming, a discrete graphics card is recommended. To install a GPU, follow these steps:
Step 1. Remove the slot covers on the case so that the DVI, HDMI, DVI ports, etc., are visible.
Step 2. Connect your GPU into the motherboard's top PCIe X16 slot, which is usually located at the rare end of the board. You should hear a clicking sound when the GPU is securely locked into place.
Step 3. Use the screws to secure the back of the GPU card to the metal brackets, tightening them just enough to keep the card firmly in place, but not too tight.
Check the connectors and make sure they're in the right place, and refer to the manual to ensure all connectors go into the correct slots.
9. How to Install Expansion Cards
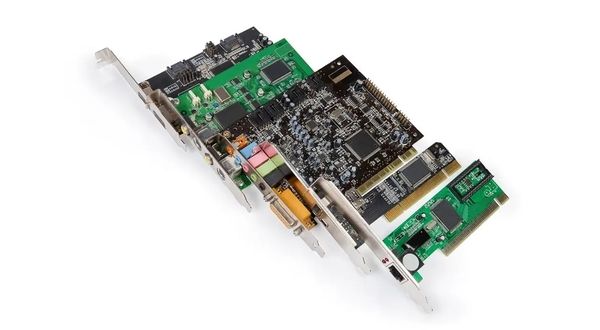
Expansion cards, like graphics cards, use the PCIe slots. Other add-ins that utilize these slots include wireless networking (Wi-Fi), sound, storage, and video capture cards.
Installing expansion cards, such as sound cards or network cards, is similar to installing a discrete GPU. You'll need to ensure the card is compatible with your system, physically install it into an available PCIe slot, secure it with screws, and connect any necessary cables (e.
There are different types of PCIe slots, which means not all expansion cards use the same one. For instance, most cards use the "PCIe 4x" slot, which is a shorter version compared to the standard PCIe slot.
Check your motherboard's connectivity and the card's connector size to determine the correct slot. This will ensure proper installation and functionality of the graphics card.
Step 1. Remove the metal bracket that protects the case where the add-in card will be installed, and keep the screw that holds it in place to secure the expansion card.
Step 2. Align the card's contact rows with the slot, then firmly push down. If the card requires additional power, locate the necessary cables and connect them to the expansion card.
Step 3. Use a screwdriver to secure the card in place and screw it firmly into the back of the case.
10. How to Install Hard Drives and SSDs
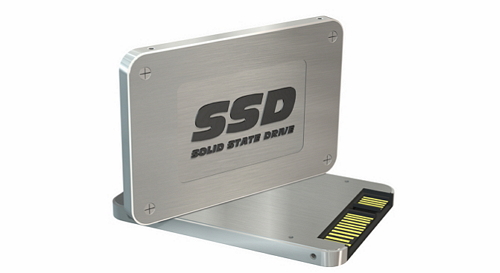
You can install three types of storage drives: hard disk drives (HDD), solid-state drives (SSD), and M.2 format. I can guide you through the process of installing HDD and SSDs.
You may be interested in: How to Set SSD as Boot Drive
Step 1. To install an HDD/SSD, locate your case's drive mounting point(s), typically found in a 3.5-inch full HDD cage or a simple space for a single drive with screw holes. Check your case's manual to confirm the exact location and mounting procedure.
Step 2. Secure your drive (and screw if HDD), or lock it in place using the case's mounting system.
Step 3. Attach the SATA cable (data) to the drive and the motherboard.
Step 4. Attach the SATA power cable/connector to the drive.
- Note:
- To install a SATA SSD, follow the same steps as before but mount it in the 2.5-inch slot/cage or slot instead of the 3.5-inch one.
Attach any given or necessary additional power cables.
Checking After Building a PC
Once you've finished building your PC and connecting internal components, double-check that everything is securely fastened and that no cables or connectors are loose or out of place. This includes checking the CPU, motherboard, RAM, and storage devices to ensure they're properly seated and connected.
To avoid any power shots before hitting the power button, it's crucial to ensure that the power button is pressed before any other buttons on the device. This can be achieved by pressing the power button first and then other buttons, or by using a power button with a slight delay before other buttons can be pressed.
Double-check everything
- 1. Check the motherboard and ensure it's seated correctly and doesn't move.
- 2. Check that the CPU cooler is fitted securely to the processor and that the fan's connector is correctly plugged into the appropriate slot on the motherboard.
- 3. Ensure the graphics card is securely attached to the motherboard, and that the power cable is properly connected to the power supply unit.
- 4. Ensure the expansion cards are securely seated in their PCIe slots with the necessary power cables properly connected.
- 5. Ensure the HDD/SSD is installed correctly and securely tightened, and that it has the proper power and data cables connected.
Power on the PC
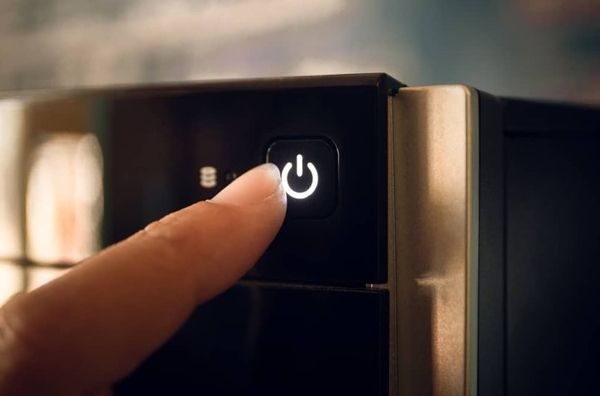
Once you've made sure everything is in its proper place, you can power on the PC:
- Connect your PC to a power source and peripherals like a keyboard and mouse.
- Plug in the power cable to the wall outlet and turn it on.
- To turn on your PC, press the power button located on the front or back of the case. If everything is properly connected, the PC should start up without any issues. However, if it doesn't, you may need to open the case and recheck the connections to ensure they are secure.
- After powering up your PC, you'll need to install an operating system (such as Windows or Linux), drivers, and system updates to get it up and running.
- After installing and updating the OS and drivers, you can start using your PC.
Voila! You've built a PC from scratch.
Final Verdict
You've successfully built a PC from scratch, with a focus on attention to detail and a bit of luck, resulting in a fully functional computer.
If you're successful, congratulations! Keep an eye on your PC temperatures for a few hours or days to ensure all the CPU coolers and fans are working correctly. If something within the PC breaks or needs attention, you're now well-equipped to work on it.
If you have any questions or concerns, please don't hesitate to share them with us in the comments section. We're here to help and want to ensure you have a smooth experience.
Related Articles
- What Is an Intrusion Prevention System (IPS)?
- How Does an SSD Work | SSD VS HDD 2022 - Qiling
- What is Remote Direct Memory Access (RDMA)
- All Inforamtion About Recovery Media Creator [Update 2022]
- 2022 TOP| Corrupt File Repair Software Free Download & Online Free
Need to fix corrupted files? Download free corrupt file repair software to repair JPEG, Excel, Word, MP4, and ZIP files on Windows and Mac. Also explore online repair tools for quick fixes. - How to Wipe a Computer and How to Delete Everything on Windows 7/10
If your computer or laptop is running slow due to accumulated trash, or you want to completely wipe everything before selling or giving it to others, this page will guide you on how to do so on Windows 7 and Windows 10.