Install IDE Hard Drive
How to Install IDE Hard Drive and Troubleshoot IDE Hard Drive Problems?
This guide is for installing an IDE drive, but keep in mind that if you're opening up an OEM machine, you may be voiding your warranty, so be sure to check first.
When installing a large hard drive into older systems, the BIOS may only recognize up to 137 GB or even 32 GB on very old mainboards. To overcome this limitation, you can use the installation disk provided with the hard drive or, if you're more advanced, update your BIOS to support larger drives. The installation disk is usually on a floppy disk, so if you don't have one, a BIOS update is your best option.
To prepare your IDE hard drive for installation in a computer, you'll need to set it up with a controller and cable. First, ensure the IDE cable is securely connected to both the motherboard and the hard drive.
| Workable Solutions | Step-by-step Troubleshooting |
|---|---|
| Step 1. Before you start | Keep the drive in the protective anti-static container until ready to install...Full steps |
| Step 2. What you need | Phillips screwdriver, four 6-32 UNC drive mounting screws and Standard 40-pin ATA...Full steps |
| Step 3. Let's Begin | Unpack everything, drives come defaulted to be ready to be installed in a single drive environment...Full steps |
| Step 4. Setting the Jumpers | Use the Master or Single Drive setting if the drive is the only drive on the ATA...Full steps |
| For more detailed steps | Install hard drive, partition drive, and troubleshooting common issues (in Steps 5, 6, and 7)...Full steps |
# 1. Before you start
- Do not drop or bump the drive.
- Keep the drive in the protective anti-static container until ready to install.
- To protect a drive from static discharge, wear a grounded wrist strap and attach it to the metal chassis of your computer, ensuring the drive is shielded from potentially damaging static electricity.
- Handle the drive by the edges of the frame.
- Do not apply pressure or attach labels to the circuit board or the top cover of the drive.
- Turn off the power to the host system before installation.
# 2. What you need
- Phillips screwdriver and four 6-32 UNC drive mounting screws.
- Standard 40-pin ATA interface cable or an 80-conductor cable if you're running UATA66/100, with a maximum length of 18 inches.
- An unused drive power cable for your new drive.
- Needle-nose pliers for removing or adding jumpers.
It's recommended to place a CD drive on a separate channel from the hard drive to prevent the hard drive's speed from being limited by the slower CD drive. This is because the hard drive's speed is typically much faster than the CD drive's, and the CD drive can become a bottleneck if they share the same channel. By separating them, you can ensure that the hard drive can operate at its full potential, without being slowed down by the CD drive.
# 3. Let's Begin
The drives come pre-configured to be installed in a single drive environment, so they're ready to go as soon as they're set up.
The terms "Master" and "Slave" were assigned to the primary and secondary drives, respectively, in a hard drive configuration. The primary drive is also sometimes referred to as the "primary" drive, while the secondary drive is called the "secondary" drive. Alternatively, some people use the term "Cable Select," where the drive's position on the cable determines which one is the primary and which one is the secondary. To use Cable Select, you'll need to ensure the drive is plugged into the correct part of the cable.
Wonder what connects to where on the cable?

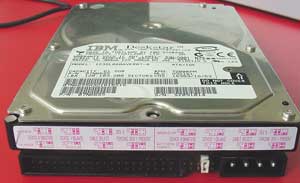
If you want to make it the master or the slave, you will have to look around the drive to find where the instructions are. A diagram should be visible, resembling this:

It's not currently set, but you can fairly easily tell from the diagram what you'll need to set it for. There is a sample about Seagate hard drive jumper setting.
# 4. Setting the Jumpers
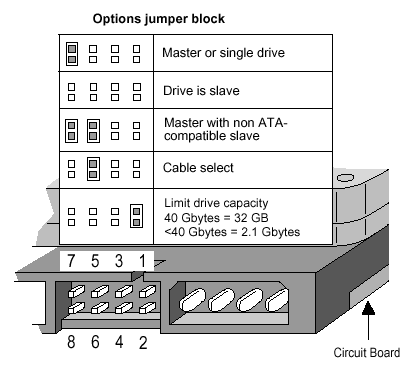
- Master or Single Drive - If the drive is the only drive connected to the ATA interface cable, then this setting should be used.
- Drive is Slave - In this setting, the additional drive on the cable is treated as a slave drive, with the original drive set as the master. This configuration allows for multiple drives to be connected to the same cable, but the master drive is prioritized for data transfer.
- Master with non-ATA compatible drive - Use this setting if the drive is connected to a CD-ROM, tape drive, or other non-ATA device. It's recommended to have the CD-ROM and other non-hard drive devices on the secondary ATA channel.
- Cable-Select Option (Default) - This setting allows the cable to automatically determine whether a drive is master or slave based on its position on the Ultra ATA cable, with the master drive connected to the black connector at the end and the slave drive connected to the gray connector in the middle.
- Limit Capacity Option - If the system the drive is being installed into doesn't support the full capacity of the drive, a limit capacity jumper may be required. This jumper will need to be used in conjunction with a drive overlay program, such as the one installed by Disc Wizard Starter Edition.
The figure below depicts the jumper settings for the U-Series and Barracuda ATA drive families (most Seagate ATA drives above 20 GBytes). If you have an older drive please visit our Technical Library and find your model number for details on jumper configuration.
# 5. Install hard drive
Before installing a new drive, unplug the power connector from the computer to avoid any potential risks. It's also a good idea to touch a grounded metal object, such as the power supply, to discharge any static electricity from your body, which can damage the internal components.
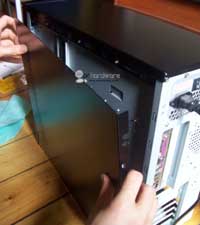
Open up your computer case.
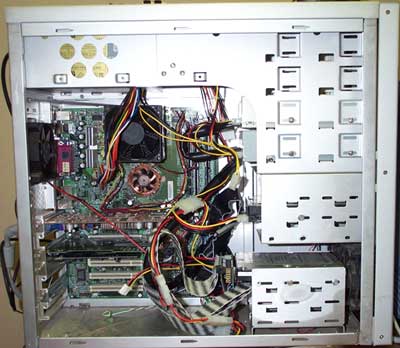
Now you should be able to find an open 3.5" slot somewhere. You can install a 3.5" drive there.
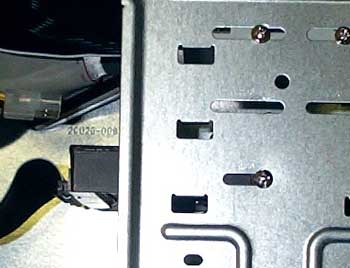
To install the drive, slide it into an available slot and locate the case screws, which are larger than those used for CD drives. If you're using a 2-screw setup, you can simply screw the drive in from the side, but if you have a 4-screw setup, you'll need to remove both side panels of your case to access the screws. This is typically the case if you never touch anything inside your system. Once you've secured the drive, you're ready to go.
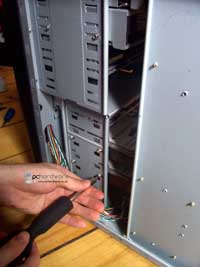
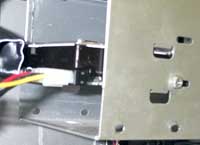
After securing the drive, connect the power and IDE cables. Identify the colored line on the cable, which indicates pin 1, and ensure it's on the same side as the power connector.
You will need a 20-pin IDE (Integrated Drive Electronics) cable, which is a flat ribbon cable with a 20-pin connector on the end. This cable is used to connect a hard drive or CD/DVD drive to the motherboard.
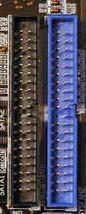
Each connector represents 1 IDE channel, with most boards having 2 channels and some higher-end boards having 4 channels.
Each channel can have 2 devices on it.
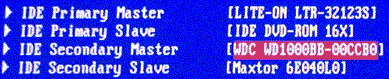
When setting up your machine, ensure the drive is correctly identified in the BIOS. Typically, pressing the [del] key gets you into the BIOS, but it may also be F1 or F2. Look for a message on the screen during the initial boot process that indicates which key to press.
Once you're in the BIOS you'll want to go into standard CMOS where you should see something like this:
Run the system setup program.
Enable LBA mode and UDMA mode, if applicable.
Select the auto-detect option.
Save and exit the system setup program.
If your drives are showing up properly, you've done it correctly. If not, you'll need to troubleshoot. Check the front page in your BIOS and select integrated peripherals. Ensure both IDE channels are enabled. It's likely you set your jumper incorrectly.
# 6. Partitioning the drive in Windows
To use a new drive in Windows, you need to partition it first, but be careful not to do this to an old drive if you want to recover data from it.
There are ways to partition a hard drive, such as using Disk Management to partition the hard drive directly, or using a third-party partition manager tool like Qiling Partition Master to manage the hard disk.
Qiling Partition Master is a comprehensive hard disk partition tool and system optimization software for Windows. It allows users to easily partition the hard disk, change or extend partitions without losing data, and offers features such as creating, deleting, resizing, formatting, and copying partitions for better Windows hard disk management.
You can partition and install a new hard drive using the built-in partition application in Windows, or a third-party tool like fdisk, depending on your operating system and needs. For Windows 9x users, you can find a boot disk at bootdisk.com to help with the process. If you're using Windows 2000 or XP, you can skip the fdisk steps and use the built-in partition application.
- Boot into Windows.
- Open Computer Management and select Disk Management.
- Initialize the drive.
- Partition the drive.
- Format the drive.
- Assign the drive letter.
- Initiate changes.
To install a secondary storage drive for Windows, go to the Control Panel, then under Administrative Tools, select Computer Management, followed by Storage, and finally Disk Management.
To create a new partition, look for the unallocated space on the bottom right, right-click on it, and select "New Partition".
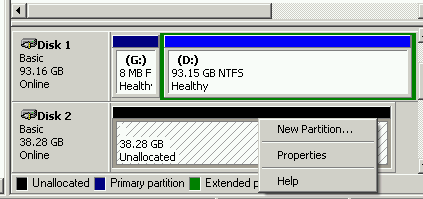
A wizard will guide you through the process. If you're creating a secondary drive, focus on storage space, and allocate 100% of the partition to a primary partition. This will maximize your storage capacity.
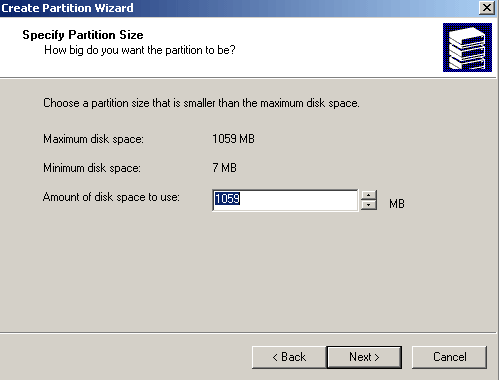
The followed screen looks like this. Just clicking next until you get here.
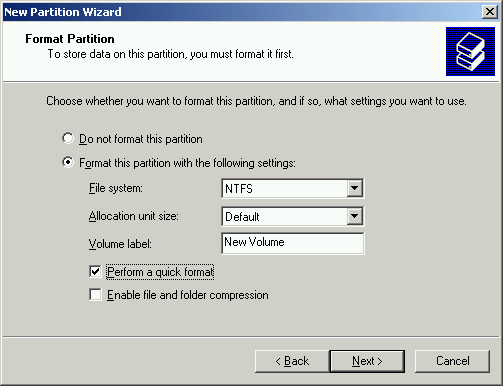
If you're using Windows, consider using NTFS. If you're dual-booting with another OS that can't read NTFS, Fat32 might be a better choice.
The default cluster size for NTFS is 4K, which strikes a good balance between speed and storage space efficiency.
A volume label is a name given to a volume of data on a computer, allowing users to easily identify and access specific data. It's essentially a label that you assign to a volume, making it easier to manage and organize your files.
Make sure you select the quick format or else it'll be a while before you can use the disk.
Make sure you select the quick format option to avoid a long wait before you can use the disk.
Click next and soon the new drive is available.
# 7. Troubleshooting
No hard drives show up:
Ensure that both drives on the same cable have different settings, either as master or slave, to avoid any potential conflicts.
Make sure the power is plugged in and everything is connected securely.
To resolve the issue, first verify that the drive is enabled in the system BIOS. If it's not, select the auto-detect option. This will allow the system to automatically detect and configure the drive.
The hard drive doesn't even power up:
To confirm the IDE cable is properly connected, check for a stripe on the cable indicating pin 1, which is usually closest to the power connector. If the cable is reversed, the drive may be silent or fail to power up.
Is the full capacity of the hard drive being seen:
Verify the BIOS has auto-detected and LBA mode is enabled.
My hard drive is slow:
To prevent your CD/DVD drive from slowing down your computer's hard drive, ensure that they are connected to different channels or cables, as most modern CD drives are ATA33 while modern hard drives are ATA133, and a drive can only transfer data as fast as the slowest device on the channel.
My hard drive doesn't have the jumper settings on the label:
To troubleshoot the issue, start by finding the model number of the device and visiting the manufacturer's website, where you may find instructions on how to resolve the problem. If not, consider reaching out to their support team via email for further assistance.
My 40 GB hard drive only show up as 38.2 GB:
The formatted space on a hard drive is typically slightly less than its advertised storage capacity, due to a difference in how manufacturers and operating systems measure drive size. Manufacturers round figures for sizing, using 1000MB to represent 1GB, whereas operating systems show the exact version, resulting in a small discrepancy. This is a normal occurrence and not a cause for concern.
Lost hard drive data:
When you lose files on your hard drive, reliable data recovery software like Deep Data Recovery can help.
Related Articles
- Fixed: CHKDSK Failed to Transfer Logged Messages to the Event Log with Status 50
- Fix MacBook Pro Shuts Down Randomly Error and Restore All Lost Data
- Fix 'Startup Repair cannot repair this computer automatically' in Windows 10/8/7/Vista
- [2022 Fixes] How to Fix Your Computer Was Unable to Start
- How to Download and Install ADB Drivers on Windows 11[2024 Updated]
We can extend the uses of Android ecosystems on our PC using Android development tools like ADB and Fastboot, but to do so, we need to download and install ADB software and drivers on our devices, which can be done on Windows 11 using various methods and ways. - How to Fix Drag and Drop Not Working [8 Ways Included]
The Windows drag-The and-drop feature allows for quick movement of objects across the OS, streamlining tasks. However, users may encounter a drag and drop not working error, which can be frustrating. Fortunately, this issue can be resolved, and the article provides a solution and an additional layer of data protection.