[2022 Fixes] How to Fix Your Computer Was Unable to Start
Quick Access to Fix "Your computer was unable to start" Error
The "Your computer was unable to start" error may be caused by system files that are broken or corrupted, and can be resolved by using System File Checker (SFC) to repair these files.
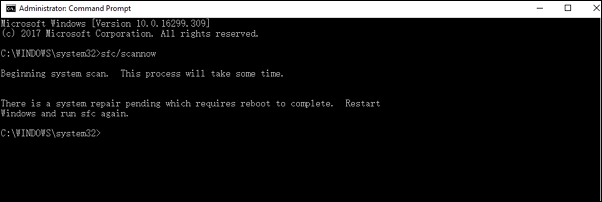
Step 1. Press the Windows key + X to bring up the Power User menu, then select Command Prompt.
Step 2. Type: sfc /scannow and hit "Enter"...Read More>>
Top 4 Solutions to Fix "Your computer was unable to start"
We have provided you with useful solutions. You can try them one by one until the "computer unable to start" error was fixed.
| Workable Solutions | Step-by-step Troubleshooting |
|---|---|
| Fix 1. Boot into Safe Mode | Turn off your PC by pressing the power button. Press the power button to turn on your PC...Full steps |
| Fix 2. Run SFC | If you are running Windows 10, Windows 8.1, or Windows 8, first run the inbox Deployment Image...Full steps |
| Fix 3. Run System Repair | Insert CD/DVD into DVD-ROM or connected external DVD drive...Full steps |
| Fix 4. Reinstall Windows 10 | Create a Windows 10 installation media on an empty USB (min 8GB)...Full steps |
Error Message - Your Computer Was Unable To Start
"Original Title: Your computer was unable to start...startup repair is checking your system for problems. I have a new Toshiba with Windows 10 preinstalled when I first took it out the box and turned it on it started up fine after I connected to my network it stops responding and shut down tried to start it back up it goes to the startup repair utility and stays on that screen I've let it run for hours and nothing happens is there a way around this... Is there a way I can start in safe mode to try and figure out what's going on?"
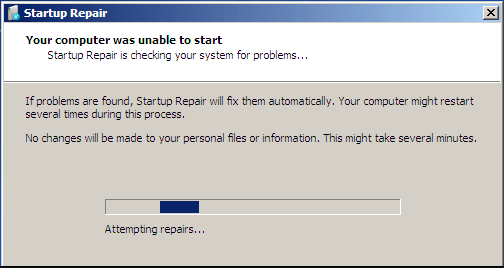
Your computer was unable to start. Startup repair is checking your system for problems. This error occurs when the system files or boot configuration are damaged or corrupted, preventing the computer from starting normally. As a result, you may experience system crashes, data loss, or even complete system failure. The error can also cause your computer to freeze or restart repeatedly, leading to frustration and potential data loss. To resolve this issue, you may need to run a system file checker, restore system files from a backup, or reinstall the operating system.
- Your Windows new updates have failed to install properly on your computer.
- The Startup Repair process can take a while to check your system for issues, resulting in an infinite loop.
- Your PC may be experiencing issues due to operating system file corruption or misconfiguration, which can cause problems with system stability and functionality.
If you're experiencing an error, don't panic! Access your files without the operating system, and export them to another location to ensure they're safe. Once your files are secure, you can focus on fixing the won't boot device without worrying about losing your data.
Recover Data When Your Computer Was Unable to Start First
To recover lost data when your computer won't boot into Windows, you'll need two things: Qiling bootable data recovery software and another working computer. This software is designed to recover lost data even when the operating system fails to start or crashes, making it ideal for data recovery cases of any system crash or starting problems. Simply follow the steps with Qiling bootable data recovery software to rescue your files.
Step 1.To launch Deep Data Recovery, start by choosing the file types you want to recover and click "Next" to initiate the process.

Step 2. To recover lost data, select the drive where the data was lost and click "Scan" to begin the recovery process.

Step 3. When the scan is complete, you can use the "Filter" or "Search" feature to find the lost files. This allows you to quickly locate the files you need, making it easier to recover them.

Step 4. Select the files you want to recover, click "Recover", and save them to a secure location.
After exporting your data to a safe location, you can attempt to fix the unbootable PC or laptop. If it's the first time this has happened, you can try waiting for the Startup Repair utility to run a check and potentially resolve the issue. If the checking process completes without issues, it's likely due to the computer shutting down improperly. However, if waiting for an extended period doesn't resolve the issue, you can try the solutions below.
Fix 1. Boot into Safe Mode to Fix "Your computer was unable to start"
If a reboot doesn't work and Startup Repair takes too long to check the problem, it's possible that a corrupt driver is the cause. In this case, try booting into Safe Mode to troubleshoot the issue. Entering Safe Mode can help identify the root cause of the problem.
Step 1. Turn off your PC by pressing the power button.
Step 2. Turn on your PC, hold the power button down for 5 seconds until it shuts down, repeat this process more than 2 times, and then the Preparing Automatic Repair screen should appear.
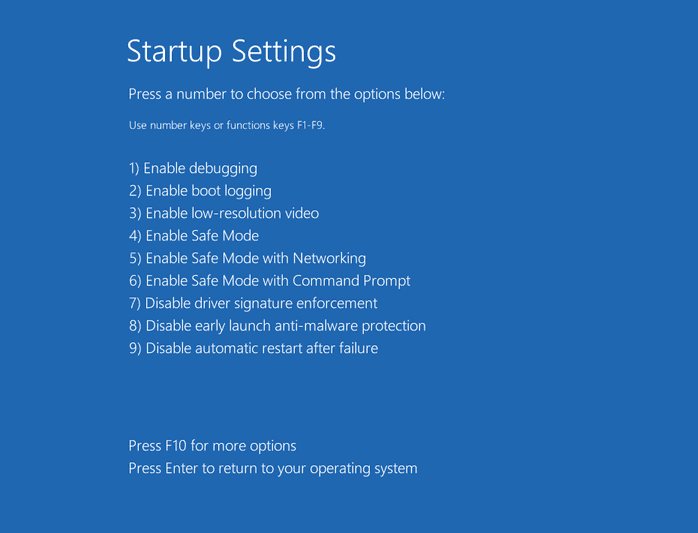
Step 3. Click "Advanced Options" > "Startup Settings" > "Restart".
Step 4. You will see the "Startup Settings" screen, where you can choose one of three Safe Mode options: Enable Safe Mode, Enable Safe Mode with Networking, or Enable Safe Mode with Command Prompt.
Step 5. Restart your computer and see whether it boots properly.
Fix 2. Run SFC to Fix Computer Unable To Start Error
System file issues can also cause the "Your computer was unable to start" error, aside from hardware problems. To fix this, you can run the sfc /scannow command.
Step 1. If you're using Windows 10, 8.1, or 8, start by running the built-in Deployment Image Servicing and Management (DISM) tool before running the System File Checker. If you're on Windows 7 or Vista, you can skip this step.
Step 2. Type the following command, and then press "Enter".
DISM.exe /Online /Cleanup-image /Restorehealth DISM.exe /Online /Cleanup-Image /RestoreHealth /Source:C:\RepairSource\Windows /LimitAccess
Replace C:\RepairSource\Windows with the actual path to your Windows repair source.
Step 3. To run the System File Checker (SFC) tool, open the Command Prompt as an administrator and type the command `sfc /scannow`, then press Enter. This will scan and replace any corrupted system files with a cached copy.
Fix 3. Run System Repair to Make your Computer Bootable
When your PC is unbootable and the SFC/SCANNOW cannot repair the error, follow this method immediately.
Step 1. Insert CD/DVD into DVD-ROM or connected external DVD drive.
Step 2. To access the backup and restore feature in Windows 7, click on the "Control Panel" icon on your computer screen. Once the Control Panel window opens, click on the "Backup and Restore (Windows 7)" option.
Step 3. To create a system repair disc, click on "Create a system repair disc" from the left column, which will open the repair disc creation window. Then, follow the on-screen instructions to complete the process.

Step 4. To boot from the CD/DVD, simply put the disc in your optical drive and restart your computer. If your computer doesn't automatically boot from the CD/DVD, you may need to change the boot settings in your BIOS to enable booting from a CD/DVD. You can usually find these settings by restarting your computer and pressing a key such as F2 or Del to access the BIOS menu. Once you've made the necessary changes, save and exit the BIOS menu, and your computer should now boot from the CD/DVD.
Step 5. On the "Install Windows" screen, select the desired language, time, and keyboard settings, and then click the "Next" button.
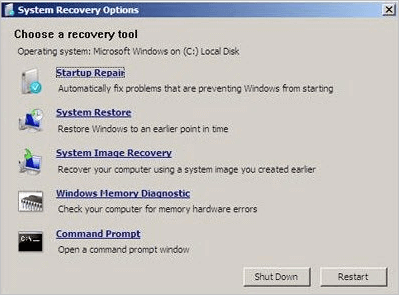
Step 6. Click "Repair Your Computer" on the next screen, then select "Next" and choose the desired repair option, such as "Startup Repair".
After following these steps, restart your computer to see if the issue is resolved. If not, try system restore.
Fix 4. Create a Windows Installation Disk to Reinstall Windows 10
This method is available when your PC cannot boot properly. To start, prepare a USB drive and follow the steps below.
Step 1. To create a Windows 10 installation media on an empty USB drive, follow these steps: 1. Download the Media Creation Tool from Microsoft's official website.
Step 2. Connect the Windows 10 installation USB to your PC and boot the system into BIOS.
Step 3. Locate the boot options menu and set the USB Boot option is at the top of the Boot Priority List.
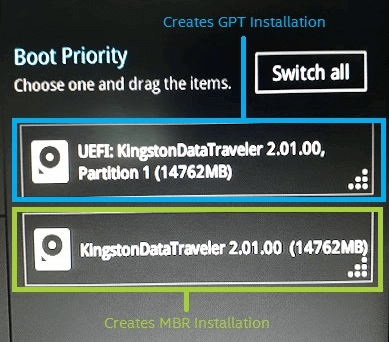
Step 4. Save your changes and restart the system to start installing Windows 10 on the disk.
Step 5. To install Windows, select the option "USB flash drive > Install Now > Install Windows only".
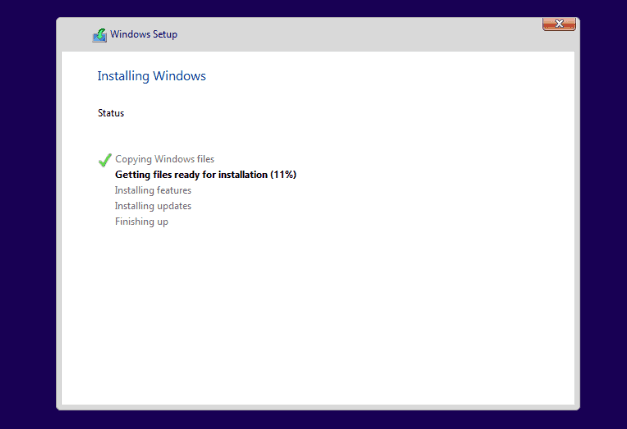
The installation process may take around half an hour or more, so be patient and let your computer restart several times as needed. Once you've completed the installation, reboot your PC and enter the BIOS settings. From there, set your computer to boot from the disk with Windows 10, save the changes, and then restart your PC again.
Conclusion
To fix the "Your computer was unable to start startup repair is checking your system for problems" error, try booting in safe mode, checking for malware, running a system file checker, and updating Windows. If the issue persists, try using a bootable USB drive to access the Advanced Startup Options, running a System Restore, or resetting Windows. If you're experiencing a blue screen of death, you can refer to a video for additional guidance.
Follow this video to learn how to:
- To fix MBR and system file errors and boot errors, you can use a Windows installation disc. Insert the disc, and restart your computer.
- Fix BCD error, which always cases system boot issue.
- Uninstall software or driver in safe mode to fix BSOD.
Related Articles
- What Does FPS Mean in Games and How to Increase FPS?
- Fix macOS 10.13/10.13.4 High Sierra Update Failure/Stuck/Installation Error
- Fix 'Restoring Your Previous Version of Windows' Stuck/Loop in Windows 10
- [Fixed] Right Click Not Responding or Working on Windows 10
- How to Open .DAT Files in Windows 10/11
Do you want to see what application stores in a DAT file? Then follow this guide, where we show how to open .dat file using various applications. It is essential to understand that every application stores a DAT file as per its requirement, and opening it might not be straightforward. - How to Open RAR Files on Windows
Even though RAR files are quite handy, it can become quite a hassle if you don't know how to open RAR files on Windows 10. This post will focus on four ways to extract and open RAR files on Windows 10. We'll be looking at free and paid options, so read until the end, so you dont miss out on any critical information.