Ultimate Guide on Network and Sharing Center [Updated 2023]
Microsoft added a vital component for networking options in Windows 7, which was dubbed the Network and Sharing center, and it has continued to evolve through Windows 8, 10, and now 11, becoming an important pillar of network-related settings.
The Network and Sharing Center is a crucial program for managing network-related settings, and understanding its importance is key. However, it's worth considering whether or not to tweak its settings, as altering them can have unintended consequences.
Introduction
In the past decade, internet activity has shifted from wired networks to wireless networking, but many still prefer to use LAN cables for a more stable connection. Regardless of your chosen method, having a Network and Sharing center in windows is essential.
The Network and Sharing Center in Windows allows users to view and manage their network connections, including Wi-Fi, Ethernet, and VPN settings. It also provides access to network sharing features, such as file and printer sharing, and allows users to troubleshoot network issues. Users can also use it to change network settings, such as the network location (public or private), and to view network statistics. While it's generally safe to use the Network and Sharing Center, users should be cautious when making changes to network settings, as they can potentially affect network security and performance. Therefore, it's usually recommended to leave the default settings alone and only make changes when necessary.
What Is Network and Sharing Center?
The Network and Sharing Center, located in the Windows Control Panel, provides users with essential networking options. Although it has undergone some improvements since its Windows 7 era, its primary function remains the same, offering access to LAN, Wi-Fi, VPN, and other connectivity modes.
To connect your PC to Wi-Fi, follow these steps: Ensure your Wi-Fi is enabled on your PC, then select your network from the list of available connections, enter the password if prompted, and click "Connect" to establish a connection. You can also use the Network and Sharing Center in Windows or System Preferences in macOS to configure your Wi-Fi settings.
How to Connect PC to Wifi
To connect your PC to Wi-Fi, go to Settings, then Network and Internet, and select Wi-Fi. Then, click on Add a network, and select your Wi-Fi network from the list. Enter your network password and click Connect.
However, you only ever need to access Network and Sharing center when you need to:
- Change or alter network setting;
- Setup a new connection;
- Change Wi-Fi password or network;
- Create an exception for an app, etc.
The Network and Sharing Center in Windows is a crucial setting that allows users to manage and configure their network connections. It provides access to settings for network adapters, IPv4, IPv6, and other network-related options. This allows users to troubleshoot and optimize their network performance, making it an essential tool for anyone working with computers.
1. Check network type, i.e., Private, Public, Enterprise, etc.
2. Change LAN/Wi-Fi setting.
3. Setup a new connection or network.
4. Troubleshoot problems, such as slow internet or bad connectivity.
5. To change adapter settings, follow these steps: access the adapter settings, which is where you can configure IPv4 and IPv6 settings. This is typically done by going to the adapter settings page, where you can select the IPv4 and IPv6 options and configure them as needed.
The Windows Network and Sharing Center is the primary dashboard for all network-related settings in a Windows system. It provides a centralized interface for managing network connections, sharing files and printers, and configuring other network-related settings.
Ultimate Guide on Network and Sharing Center
Now that we know what Network and Sharing center is, let's explore how you can access it. We'll break it down into five parts:
- Opening Network & Sharing Center
- Private or Public Network
- Advanced Sharing Settings
- Setup New Network & Troubleshoot Problems
- Change Adapter Settings
Opening Network & Sharing Center
To open the Network and Sharing Center in Windows 7, 8, 10, or 11, you can use the following methods, which are applicable across all versions:
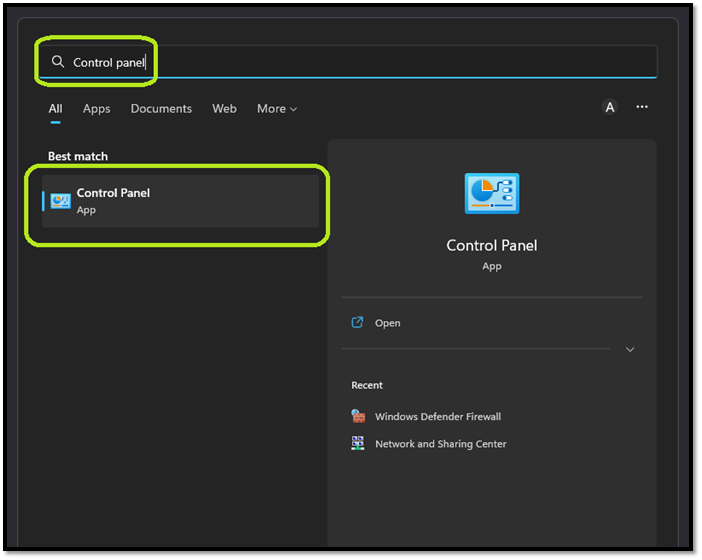
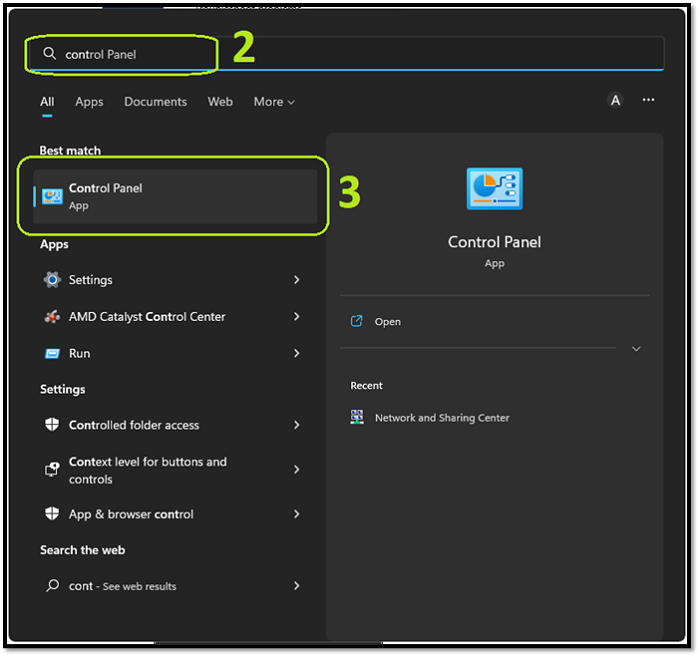
Step 1. Press Windows button.
Step 2. Type Control Panel.
Step 3. Click on "Control Panel" when it shows up.
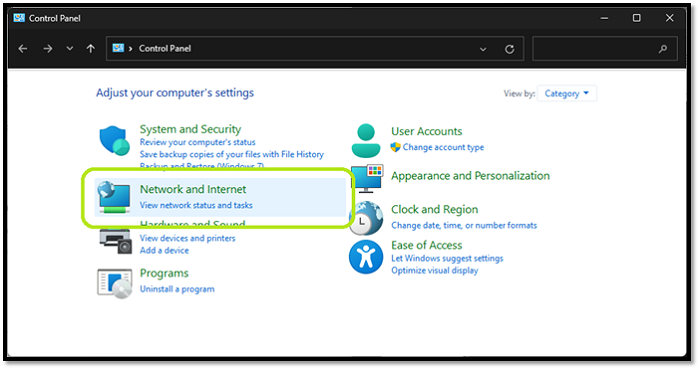
Step 4. Click on "Network and Internet".
Step 5. Find and click "Network and Sharing Center".
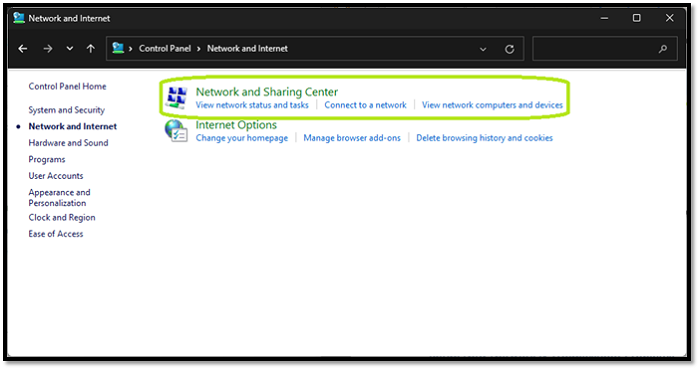
Step 6. Done.
The Network and Sharing Center can be easily accessed, but its location differs across Windows versions. In Windows 7, 8, 10, and 11, you can find it in the same place, making it a consistent option.
Private or Public Network
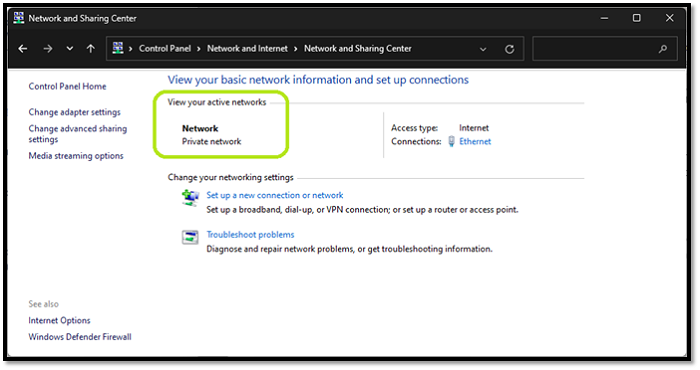
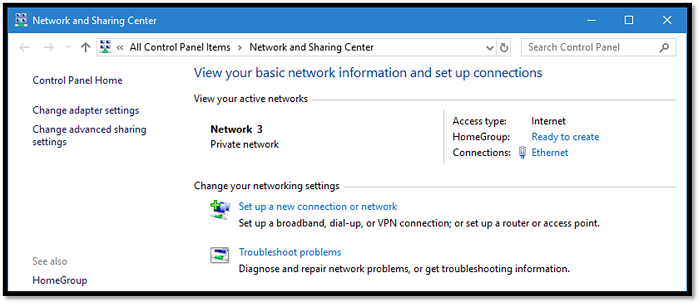
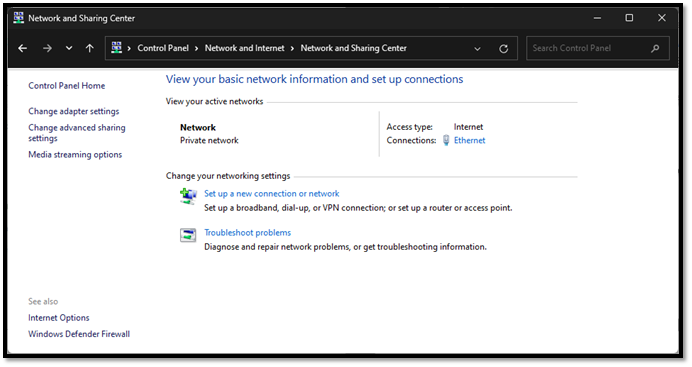
Checking whether your network is private or public is relatively straightforward. In Windows, upon opening the Network and Sharing Center, you will see this as a prominent feature, allowing you to easily determine the current network status.
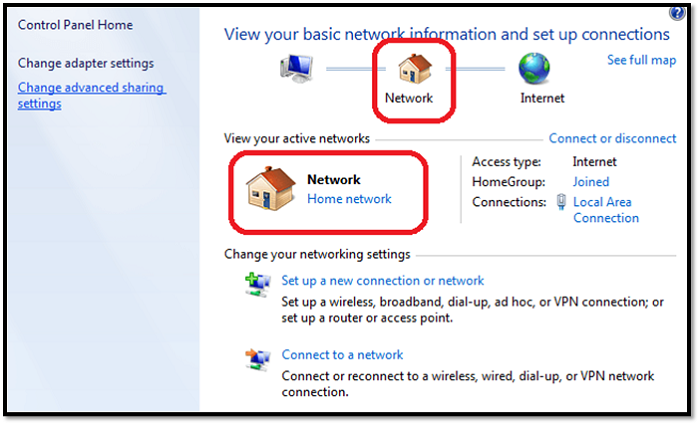
In earlier versions of Windows, such as Windows 7 or 8, the Task Manager appeared differently, with a more traditional layout and a focus on system performance metrics, whereas in newer versions like Windows 10, it has a more modern and user-friendly design with a focus on process management and system resource utilization.
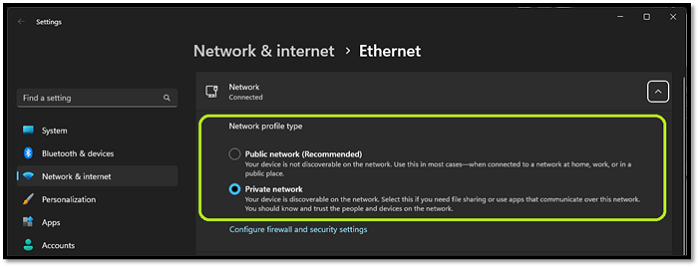
In Windows 11, you can see which type of network you're connected to by looking at the system tray, specifically the network icon. This icon will display a symbol indicating whether you're connected to a private network, a public network, or a guest network. Simply hover over the icon to see the details.
Windows recommends your system be on a Public network, but most users today have a Wi-Fi router at home, so it's best to leave it on a Private network.
Advanced Sharing Settings
To change your network settings to Public, go to your Windows settings, click on "Network & Internet," then select "Status" from the left menu. Next, click on "Network and Sharing Center" and select "Change connection settings" from the top left. Finally, click on the "Network location" dropdown menu and select "Public." This will ensure your network is private and secure.
Step 1. Find and click "Change advanced sharing settings".
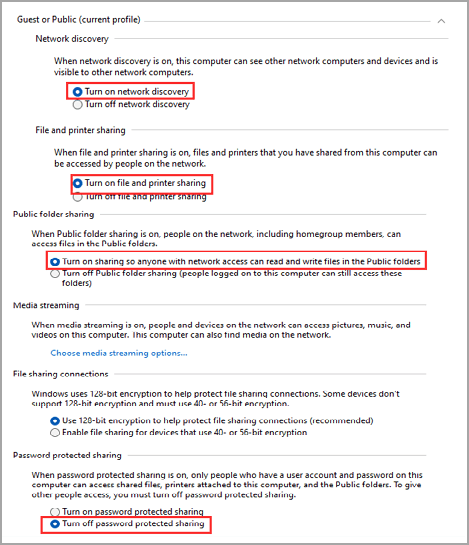
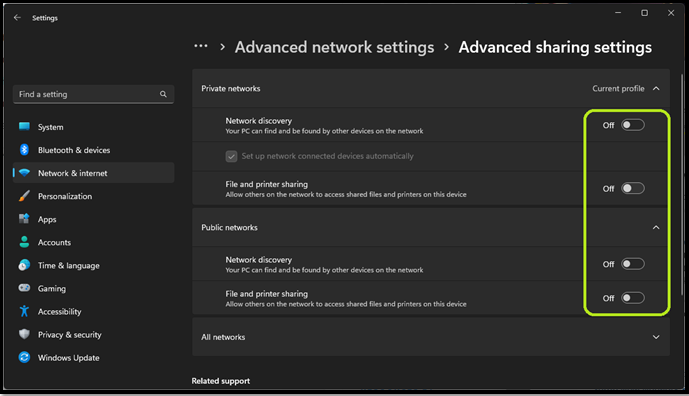
Step 2. To enhance network security, disable Network Discovery and File and Printer Sharing on both private and public networks. This can be done by navigating to the Network and Sharing Center, selecting Change advanced sharing settings, and then turning off the options for both private and public networks.
Step 3. Done.
Here is what the advanced sharing settings look like after you have made your selections:
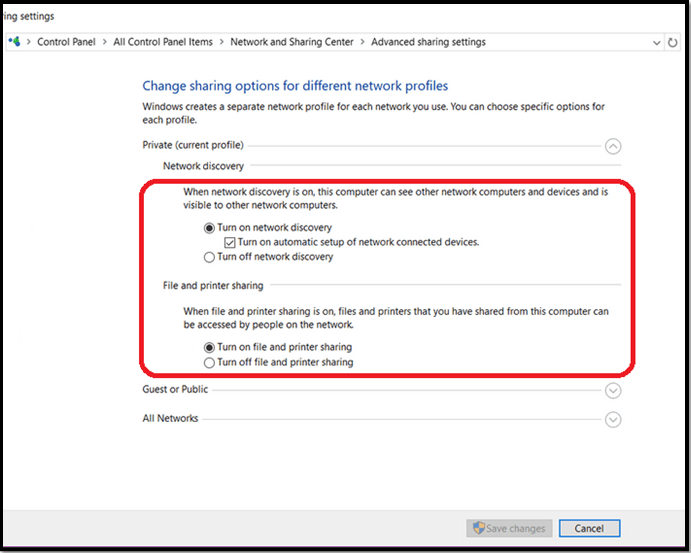
Once again, make sure you turn those settings off to ensure your privacy and safety—especially on Public Networks.
Setup New Network & Troubleshoot Problems
To set up a new network or troubleshoot problems in Windows, you can follow these steps: 1) Go to the Start menu and select Settings, then click on Network & Internet. 2) Click on Status in the left menu to view your current network status. 3) If you need to set up a new network, click on Set up a new network.
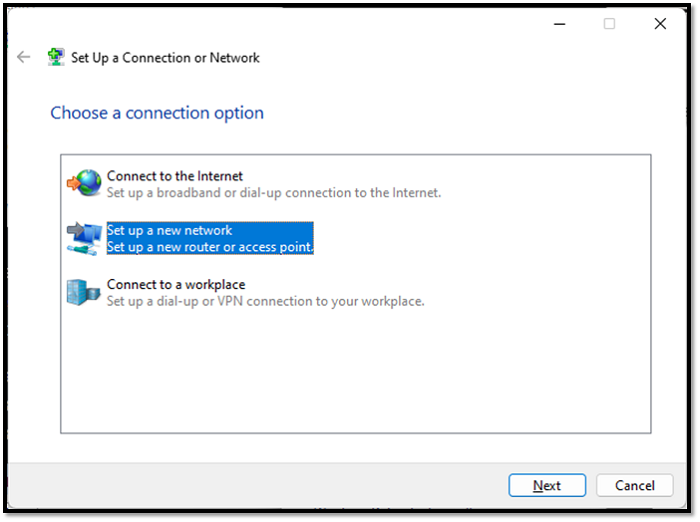
Step 1. Click on "Setup a new connection or network".

Step 2. Click on "Set up a new network".
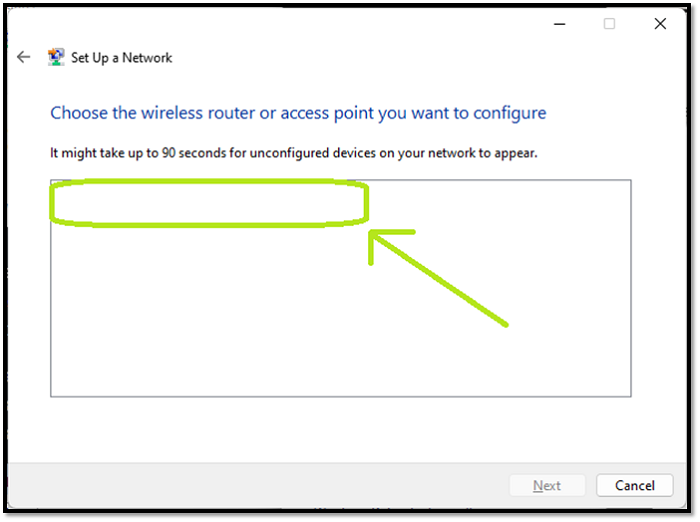
Step 3. If you're using a Wi-Fi connection, pick it once it appears here:
Step 4. Done.
To manually connect to a Wi-Fi network or set up another connection, follow these steps: Select the Wi-Fi network you want to connect to from the list, enter the password, and confirm the connection. If you're experiencing issues, try restarting your device, checking your internet connection, or ensuring your Wi-Fi network is functioning properly. If the problem persists, you may need to reset your router or contact your internet service provider for further assistance.
Step 1. Click on "Troubleshoot problems".
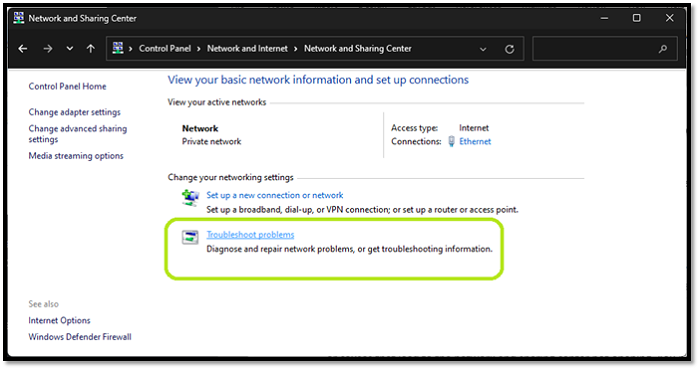
Step 2. On Windows 11, you'll see this:
Step 3. On Windows 10 and ones before, you'll see this:
Step 4. Done
If you're experiencing issues with your internet connection, you'll need to troubleshoot the first issue on the list. If you're having problems with your printer, you'll need to troubleshoot the second issue, and so on. Each issue on the list is self-explanatory, meaning you can figure it out on your own without needing further guidance.
Change Adapter Settings
To change adapter settings, access the Settings app, then navigate to the Network & Internet section. From there, click on the Ethernet or Wi-Fi option, depending on the type of connection you're using. Next, click on the Advanced or More network settings option.
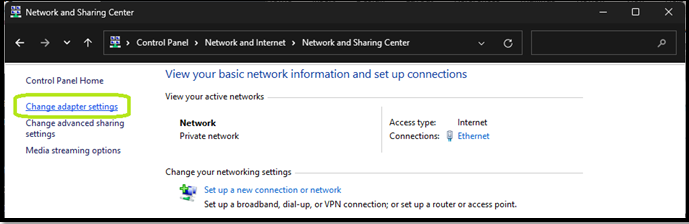
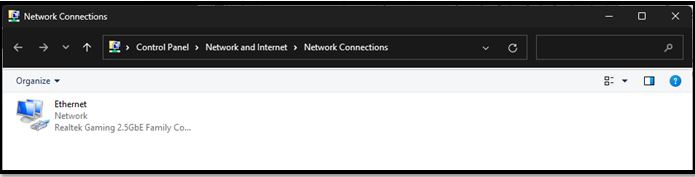
Step 1. Click "Change adapter settings" on the side-menu.
Step 2. Right-click the network adapter you wish to configure and select "Properties" from the context menu.
Step 3. Here you'll see the speed information + connectivity time.
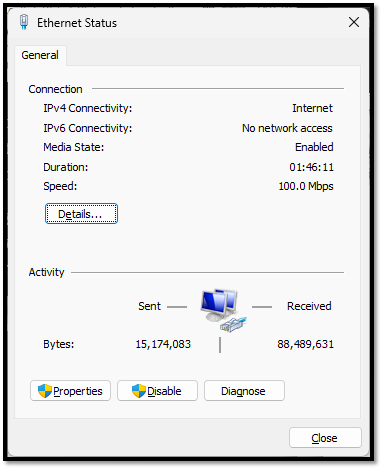
Step 4. Click on "Properties".
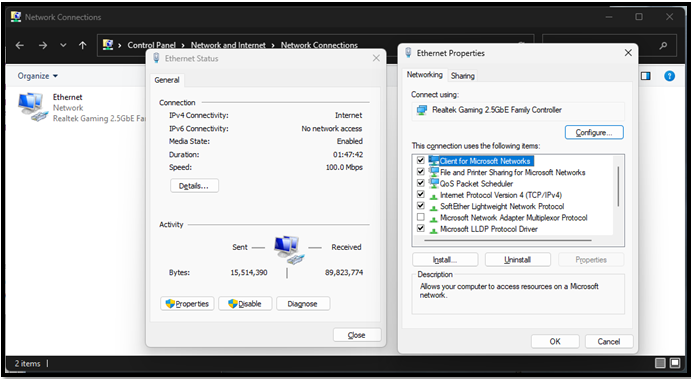
Step 5. Head to your subsequent settings.
Step 6. Done.
When you're using a software or application, there might be some settings that you're not familiar with or don't need to use. It's generally recommended not to change these settings unless absolutely necessary.
Solved: Network and Sharing Center not Opening in Windows 11/10
Many users face the issue of an inaccessible Network and Sharing center, which can be frustrating. To resolve this problem, there are four possible fixes to try:
| Four Fixes | Step-by-step Troubleshooting |
|---|---|
| Fix 1. Run System File Checker | The first thing you can do is run System File Checker in Command Prompt...Full steps |
| Fix 2. Reset Network | In order to remove any network-related issues that might prevent you from going into Network and Sharing Center...Full steps |
| Fix 3. Configure Windows Firewall to allow Network Discovery | Windows Firewall might be blocking some aspects of the Network and Sharing center. So, to ensure that's not the case...Full steps |
| Fix 4. Create a New Local Admin Account | If nothing else works, you can add another admin account to your Windows 10 or 11...Full steps |
Fix 1. Run System File Checker
To run System File Checker in Command Prompt, open Command Prompt as an administrator and type the command `sfc /scannow`. Press Enter to execute the command. This will scan all system files for corruption and replace any corrupted files with a cached copy.
Step 1. Type CMD in Windows search and open as Administrator.
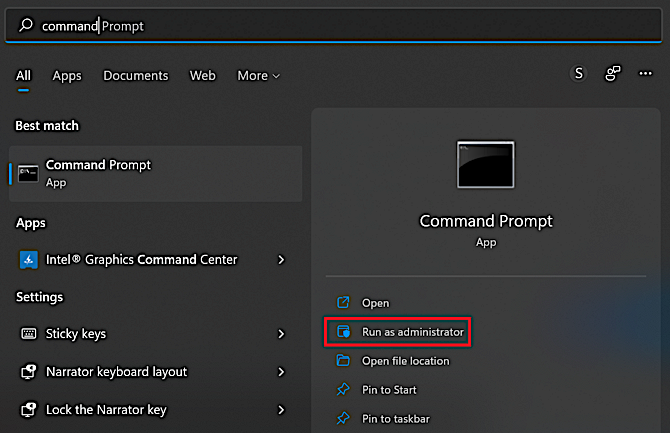
Step 2. Type SFC /scannow in CMD.
Step 3. Let it scan.
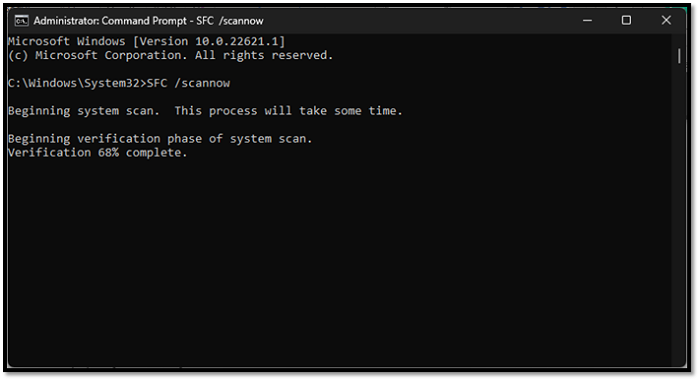
Step 4. Done.
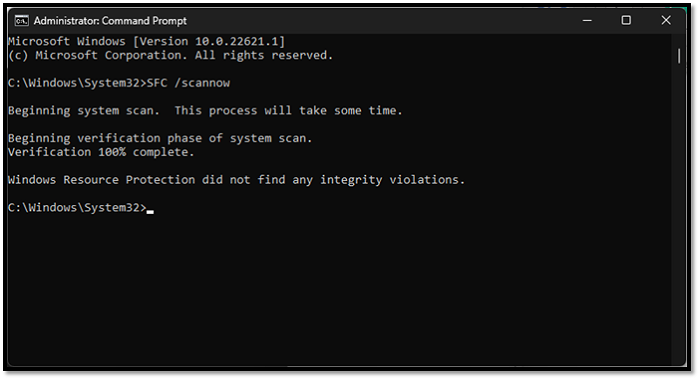
Once it identifies any corrupt or damaged files, it will replace them and reboot your computer, allowing you to access the Network and Sharing Center again.
Fix 2. Reset Network
In order to remove any network-related issues that might prevent you from accessing the Network and Sharing Center, follow these steps:
Step 1. Head into Windows Settings by pressing "Windows + I".
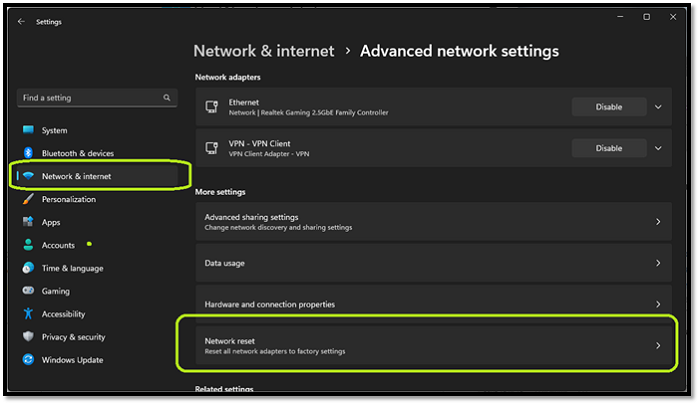
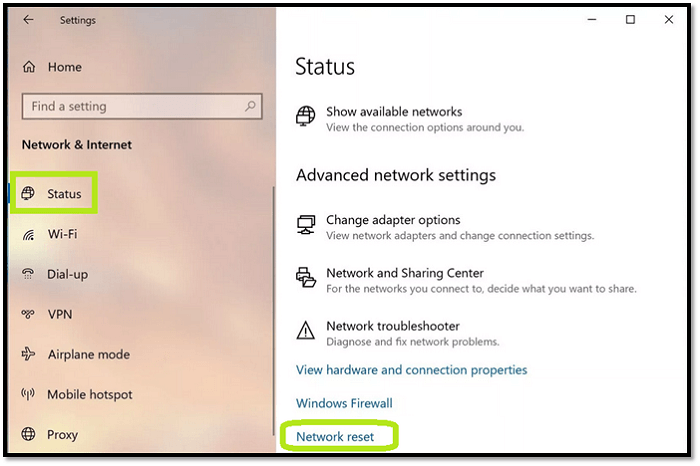
Step 2. To reset your network settings, go to Settings, then tap Network and Internet, then scroll down to find Network Reset.
Step 3. Click on "Reset now".
Step 4. Let it finish.
Step 5. Done.
After resetting, your computer will restart automatically to apply the changes.
However, you'll be asked for confirmation in all Windows.
Fix 3. Configure Windows Firewall to allow Network Discovery
To resolve the issue, you can try temporarily disabling the Windows Firewall to see if it's blocking the Network and Sharing center. If disabling the firewall resolves the issue, you can then configure it to allow the necessary services to function properly. Alternatively, you can also check the Windows Firewall settings to ensure that the Network and Sharing center is not being blocked.
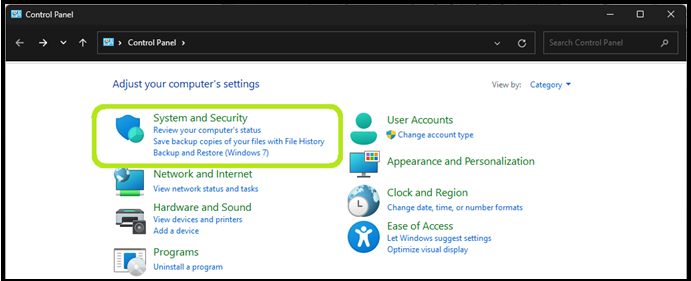
Step 1. Open Control Panel.
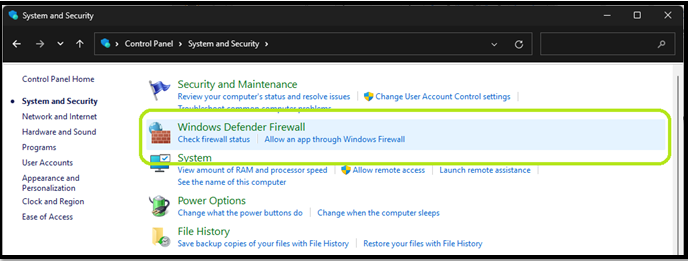
Step 2. Head into System and Security.
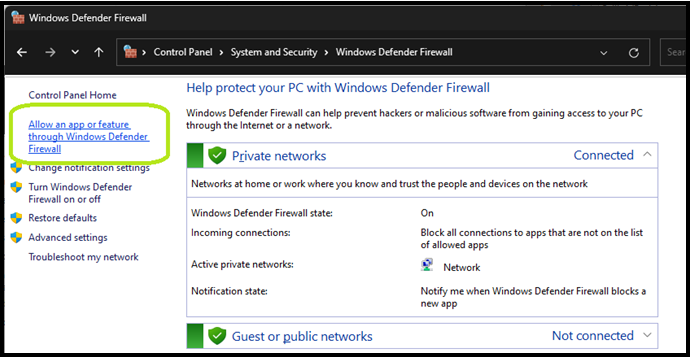
Step 3. Head into Windows Defender Firewall.
Step 4. Click on "Allow an app or feature through Windows Defender Firewall" on the top-left side.
Step 5. Find Network Discovery and ensure it's checked.
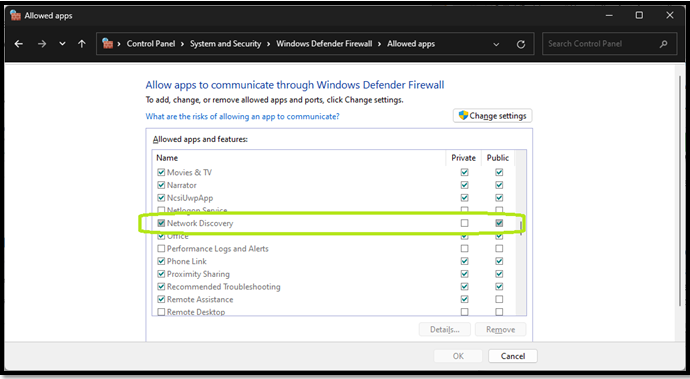
Step 6. Done.
This will require administrative privileges. So, once you're asked, make sure you allow it to make the required changes.
Fix 4. Create a New Local Admin Account
If you're having trouble with your current admin account, you can create a new admin account on Windows 10 or 11 by following these steps: click on the Start menu, type "User Accounts" and select the result, then click on "Manage User Accounts" from the left menu, click on "Add a new user in PC settings", select "Administrator" as the account type, and follow the prompts to create a new account. This will give you a new admin account that you can use to troubleshoot and fix issues with your current account.
Step 1. Open Settings by pressing Windows + I.
Step 2. Head into Accounts and tap Other Users.
Step 3. Click on "Add accounts".
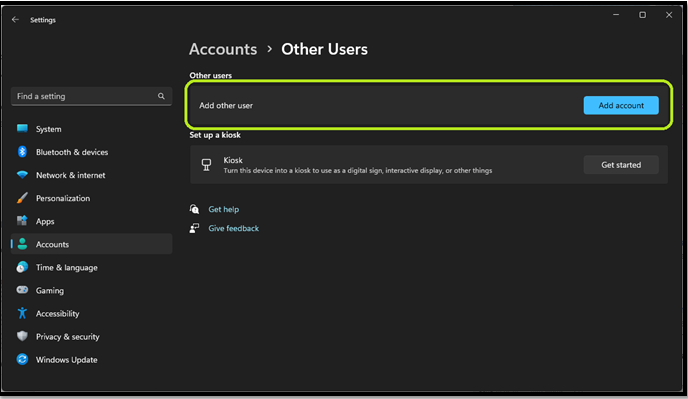
Step 4. Follow the on-screen instructions.
Step 5. Done.
If adding another admin account allows access to the Network and Sharing Center, it's suggested to delete the original account as it may be a security risk.
FAQs about Network and Sharing Center
We've got you covered with our FAQ section, addressing frequently asked questions and providing clarity on various topics. Feel free to explore and find the answers you're looking for. If you still have questions, don't hesitate to ask, and we'll be happy to help.
1. What is the network and sharing center?
The Network and Sharing Center is the primary element in Control Panel that allows Windows users to change, alter, or tweak network-related settings.
2. Why won't my network and sharing center open?
The Network and Sharing Center may not open due to a blocking firewall or a corrupt file. To fix the issue, you can try four different methods: checking the firewall, scanning for malware, checking for corrupt files, or resetting Windows.
3. How do I open the network and sharing center?
To access the Network and Sharing Center on Windows, you can click on the Start Menu and type "Control Panel", then open the Network and Internet section, and finally click on Network and Sharing Center. This method applies to all Windows versions.
4. Where is the network and sharing center on my computer?
The Control Panel's Network and Internet options can be found in Windows.
Conclusion
The Network and Sharing Center in Windows provides a central location to manage network connections, sharing, and other related settings. It offers various features and tools, including network status, network and sharing settings, and homegroup settings. The center also allows users to change network location, view network details, and access network and sharing center settings. By following the guides and tips provided, users can effectively utilize the Network and Sharing Center to troubleshoot network issues, share files and printers, and manage network connections.
Related Articles
- NTFS VS APFS: What Are the Differences? [2023 Updated]
- JPG VS JPEG: What's the Difference
- USB Splitter vs. USB Hub - Which is Better[ A Thorough Guide]
- Does Wireless Network Switch Exist? Find the Answer
- Palworld Save File Location & Config File on PC/Steam/Xbox
Finding the PC game save file location can be a challenge for some players, especially with games like Palworld that have gained popularity recently. To locate the Palworld save file location, you can follow the steps outlined in this article, which will guide you through the process of finding the file where your game saves are stored. - Five Ways to Fix "Path Not Found C:Boot" Error in Windows
Do you know why the path not found C:\boot error happens? This guide will help you figure out the reasons and provide you with several ways to fix this issue.