File History Backup Drive Full in Windows 11
A full File History drive may contain years of versions, unrelated files, or a second backup application’s images. Do not delete the entire FileHistory folder just to clear a warning. First confirm which device is full and whether its older versions are your only copy.
Find what is using the space
Step 1. Open File Explorer > This PC and compare the free space on the backup drive with its total capacity. Check the drive letter, label, and model so you do not clean the Windows drive by mistake.
Step 2. In Control Panel > File History, check the selected destination and last run. If it is a network share, check its quota as well as the Windows drive's displayed space.
Step 3. Inspect top-level folders on the destination. Record which belong to File History, disk images, and ordinary files. Do not manually erase an unfamiliar backup set.
Clean up old versions deliberately
In File History, open Advanced settings and use the version-cleanup option if it is present on your build. Choose a retention threshold that leaves a version old enough for your recovery needs. Before confirming, restore a small older file to a separate folder and verify that it opens. Cleanup is irreversible for the versions it removes.
If the destination also contains system images or Qiling backup files, manage those using their own application's history and retention controls. Deleting one image file from the middle of an incremental chain can make later restore points unusable. If you cannot identify the owner, add a larger destination rather than guessing.
Create a separate file backup with Qiling
Qiling Disk Master Pro can make a selected-folder backup to a different external drive. It does not expand a full File History drive or repair its version database. Use it to establish an independent, restorable copy before retiring an overcrowded destination.
Step 1. Attach a second drive, open Backup and Recovery > File backup, and select the folders that matter in the source tree.
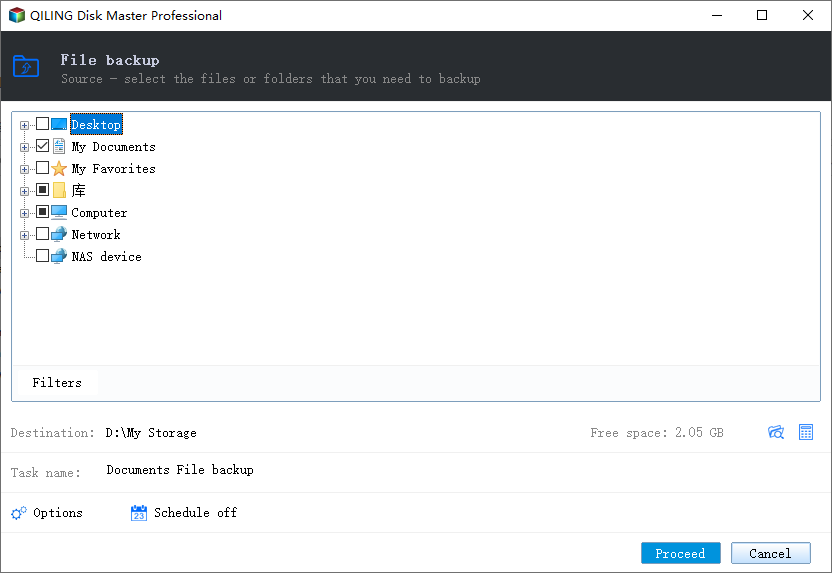
Step 2. Choose the second drive as Destination. Confirm it has sufficient free space and is not the full File History device.
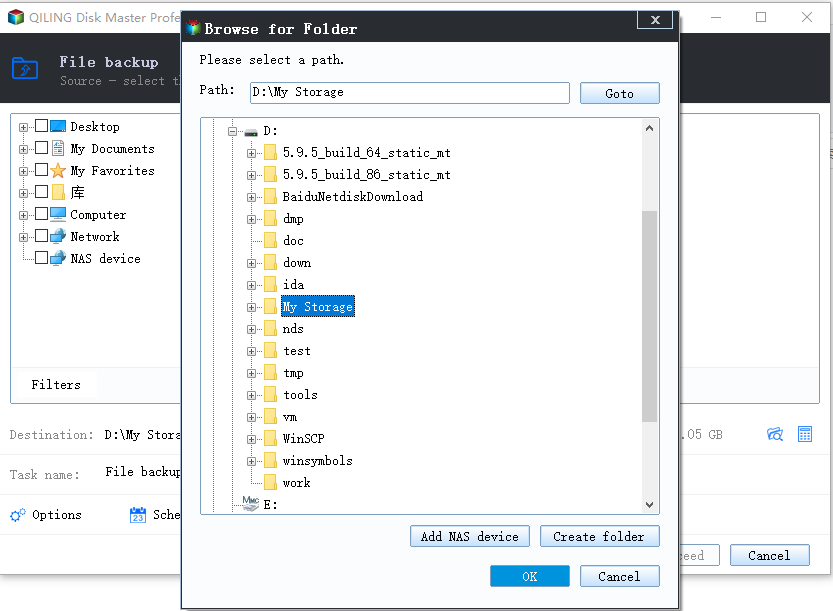
Step 3. Review filters and schedule, click Proceed, and wait for success. Open the backup task and test that a file can be selected for recovery.
Prevent the next space crisis
Review how often versions are saved, how long they are kept, and how quickly source data changes. Large media files and virtual machines can exhaust a small destination rapidly. Keep at least two independent copies of irreplaceable material; cleaning old versions is not a substitute for backup verification.
Related Articles
- Downloads Missing from File History
Check whether the folder was included at all. - Create a File History Backup
Review setup and destination selection.
Products
Articles & Tutorials
- Data Recovery
- Data Backup
- File Recovery
- File Backup
- System Backup and Restore
- Disk and Partition Clone
- Technical articles
- Mobile articles
- Disk Master Help
- Windows Data Recovery Tutorials
- Windows Secure Delete Tutorials
- Windows Partition Management Tutorials
- Windows File Backup and Restore Tutorials
- Windows System Backup and Restore Tutorials
- Windows Disk Backup and Restore Tutorials
- Windows Clone Tutorials