File Sync Replaced a Newer File at the Destination
File sync is not the same as a versioned backup. If a destination file was newer but a sync run replaced it, stop the task before another run changes more files. The cause may be the selected source and destination, a file that was updated under another path, or sync rules that are unsuitable for editing in both locations. Do not assume a sync tool will resolve conflicting edits the way you expect.
Preserve both copies first
Step 1. Pause the schedule and copy the current source and destination folders to two separate safe folders. Keep their paths and timestamps visible; do not overwrite one with the other.
Step 2. Check Windows File History, Previous Versions, OneDrive version history if used, and any Qiling File backup point. Restore a candidate older version to a third folder and open it before replacing the working file.
Inspect the Qiling sync direction
Step 1. Open Backup and Recovery > File sync and read the selected source path and Destination. Verify which copy you intended to be authoritative. The folder shown in the source tree is not automatically the one you edited most recently.
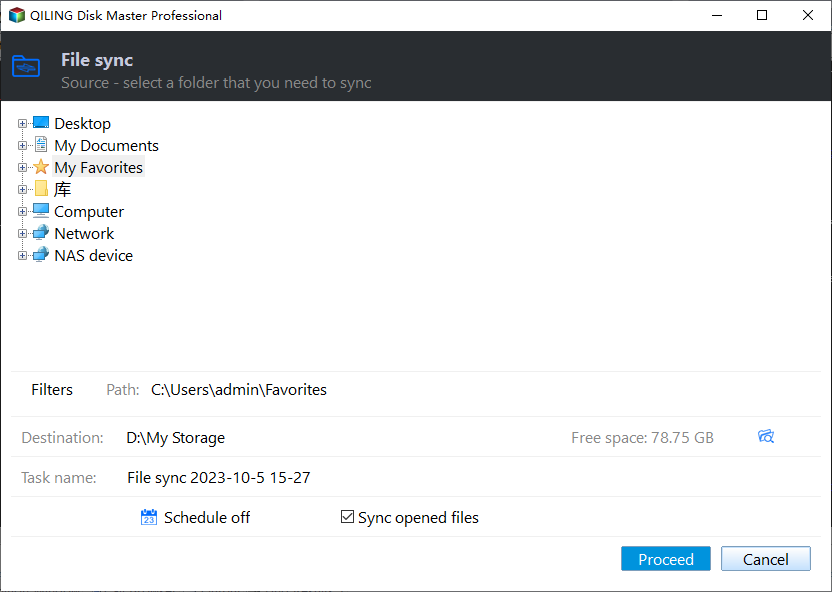
Step 2. Review Filters and Schedule. If both sides are regularly edited, choose a workflow that preserves versions instead of using a one-direction copy as the only protection.
Test a new task safely
Step 1. In File Explorer, create a test source folder with two disposable files. Create a separate, empty destination folder on another drive. Keep both outside the original source and destination so this trial cannot replace a valuable copy.
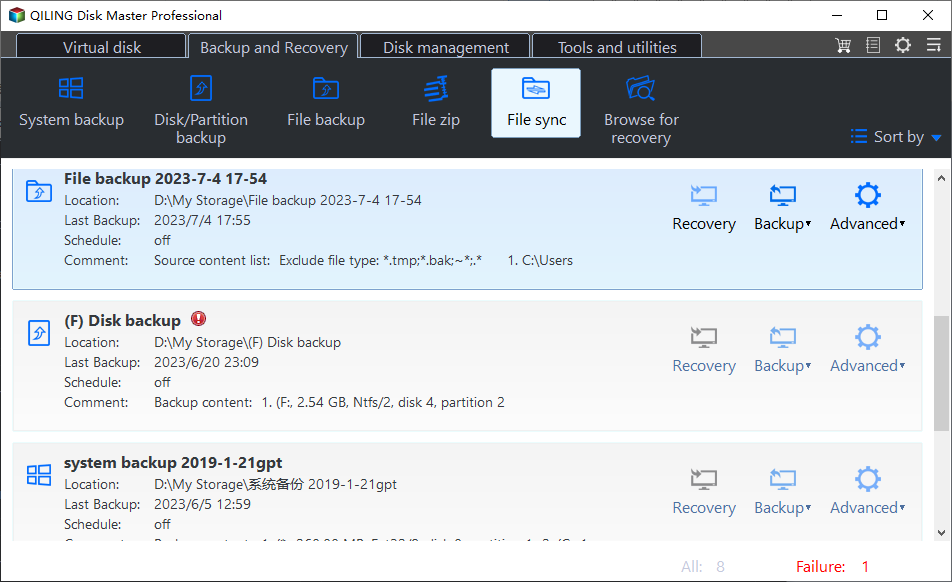
Step 2. In Qiling Disk Master Pro, open Backup and Recovery > File sync to start a new task. Do not resume the old scheduled task yet.
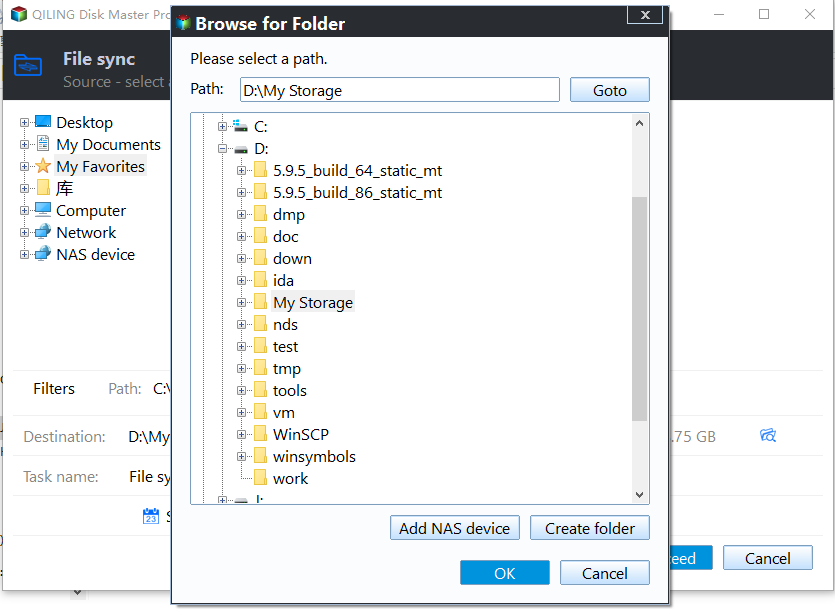
Step 3. In the source tree, expand the drive containing the test source and select that folder directly. Check the Path shown below the tree; it must name the test source, not the original working folder.
Step 4. Click the folder icon beside Destination. Browse to the empty test destination, click OK, and confirm that its displayed path differs from both the source and the original destination.
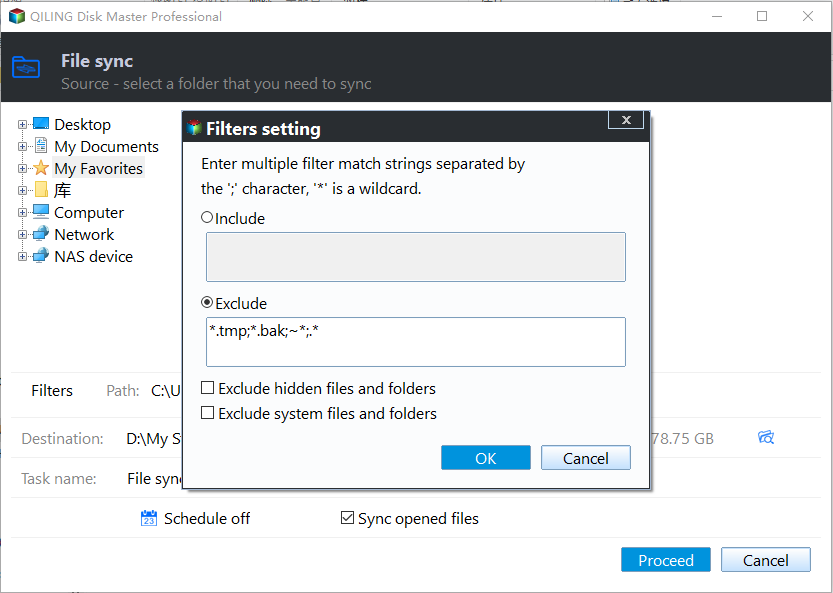
Step 5. Open Filters and check the include and exclude rules. Leave the two test files included, then click OK. Keep Schedule off for this manual test and give the task a recognizable name.
Step 6. Read the source Path, Destination, and schedule once more. Click Proceed and wait for the task to finish. Do not disconnect either drive during the run.
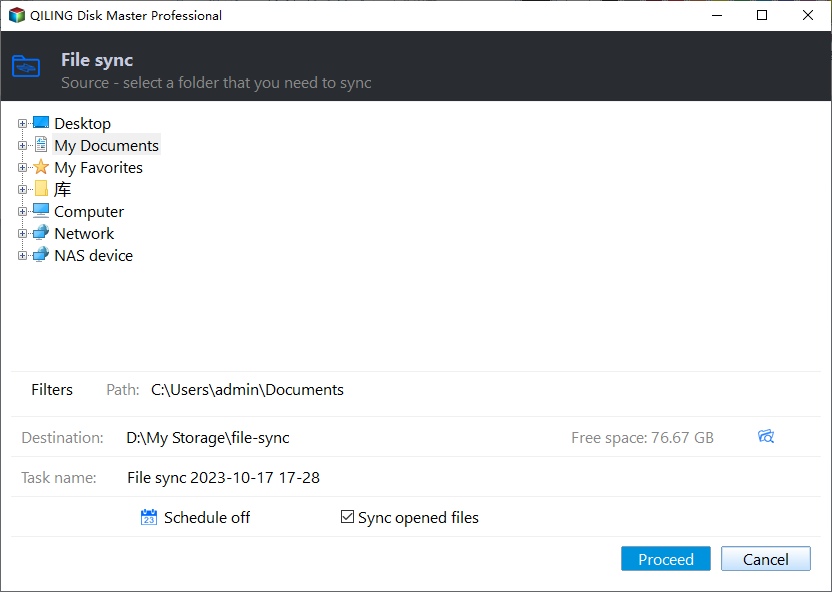
Step 7. In File Explorer, open the test destination and confirm that both files arrived and contain the expected data. To check conflict behavior, change a copy at the test destination, note its contents and time, and rerun only the test task. Compare the two copies afterward; never perform this experiment on the original folders.
Step 8. If the test can replace destination edits, treat the source as the sole authoritative folder and do not edit the destination directly. Keep the old task disabled until you have chosen the correct source, protected any unique destination files, and created a separate versioned file backup.
Related Articles
- Sync Destination Did Not Change
Check source paths and filters in another sync failure. - Restore One Folder
Recover an earlier file version to a separate location.
Products
Articles & Tutorials
- Data Recovery
- Data Backup
- File Recovery
- File Backup
- System Backup and Restore
- Disk and Partition Clone
- Technical articles
- Mobile articles
- Disk Master Help
- Windows Data Recovery Tutorials
- Windows Secure Delete Tutorials
- Windows Partition Management Tutorials
- Windows File Backup and Restore Tutorials
- Windows System Backup and Restore Tutorials
- Windows Disk Backup and Restore Tutorials
- Windows Clone Tutorials