How to Clone HDD to SSD in Windows 10/11/7 (2026 Guide)
Replacing your old mechanical hard drive (HDD) with a solid-state drive (SSD) is the single most effective upgrade you can make to speed up your computer. Boot times drop from minutes to seconds, applications launch instantly, and the whole system feels more responsive. But reinstalling Windows and all your programs from scratch is time-consuming. The solution? Clone HDD to SSD—copy your entire system, apps, and data to the new drive in one operation.
This guide walks you through the entire process of cloning an HDD to an SSD on Windows 10, Windows 11, and Windows 7, including how to choose the right SSD, connect it, clone the drive, and boot from the cloned SSD without errors.
PAGE CONTENT
- Before You Start: Choose the Right SSD
- What You Need to Clone HDD to SSD
- Step-by-Step: Clone HDD to SSD with Qiling Disk Copy
- How to Boot from the Cloned SSD
- How to Clone Larger HDD to Smaller SSD
- Troubleshooting: Cloned SSD Won't Boot
- FAQs About Cloning HDD to SSD
Before You Start: Choose the Right SSD
The first step is to pick an SSD that fits your computer and budget. Here are the main options:
- SATA SSD: Uses the same cable as an HDD (2.5-inch form factor). Easy to install, affordable, and compatible with almost all PCs. Speeds up to 550 MB/s.
- NVMe M.2 SSD: A small stick that plugs directly into the motherboard. Much faster (up to 7000+ MB/s) but requires an M.2 slot. Check your motherboard manual before buying.
- PCIe SSD: Plugs into a PCIe slot. High performance but less common for consumer upgrades.
For most users, a SATA SSD is the simplest and most cost-effective upgrade. If your PC supports NVMe M.2 and you want maximum speed, go with an NVMe drive.
What You Need to Clone HDD to SSD
Before cloning, gather the following:
- A new SSD with enough capacity to hold all the used data from your HDD. The SSD does not need to be the same size as the HDD as long as the used space fits.
- A way to connect the SSD to your PC: If you have an internal SATA or M.2 slot, install the SSD directly. Otherwise, use a USB-to-SATA adapter or an external SSD enclosure.
- Disk cloning software: We recommend Qiling Disk Copy for its simplicity, one-click system clone, and automatic SSD alignment.
Step-by-Step: Clone HDD to SSD with Qiling Disk Copy
Follow these steps to clone your HDD to an SSD without reinstalling Windows:
Step 1. Connect the new SSD to your computer. If it is an internal SATA or M.2 drive, install it inside the PC. If using an external adapter, plug it into a USB port.
Step 2. Download, install, and launch Qiling Disk Copy. Click the "Clone" button on the left panel, then select "Disk Clone".
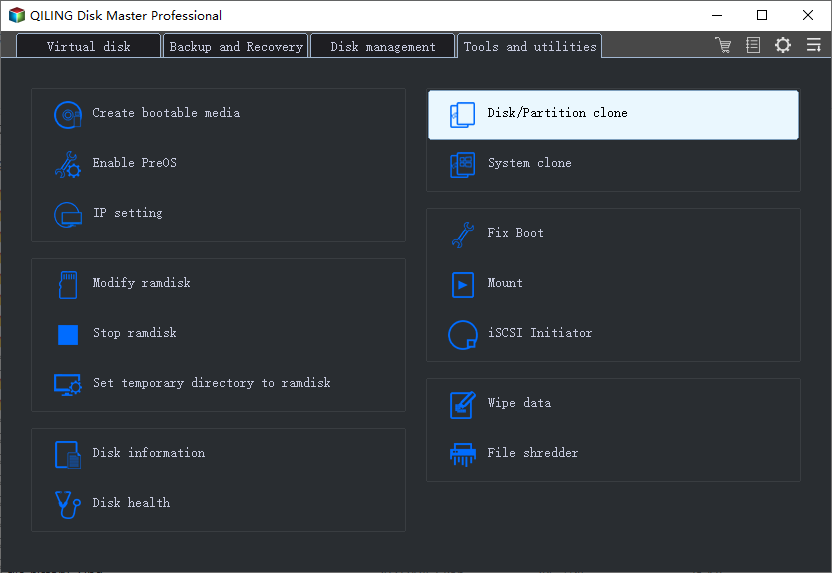
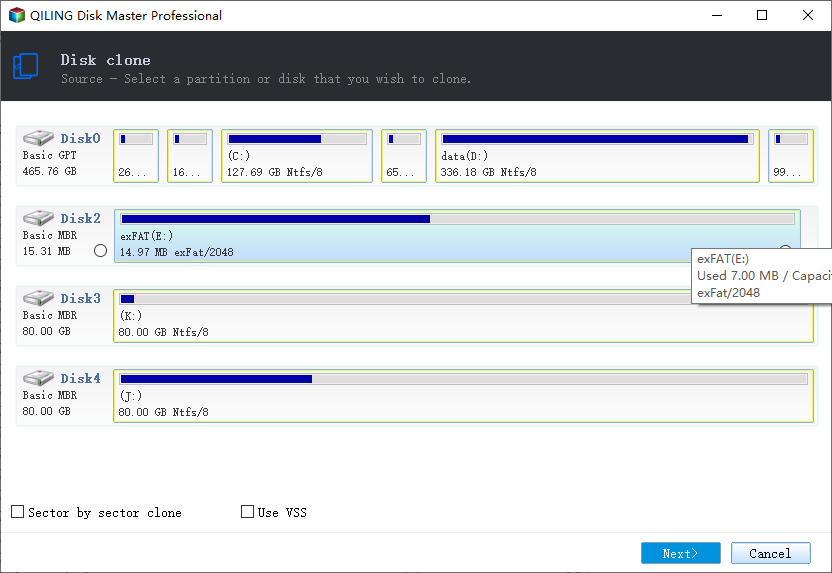
Step 3. Select your old HDD as the source disk and click "Next".
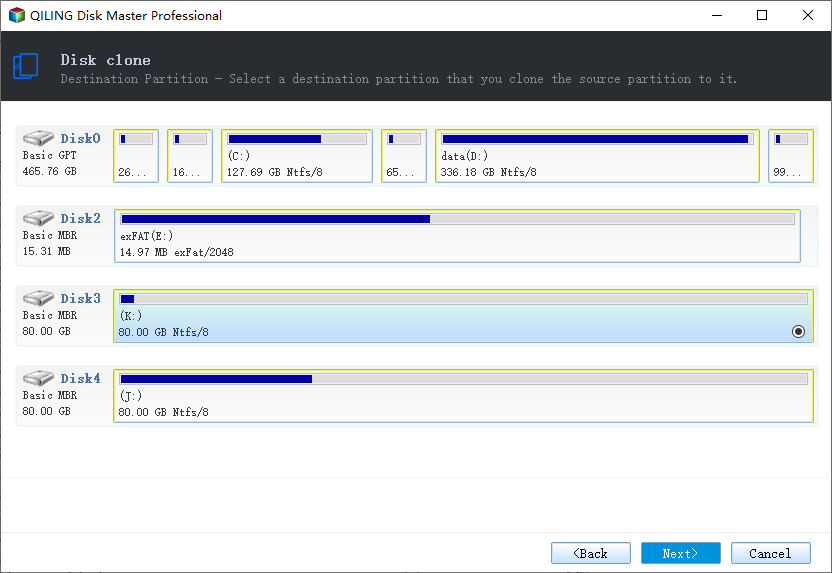
Step 4. Select your new SSD as the destination disk and click "Next". Warning: all data on the SSD will be erased during cloning.
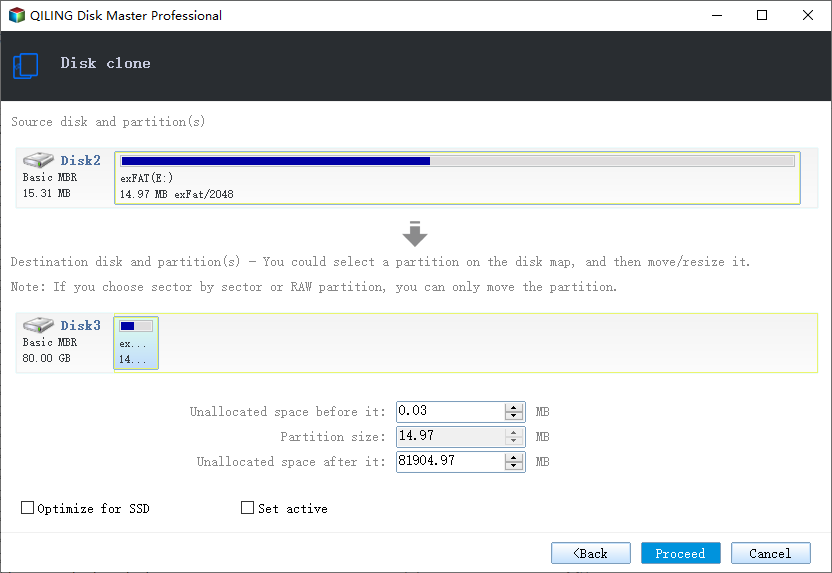
Step 5. Check the "Optimize for SSD" option to enable 4K partition alignment. This ensures the SSD runs at full speed and lasts longer. Then click "Proceed" to start cloning.
Step 6. Wait for the cloning process to finish. The time depends on the amount of data being copied—usually 10 to 60 minutes for a typical system drive.
How to Boot from the Cloned SSD
After cloning completes, you need to make the SSD the boot drive:
- Laptop with one drive bay: Shut down the laptop, remove the old HDD, install the SSD in its place, then power on. The laptop should boot from the SSD automatically.
- Desktop with both drives connected: Restart your PC and press the BIOS/UEFI key (usually Del, F2, F10, or F12, depending on the manufacturer) during startup. In the boot menu, set the SSD as the first boot device. Save and exit.
- M.2 NVMe SSD: If you cloned to an NVMe drive, make sure the motherboard is set to boot from NVMe (check the boot order in BIOS).
Once Windows boots from the SSD, verify that everything works: check that your files, applications, and settings are intact. You can then format the old HDD to use it as extra storage, or keep it as a backup.
How to Clone Larger HDD to Smaller SSD
Many users upgrade from a large 1TB or 2TB HDD to a smaller 256GB or 512GB SSD. Qiling Disk Copy supports this as long as the used space on the HDD fits on the SSD.
If the used space exceeds the SSD capacity, first free up space on the HDD:
- Delete unnecessary files and folders
- Empty the Recycle Bin
- Uninstall unused applications
- Move large files (videos, backups, archives) to an external drive
- Run Disk Cleanup to remove temporary files and system files
Once the used data fits on the SSD, Qiling Disk Copy will automatically resize the partitions to fit the smaller drive during cloning.
Troubleshooting: Cloned SSD Won't Boot
If the cloned SSD does not boot, try these fixes:
1. Check the Boot Order in BIOS
Restart your PC and enter BIOS/UEFI. Make sure the SSD is set as the first boot device. If both the HDD and SSD are connected, the PC might still try to boot from the HDD.
2. Set the Correct Boot Mode (UEFI vs Legacy BIOS)
If your original HDD used UEFI boot (GPT partition style), the cloned SSD must also boot in UEFI mode. If it used Legacy BIOS (MBR), boot in Legacy mode. Mismatched boot modes are a common cause of boot failures. You can check and change this in BIOS under "Boot Mode" or "SATA Mode".
3. Rebuild the Boot Configuration
If the SSD still does not boot, use Windows installation media to boot into the recovery environment, open Command Prompt, and run the following commands:
bootrec /fixmbr
bootrec /fixboot
bootrec /rebuildbcd
4. Ensure the EFI System Partition Was Cloned
On UEFI systems, the EFI System Partition (ESP) must be present on the SSD. Qiling Disk Copy clones it automatically during system clone. If you performed a partition clone instead, make sure you included the ESP.
FAQs About Cloning HDD to SSD
Do I need to reinstall Windows after cloning to SSD?
No. A proper system clone copies Windows, all installed applications, settings, and personal files to the SSD. You can boot directly from the cloned SSD without reinstalling anything.
How long does it take to clone an HDD to an SSD?
It depends on the amount of data and the connection speed. A typical 100GB used space takes 10-20 minutes via USB 3.0 or SATA. USB 2.0 is much slower, so use USB 3.0 or an internal connection if possible.
Can I clone an HDD to a smaller SSD?
Yes, as long as the used space on the HDD fits on the SSD. Qiling Disk Copy clones only the used data and resizes partitions automatically.
Will cloning delete my data on the HDD?
No. Cloning reads data from the HDD and writes it to the SSD. The original HDD is not modified. Your data on the HDD remains intact until you decide to format or erase it.
Is Qiling Disk Copy free?
Qiling Disk Copy offers a free trial that lets you test the full cloning workflow. For unlimited use, you can purchase an affordable one-time license.
Conclusion
Cloning an HDD to an SSD is the fastest way to upgrade your PC without reinstalling Windows or your applications. With Qiling Disk Copy, the process takes just a few clicks—select the source HDD, select the destination SSD, enable SSD optimization, and start cloning. The cloned SSD boots directly, giving you a faster, more responsive computer in minutes.
Download Qiling Disk Copy today and upgrade to an SSD without the hassle of a fresh Windows install.
Related Articles
- How to Clone HDD to SSD in Windows 11 and Make It Bootable
- How to Clone SSD to Larger SSD in Windows 10/11
- How to Clone Larger HDD to Smaller SSD Without Losing Data
- Best Free SSD Cloning Software of 2026: Top 6 Picks
- How to Clone a Failing Hard Drive in Windows 10 Without Data Loss
Learn how to clone a failing or dying hard drive to a new HDD or SSD, rescue your data, and avoid permanent data loss with sector-by-sector cloning. - Best Macrium Reflect Alternative for Free Disk Cloning (2026)
Macrium Reflect free was discontinued. Try the best Macrium Reflect alternative — Qiling Disk Copy — for free HDD to SSD cloning and OS migration on Windows 11/10/8/7.
Products
Articles & Tutorials
- Data Recovery
- Data Backup
- File Recovery
- File Backup
- System Backup and Restore
- Disk and Partition Clone
- Technical articles
- Mobile articles
- Disk Master Help
- Windows Data Recovery Tutorials
- Windows Secure Delete Tutorials
- Windows Partition Management Tutorials
- Windows File Backup and Restore Tutorials
- Windows System Backup and Restore Tutorials
- Windows Disk Backup and Restore Tutorials
- Windows Clone Tutorials