Surface Pro 9 SSD Upgrade and Windows Migration
Surface Pro 9 storage service is model-specific and should follow Microsoft's current instructions. Its removable SSD does not make every replacement a routine user upgrade. Microsoft notes that SSD removal should be performed by qualified technicians. Confirm the exact Surface variant and a compatible module before purchasing a drive.
Protect data and recovery access
Step 1. Back up files to a separate drive or cloud account, then open representative files to verify the backup.
Step 2. Find and save the BitLocker recovery key for this Surface. Changing the SSD or boot configuration may trigger recovery.
Step 3. Prepare official Surface recovery media for the exact model and Windows version, and test that the USB device is readable.
Step 4. Check the replacement SSD's physical size, interface, capacity, and service compatibility against Microsoft's guide. Do not rely only on another Surface model's parts list.
Choose cloning or clean recovery
A clean installation from official recovery media is often the simplest way to establish the correct drivers and partition layout. Cloning may preserve apps and settings when the old SSD is healthy and both drives can be connected through suitable hardware. A clone must include the boot partitions, and the target must have enough usable space.
Warning: Cloning overwrites the replacement SSD. Do not select the external backup as the destination. Keep a separate file backup even when cloning.
Optional Qiling system-clone sequence
Step 1. On the running Surface, attach the compatible replacement SSD through an appropriate enclosure.
Step 2. Open Qiling Disk Master and select Tools and utilities > System clone.
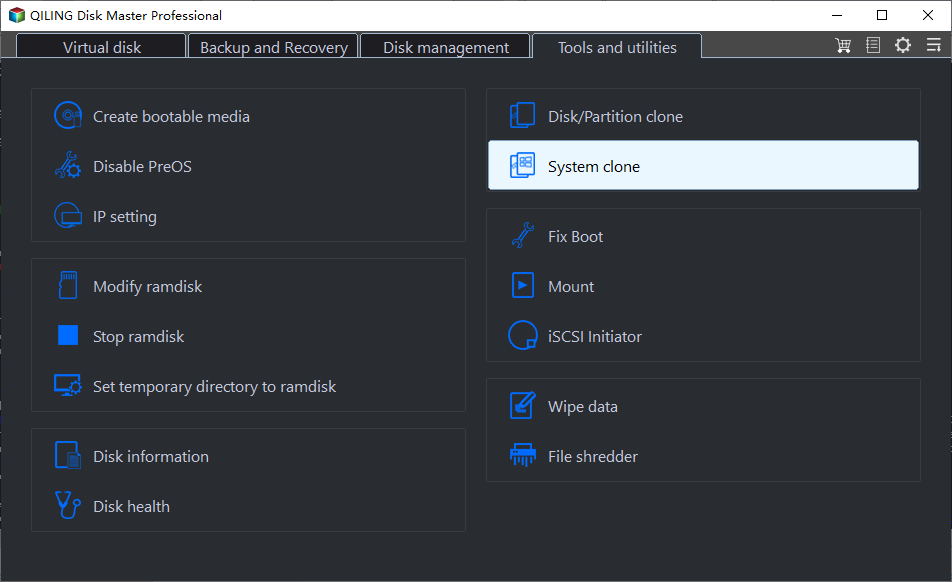
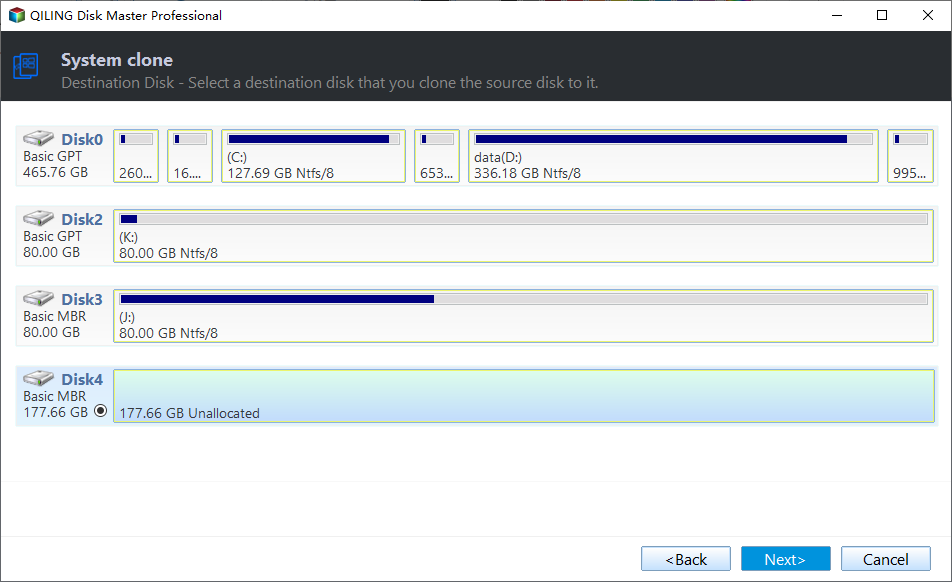
Step 3. Confirm the internal Windows SSD as source, then identify the replacement by model and capacity as destination.
Step 4. Review the boot-related partitions and destination layout in the preview. Stop if the disks appear reversed or the target is too small.
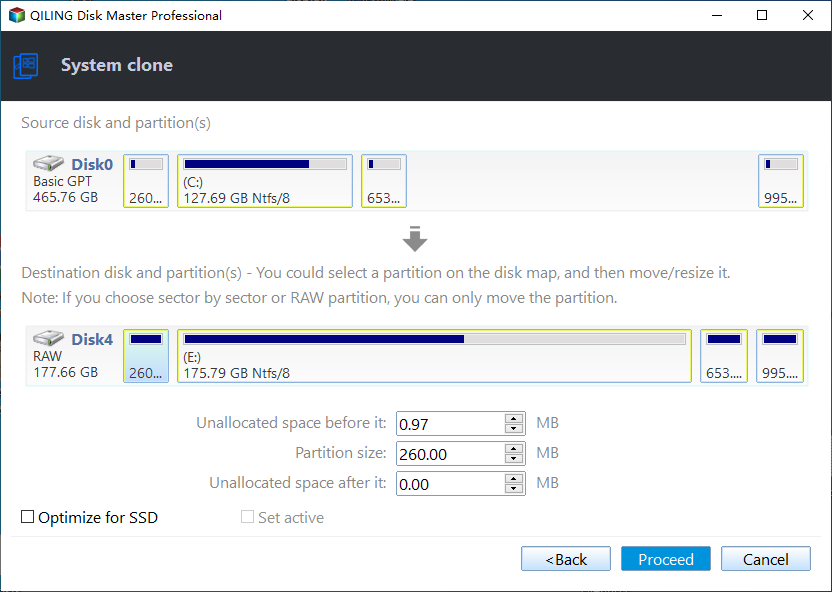
Step 5. Click Proceed, confirm the target-overwrite warning, and wait until cloning finishes. Safely disconnect the external enclosure afterward.
Service and verify the Surface
Shut down completely and follow Microsoft's Surface Pro 9 SSD removal and reassembly guide, including handling and safety precautions. If you are not qualified to service the device, use an authorized technician. After installation, boot with the new SSD, enter the BitLocker key if requested, run Windows and Surface driver updates, and check storage size, sign-in, apps, and files. Retain the original SSD until the migration is verified.
Consult the Microsoft Surface SSD removal guide and the Surface Pro 9 service guide before disassembly.
Related Articles
- SSD Migration
Understand clone verification and BitLocker preparation. - Cloned Capacity
Check unused space after migration.
Products
Articles & Tutorials
- Data Recovery
- Data Backup
- File Recovery
- File Backup
- System Backup and Restore
- Disk and Partition Clone
- Technical articles
- Mobile articles
- Disk Master Help
- Windows Data Recovery Tutorials
- Windows Secure Delete Tutorials
- Windows Partition Management Tutorials
- Windows File Backup and Restore Tutorials
- Windows System Backup and Restore Tutorials
- Windows Disk Backup and Restore Tutorials
- Windows Clone Tutorials