How to Use System Restore in Windows 10
PAGE CONTENT:
- How to Create a Restore Point?
- How to Use System Restore
- How Long Does System Restore Take
- System Restore Alternative
Computer breakdowns or data loss can be devastating, especially when you haven't backed up your system. Malware or misoperation can cause irreparable damage, leaving you with lost files and a broken computer, making the situation feel unbearable.
Fortunately, Windows has a built-in feature called System Restore that can save the breakdown system and restore your computer to an earlier point in time, allowing you to bypass the current issue. In the next parts, we will explain what System Restore is, how to create a system restore point, and how long the restore process takes.
What is System Restore?
System Restore is a Windows feature that brings the installation back to its last working state without reinstalling the OS or damaging data files. It's a built-in feature that's turned on by default, requiring only 200MB of disk space, and can recover registry, configuration files, and other system components.
How to Create a Restore Point?
To create a restore point, go to System Protection in the Control Panel, click on "Create" and then select the drive you want to create a restore point for. You can also use the Backup and Restore Center to create a restore point. In the Backup and Restore Center, click on "Create a restore point" and then select the drive you want to create a restore point for. This will create a snapshot of your system configuration and settings in the Windows registry, which you can use to restore your system to a previous state if needed.
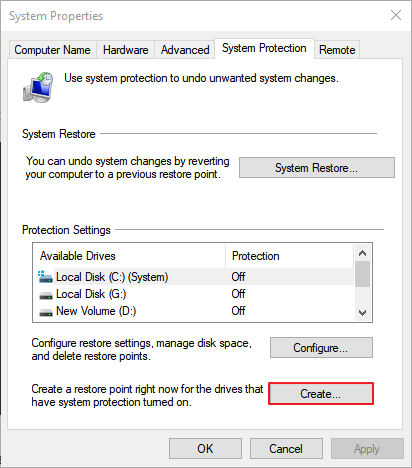
Step 1. Type "create a restore point" in your computer's search bar. Click the result to enter.
Step 2. Under the "System Protection" tab, click the "Create" button.
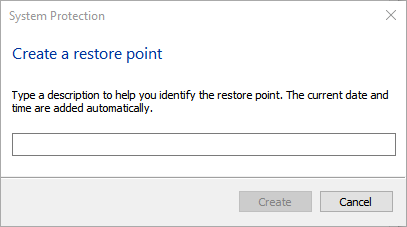
Step 3. Type a description for the restore point you created, and then click "Create".
In System Protection, you can also start a system restore, configure restore settings, manage disk space, and delete restore points.
How to Use System Restore
To use System Restore, you can follow these steps. Restoring won't affect your personal files, but it will remove apps, drivers, and updates installed after the restore point was made. This means that any changes made to your system after the restore point was created will be undone, effectively rolling back your system to a previous state.
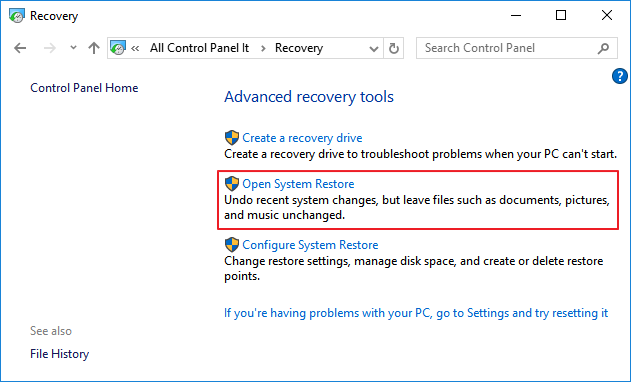
Step 1. Search Control Panel in Windows search box, and click the best match result to enter.
Step 2. Click "Recovery" in Control Panel, and select "Recovery" > "Open System Restore" > "Next".
Step 3. Choose the restore point related to the problematic app, driver, or update, and then select "Next" > "Finish".
How Long Does System Restore Take
The time a System Restore takes depends on the number of files on your system, with the process taking around 25 to 40 minutes if the restore point is recent.
System Restore Alternative
While System Restore can be a lifesaver in OS crash situations, it's not foolproof. For a more reliable backup and restore solution, consider using a dedicated tool that can provide more comprehensive protection for your system and data.
Qiling Backup is a simple and effective tool for protecting your data, allowing you to back up your Windows system and user settings with just a few clicks. In the event of a system crash, you can restore everything instantly. The tool also offers three backup types: full, differential, and incremental backups, giving you flexibility in creating computer data backups. Additionally, Qiling Backup enables you to clone or migrate your system to a new hard drive or computer without reinstalling the system and applications.
Here you can download Qiling Backup from the button below, and follow the guide to see how to make a system backup.
Step 1. To backup only Windows 10 on your computer, choose the option "System backup" on the "Backup and recovery" home page.
Step 2. In the next window, you can customize your own Windows 10 backup by choosing a backup location (HDD, USB hard disk, network drives, cloud drives) and adding a plan name and text description to it.

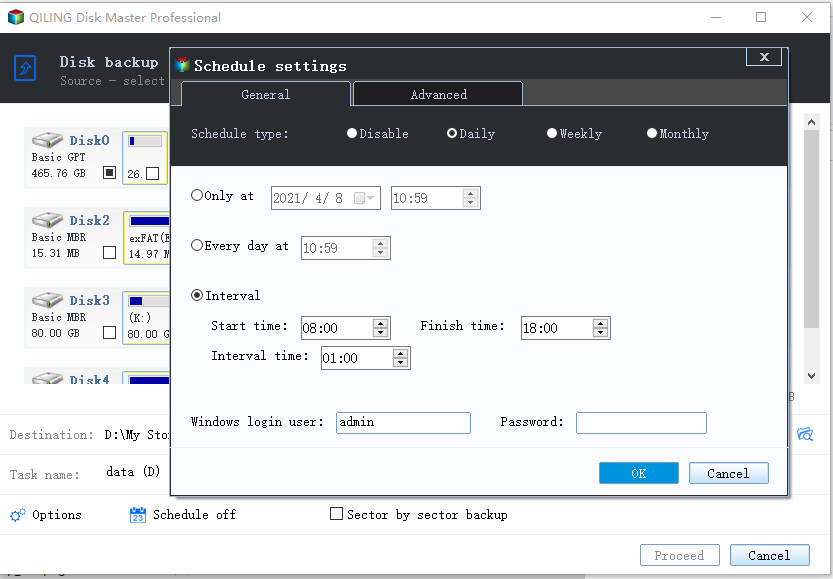
To enable automatic Windows 10 backups, go to Settings > Update & Security > Backup, and turn on the "Schedule" feature. This allows you to set a backup time, such as daily, monthly, or upon a specific event, and choose when the backup will start, such as during system startup, shutdown, user logon, or logoff.
Step 3. Once all the basic settings are made, click "Proceed". A full Windows 10 backup will be created, protecting your system from unexpected disasters.
To backup Windows 10 to an external storage device, connect the device to your computer, click "Browse" in the "Destination" area, and select the connected hard disk as the backup location, or choose from other supported paths such as cloud devices or network storage.
FAQ
1. Which versions of Windows have the system recovery function?
Windows Me, Windows XP (Home and Professional Editions), Windows Vista (all editions), Windows 7 (all editions), Windows 8 (all editions), and Windows 10 are the operating systems that support the Windows Media Player.
2. What's the difference between a system restore and file backup?
System Restore only monitors core system files and certain app files, recording their status before changes, whereas file backup saves users' personal data files to a safe location, not restoring changes made to personal data files.
3. Do users need to manually turn on system restore?
System Restore is automatically turned on, but requires at least 200M of free hard disk space to function. If the hard disk lacks this space, System Restore is disabled until enough space becomes available.
Related Articles
- Create System Image on USB Drive in Windows 10/8/7
- [Solved] This Application Was Unable to Start Correctly (Error Code: 0xc000007b)
- How to Create a Windows 10 Recovery USB for Another Computer
- Make External Hard Drive Bootable in Windows 10
- Hard Disk Backup in Windows 10/8/7 [Beginners' Guide]
- Backup HDD with Bad Sectors [Detailed Guides]
This article provides an overview of bad sectors on a hard drive and offers guidance on backing up a HDD with bad sectors. Bad sectors are areas on a hard drive where data cannot be written or read, and can cause data loss if not addressed. To prevent this, it is recommended to back up the HDD using disk backup software, which can help to identify and exclude bad sectors from the backup process.