How to Clone Windows 10/8/7 to Another Computer
Why Need to Clone Windows 10 to a New Computer
"You're looking to transfer your existing Windows 10 installation, programs, and files to your new laptop without reinstalling everything. You can use a tool like Qiling Disk Master to clone your old PC's hard drive to the new laptop's hard drive, preserving the exact same setup. Alternatively, you can use a USB drive to transfer your files and settings using the Windows Easy Transfer tool, but this won't transfer programs. If you have a lot of programs installed, using a cloning tool might be the quicker and easier option."
Many users are confused about how to migrate their Windows and data to a new computer. Instead of wasting time re-installing the system, applications, and files, you can use the methods provided to efficiently clone your PC. This will save you time and effort, allowing you to easily transfer everything to your new computer.
If you only need to clone Windows 10 and applications to the new computer, you can use powerful backup software to transfer the system.
How to Clone Windows 10 to Another Computer
Setting Dell factory restore may seem complex, but it's actually a relatively straightforward process. There are two secure and highly recommended ways to achieve this, and I can guide you through them.
1. Backup data and set Dell factory restore manually
When cloning Windows 10 from one computer to another, compatibility and start-up issues are major concerns. This is because most hardware requires specific drivers to function properly, making it unlikely for the system to run normally on a computer with a different hardware configuration.
To avoid cloning worries and clone the Windows system without removing and installing the disk, try the "System Transfer" function in Qiling Backup, which clones Windows 10 from the old computer to the new one with a bootable disk, ensuring a successful system boot-up from the cloned hard drive on the new computer. Prepare a proper WinPE emergency disk/USB and begin cloning a PC by creating a Windows 10 system backup.
Step 1. Create an Emergency Disk to USB
1. Connect an empty USB flash drive or external hard drive with over 100GB of space to your PC.
Initialize the USB or external hard drive as MBR, and create two partitions: set the first partition as FAT32 and the second partition as NTFS.
2. Run Qiling Backup and click "Tools" > "Create bootable media".
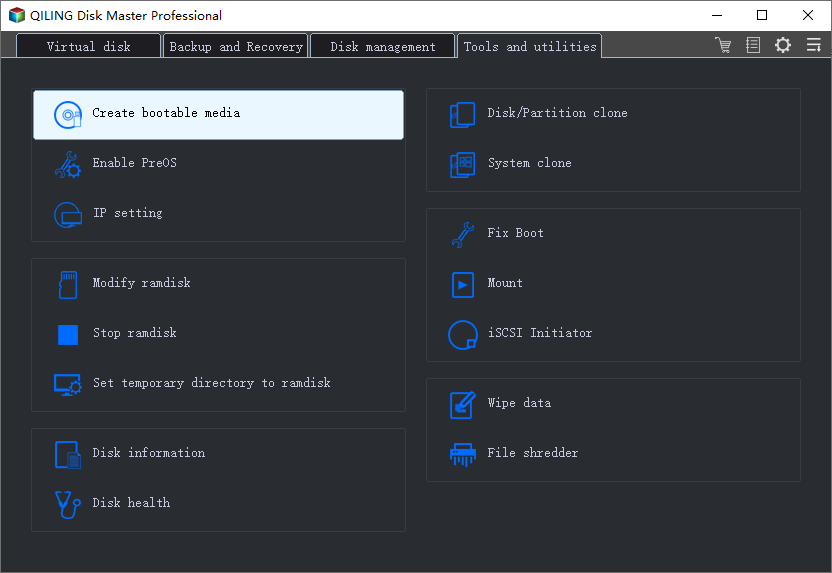
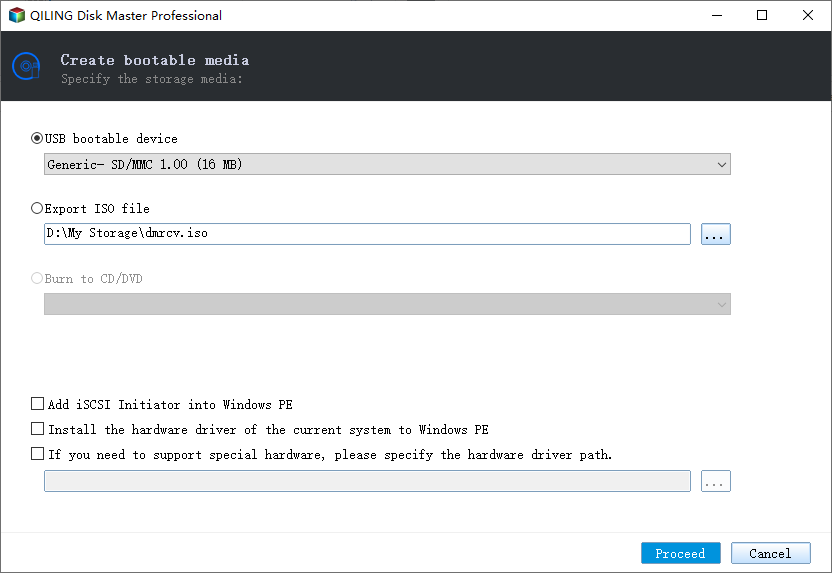
3. To create an emergency disk, select USB as the disk location and click the "Proceed" button.
The bootable disk will enable you to boot your computer and transfer the system image to the new PC.
Step 2. Create System Backup Image on Source Computer
1. To initiate a system backup, select "System Backup" from the top pane, and Windows OS will be automatically selected.
2. To save the system image, click the Browse icon and select the second partition of the USB drive that contains the emergency disk. This will allow you to save the system image to the specified location.
You can also save a system backup image to another empty external disk, which should be equal to or larger than the system C drive.

3. To proceed, you'll be creating a system backup image to the target device, which will be used to restore your system in case of any issues or failures. This process will save a snapshot of your current system configuration, including installed applications, settings, and data.
Step 3. Boot Target Computer from Qiling Backup Emergency Disk
1. Eject Qiling emergency disk and system backup image USB and connect it to the new computer.
2. Restart PC and press "F2/F8" to boot into BIOS.
3. To resolve the issue, go to the boot menu and set the computer to boot from the Qiling Backup emergency disk.
To restore a system image to a GPT disk, you need to change the boot mode to UEFI in the BIOS, then access the Qiling Backup main interface.
Step 4. Transfer System to the New Computer
Note: Restoring a system image to a new computer will erase the data on the target disk. It's essential to back up any important files beforehand or use an empty disk to avoid losing data.
1. On Qiling Backup's main interface, click "Browser to Recover" to initiate the recovery process.
2. Select the system image on your USB external drive and click "OK" to continue.

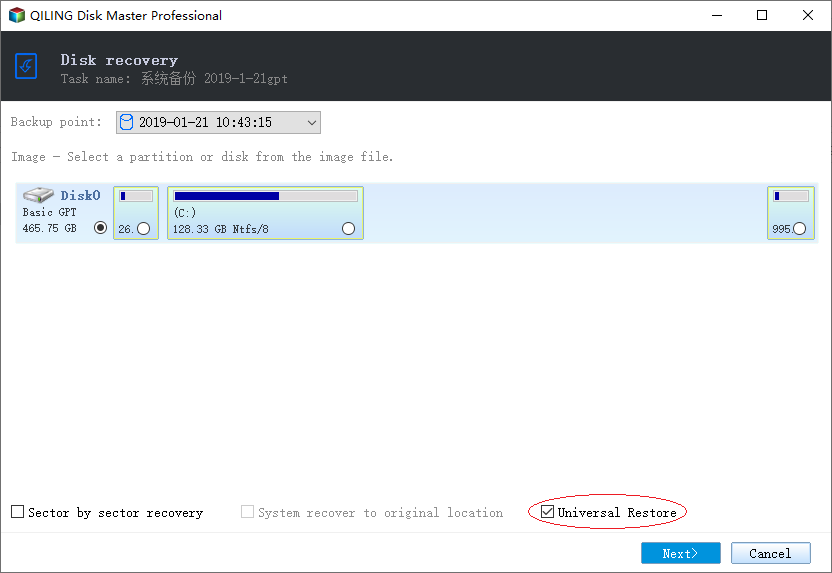
3. To restore a system image, select the disk you want to restore the system image to and tick the "Universal Restore" option. This will allow you to restore the system image to the selected disk while also preserving any existing data on the disk.
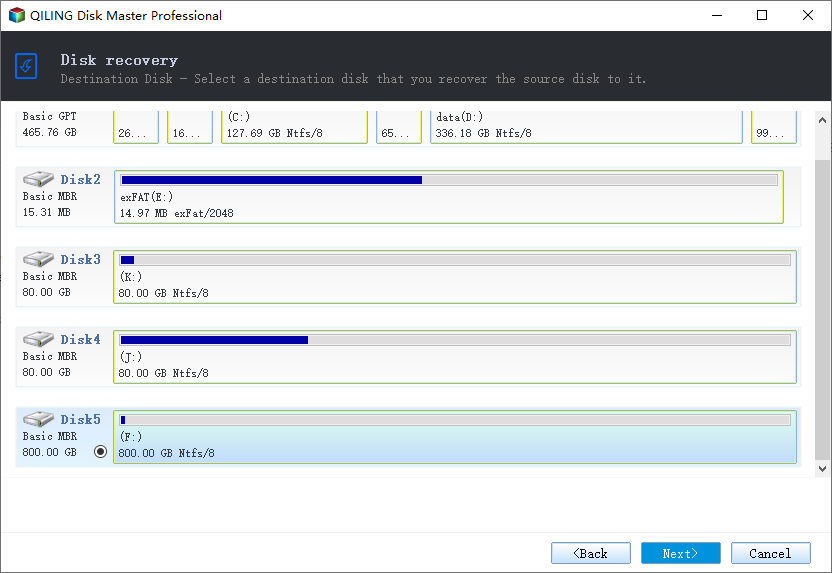
4. Select the destination disk and click "Next" to continue.
5. Click "Proceed".
Step 5. Restart PC with transferred system
1. Enter the BIOS settings and configure the computer to boot from the drive where the system was transferred, allowing the machine to start up from the newly installed operating system.
2. Save all changes and restart your computer.
3. To ensure a smooth transition to the new computer, it's recommended to update all drivers for the hard drive, solid state drive, and other storage devices, as well as all programs and software installed on the old computer, to guarantee compatibility and optimal performance on the new device. This will prevent any potential issues or glitches that may arise from outdated drivers or software.
When the system transfer is complete, Windows 10/Windows 7 and most applications should work on your computer. If you have software installed on partitions other than the C drive, you can manually copy them to the new computer for continued use.
Qiling Backup provides system cloning for complex migration problems, such as upgrading from an old to a new hard disk, from smaller to larger, or from HDD to SSD, except for system transfer.
Bottom Line
Qiling Backup makes it easy to replace an old computer without worrying about system transfer, and also allows for regular backups of a new computer using its disk/partition backup function, making it a convenient and efficient solution.
Related Articles
- Download Best SSD to SSD Cloning Software
- What's the Difference between Differential and Incremental Backups
- How to Create and Restore (Windows 10) System Image to Different Computer
- Clone SSD/HDD Sector by Sector
- Transfer Windows 10 Installation to New Hard Drive
- Computer Imaging: Image A Computer with Step-by-Step Guide
Have you heard of computer imaging or image computer? Do you know how to image a computer? This post offers a complete overview of Computer Imaging, and a step-by-step guide to image a computer easily.