Transfer Disk Image to New Hard Drive
A disk image is a backup file that stores the content and structure of a disk. Restoring it to a new hard drive can bring back Windows, programs, and data after disk replacement.
Prepare the New Drive
- Install or connect the new drive and confirm it is detected in BIOS/UEFI.
- Use a drive with equal or larger usable space when possible.
- Check whether the old system used UEFI/GPT or Legacy/MBR.
- Keep the disk image on a separate external drive or NAS.
Restore the Disk Image with Qiling Backup
Step 1. Open Qiling Backup and choose the disk recovery or restore option.
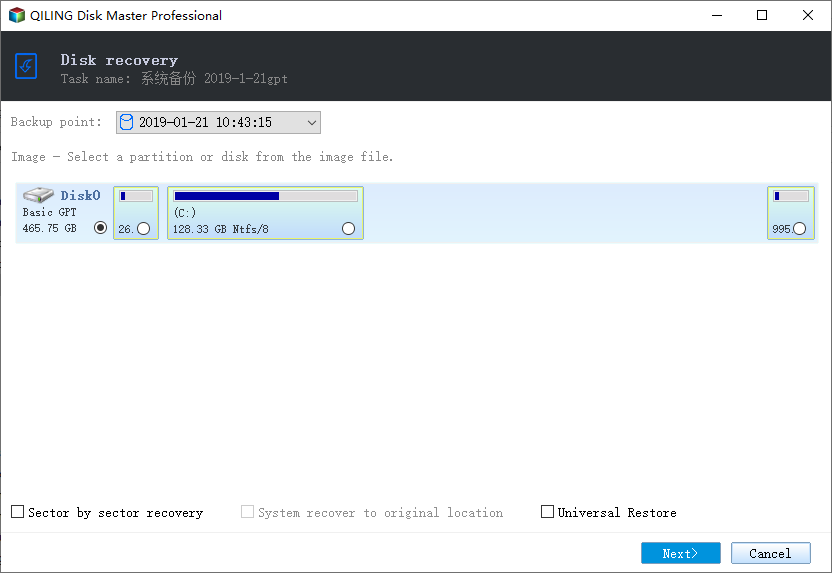
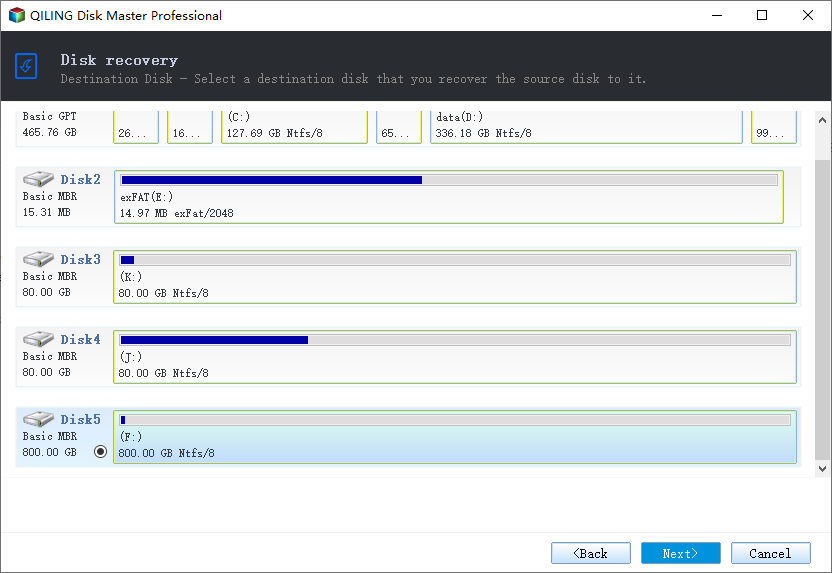
Step 2. Select the new hard drive as the restore destination.
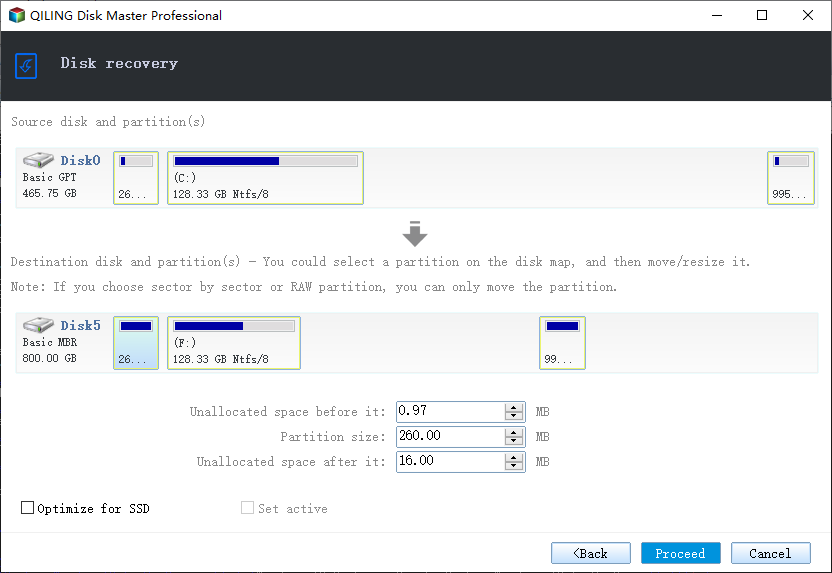
Step 3. Preview the layout and click Proceed.
After Restoring the Image
- Shut down the computer and disconnect the old drive if both drives contain bootable Windows copies.
- Enter BIOS/UEFI and set the new hard drive as the first boot device.
- Confirm boot mode matches the restored disk: UEFI for GPT, Legacy for MBR.
- After Windows starts, open Disk Management and extend the main partition if the new drive is larger.
- Keep the original disk image until you have tested Windows, apps, and personal files.
Common Problems
If Windows does not boot, check boot order, boot mode, and whether the EFI/System Reserved partition was restored. If the restored drive shows the old size, extend the partition or move blocking recovery partitions.
Conclusion
To transfer a disk image to a new hard drive, restore the image to the replacement disk and confirm BIOS boot order afterward. Keep the original image until Windows boots normally.
Related Articles
- Move Windows 10 to New Computer with Dissimilar Hardware
- Move Windows to New SSD Without Reinstalling Apps
Products
Articles & Tutorials
- Data Recovery
- Data Backup
- File Recovery
- File Backup
- System Backup and Restore
- Disk and Partition Clone
- Technical articles
- Mobile articles
- Disk Master Help
- Windows Data Recovery Tutorials
- Windows Secure Delete Tutorials
- Windows Partition Management Tutorials
- Windows File Backup and Restore Tutorials
- Windows System Backup and Restore Tutorials
- Windows Disk Backup and Restore Tutorials
- Windows Clone Tutorials