[Solved] How to Move OS to Another Drive Without Reinstalling Windows and Applications
To migrate Windows to a new hard drive, you'll need to clone the existing operating system to the new drive, then replace the old drive with the new one. This process varies slightly depending on the Windows version, but the general steps remain the same.
This tutorial guide shows you how to move your OS to another drive without reinstalling Windows and applications. You'll learn how to set up your PC with necessary tools before moving the OS to the new drive, and also get follow-up tips on setting up your computer to boot from the new disk.
Download One awesome OS Migration Software - Qiling Disk Copy
How Do I Transfer My OS to a New Hard Drive?
To copy your Windows OS hard drive to a new hard drive and make your PC boot from it, the best option is to use a cloning software. This will create an exact replica of your original hard drive, including the operating system, programs, and data. Some popular cloning software options include Qiling Backup. These tools can be used to clone your hard drive to a new one, and then you can set your PC to boot from the new drive.
If the system partition is running out of disk space, a common solution is to extend it using a partition manager software. However, if the system disk itself is fully utilized, alternative methods such as relocating the system to a larger disk, using a cloud storage service, or even reinstalling the operating system from scratch may be necessary.
Upgrading a computer's storage capacity by adding a new hard drive can be a solution, but using it as a second data drive is not the most effective approach. Instead, it's more beneficial to transfer the entire operating system to the new hard drive, effectively making it the system drive, which can improve performance and efficiency.
To switch the whole system disk, including the OS, applications, and data, to a new drive, you can use a reliable disk copy software. This software will help you move your OS with data to the new disk in just a few clicks, making the process efficient and hassle-free.
Qiling Disk Copy - Best OS Moving Tool
To avoid reinstalling the operating system and all applications on a new hard drive, it's essential to transfer installed programs to the new drive, unlike data which can be simply copied.
To transfer your Windows OS, installed applications, and disk data to a new larger hard drive, you can clone your whole system disk to the new drive, which is an all-in-one resolution that will transfer everything seamlessly.
To transfer an OS to a new hard drive, you'll need a professional disk cloning software, such as Qiling Disk Copy, which can help you do so with just a few clicks.
To ensure a seamless OS disk migration process, activate the tool to a pro version in advance. This will provide you with an immediate activation key, allowing you to proceed with the upgrade.
A user-friendly interface allows anyone to easily transfer their operating system to a new hard drive or SSD on Windows 10/8/7/Vista/XP without having to reinstall the OS and applications.
How to Transfer OS to New Drive - Here is the Full Process
Follow through the OS disk migration process and set up your OS bootable on the new drive now:
#1. Check your Hard Drive
To ensure a successful transfer, verify that the new hard drive is the same size or larger than the original one. If it's smaller, the transfer will fail. Consider deleting temporary files to free up disk space on the original drive.
Your computer is not infected with the virus and the operating system is not damaged. The virus has been successfully removed and your system is now secure.
#2. Preparations
- 1. 256GB SSD (Bigger than the used space on your old hard drive) 256GB SSD is a significant upgrade from your old hard drive, offering more than double the storage capacity. This means you can store more files, documents, and programs without worrying about running out of space.
- 2. A Screwdriver
- 3. The USB 3.0 to SSD / 2.5-Inch SATA Hard Drive Adapter is a device that allows for the connection of a solid-state drive (SSD) or a 2.5-inch SATA hard drive to a USB 3.
- 4. Download Disk Cloning Software - Qiling Disk Copy
#3. Transfer OS to New Hard Drive using Qiling Disk Copy
Step 1: Download, install and run Qiling Disk Copy on your PC.
Step 2. Choose "Disk/Partition clone" in the tool page to start.

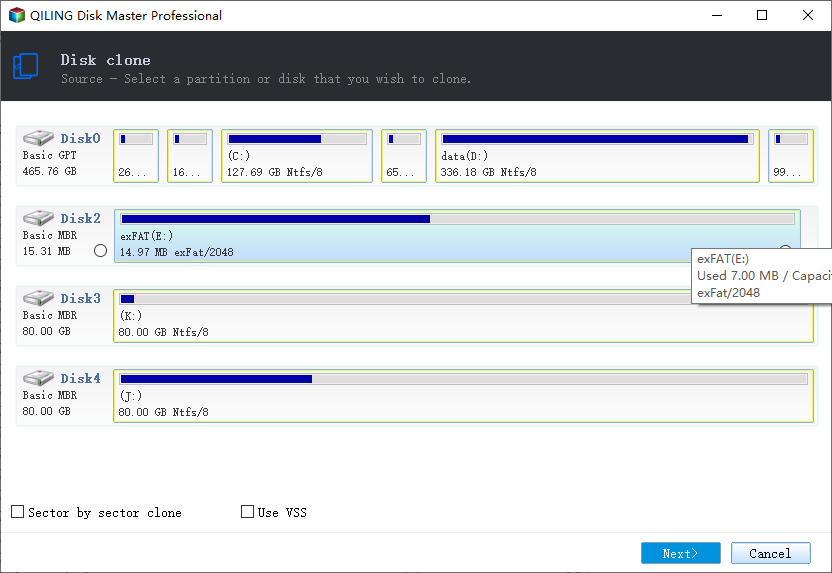
Step 3. To copy or clone a Linux hard drive, select the source drive, and ensure the "Sector by sector clone" option is checked to preserve the disk layout, then click Next.
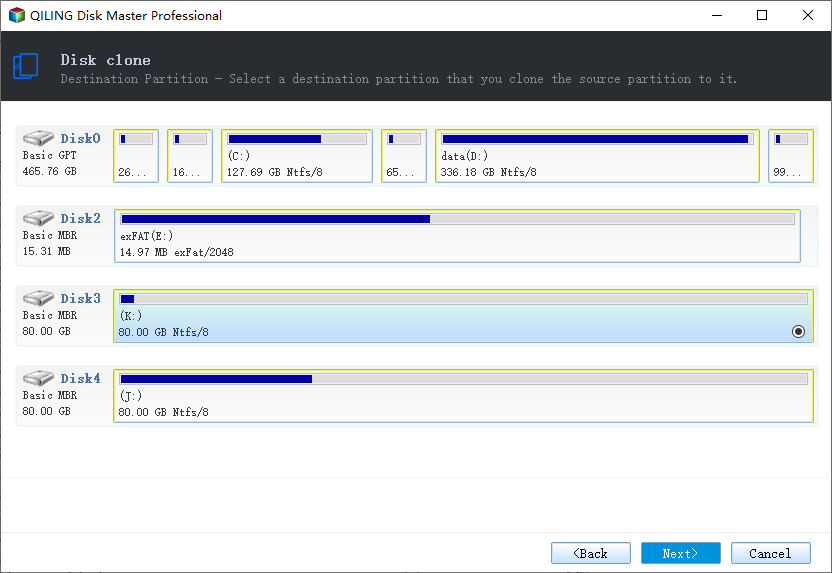
Step 4. Select the destination disk where you want to clone/copy the old disk and click Next to continue.
To copy or clone a hard disk, the destination disk should be at least the same size or larger than the source disk.
Step 5: Check and edit the disk layout.
If your destination disk is an SSD drive, remember to select the "Optimize for SSD" option as the target is SSD.

Step 6: Click "Proceed" to start the hard drive cloning process.
A warning message is displayed stating that the data on the destination disk will be overwritten. To proceed, click "OK" if the destination disk is empty or does not contain important data.
#4. Set Up Windows OS Boot from New Hard Drive
After cloning, you need to set up the computer and boot the OS from the new hard drive.
Step 1. Restart PC and press F2/F12/Del keys to enter BIOS.
Step 2. Go the boot option, change the boot order, setting OS to boot from the new disk.
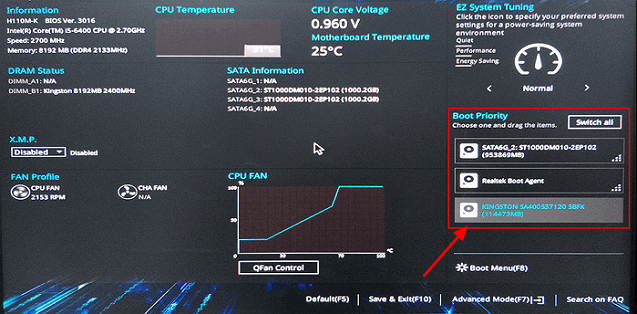
Step 3. Save the changes, exit BIOS, and restart PC.
You can wait patiently for the computer to boot up, and everything should remain the same, including the OS, applications, and data.
The only thing changed is that you have switched the disk and you can delete everything on the old disk, using it as a second data drive by now.
Conclusion
This page guides you through the process of switching your system disk, moving your OS to a new hard drive or SSD, without reinstalling your OS and applications, using Qiling Disk Copy.
The method on this page can be used to migrate the OS to a new drive, including an SSD, such as an M.2 SSD, and also to set up Windows on the new drive, following the OS drive setting-up guide. This allows for a seamless transition to a new storage device.
Related Articles
- Free disk cloning software for Windows 10/8/7
- Clone Hard Drive to Larger Drive Without Reinstalling Windows and Programs
- HDD RAW Copy Tool: Upgrade Disk, Copy Disk, Recover Disk
- How to Clone a Drive (HDD/SSD) with Bad Sectors
- How to Move Windows Boot Partition to A New Drive
- (FULL FIX 2021) We Couldn't Create a New Partition or Locate an Existing One
Get the full solutions to fix 'we could not create a new partition or locate an existing one' Windows 11/10 USB, error 0x8004240f, 0x80042468, SSD, RAID, unallocated space, and many other related Windows 11/10 install errors.