(FULL FIX 2021) We Couldn't Create a New Partition or Locate an Existing One
"The partition setup failed. Check the Setup log files for more details."
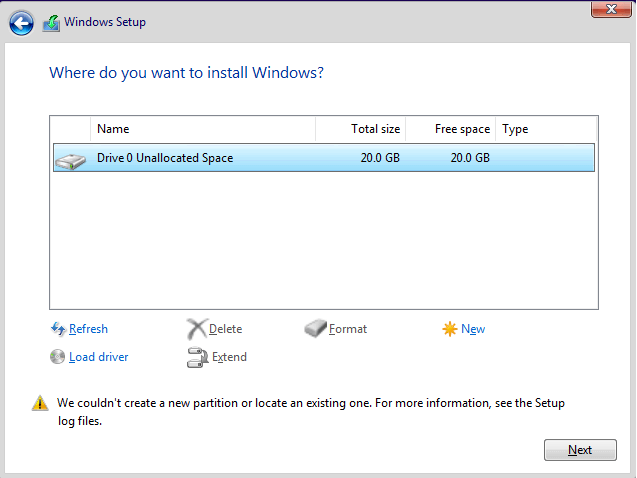
When trying to install a second OS using a bootable USB drive to dual boot Windows 11/10 with Windows 7 or Windows 8, the error "we couldn't create a new partition" occurs. This issue arises when attempting to clean install the second OS, specifically when choosing custom install and selecting the drive where the OS is supposed to install, resulting in Windows being unable to create a new partition or locate an existing one.
We Couldn't Create A New Partition Error Messages and Fixes
The table below provides a quick overview of all 'Windows couldn't create a new partition' scenarios and possible solutions. It includes solutions for various errors such as 0x8004240f and 0x80042468, as well as for USB, SSD, RAID, and unallocated space issues. Click to see the full solutions to fix 'we could not create a new partition or locate an existing one' Windows 11/10 errors.
1. During Windows 11/10 Installation
2. Error 0x8004240f, 0x80042468
Solution 1. Disconnect any peripherals with PC/Laptop
When encountering the error, it's likely due to external storage devices connected, such as an external HDD, SSD, USB drive, or SD card. Simply disconnect all external storage devices from the USB port, and if you're using a bootable USB drive for OS installation, reconnect only that drive and try again.
Solution 2. Format the partition using Diskpart
To resolve the "we couldn't create a new partition or locate an existing one" error, you may need to take additional steps. This often involves using the Diskpart utility in Windows to set the partition that holds the Windows setup files and boot files as primary. To accomplish this, you can start Diskpart by typing "diskpart" in the Command Prompt and then follow the commands to identify and set the correct partition as primary. This process requires careful execution of specific Diskpart commands to resolve the issue.
Step 1. Start Windows 11/10/8.1/8/7/XP/Vista setup using a bootable USB or DVD.
Step 2. If you get the We couldn't create a new partition error message, close the setup and click the "Repair" button.
Step 3. Choose "Advanced tools" and then select "Command Prompt".
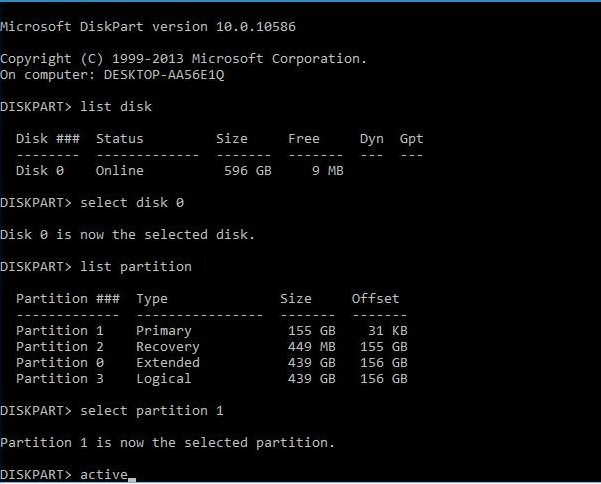
Step 4. When Command Prompt opens, enter start diskpart.
Step 5. Now enter list disk. You should see the list of all hard drives connected to your computer.
Step 6. To identify your hard drive, you'll need to use the command "list disk" in the command prompt. This will display a list of all disks, including your hard drive, along with their corresponding numbers.
Step 7. Enter the following lines and press Enter after each line:
- disk 0 clean
- disk 0 create partition primary
- disk 0 active
- disk 0 format fs=ntfs quick
- disk 0 assign
Step 8. Enter exit in order to close the Command Prompt.
Step 9. Start the installation process again.
Solution 3. Make your partition active Using Diskpart
Repeat the steps (1-To install Windows OS, open Diskpart first. Then, run the Diskpart commands as instructed below to set the partition where you want to install Windows OS as active.
Step 1. Enter list disk.
Step 2. To see a list of available hard drives, locate your hard drive and enter the command "select disk 0", replacing 0 with the number representing your actual hard drive.
Step 3. Enter list partition.
Step 4. Locate the partition on which you want to install the Windows system and select it by entering the corresponding number. Replace 1 with the actual number of your partition.
Step 5. Enter active.
Step 6: Type exit and press "Enter" to exit the Command Prompt.
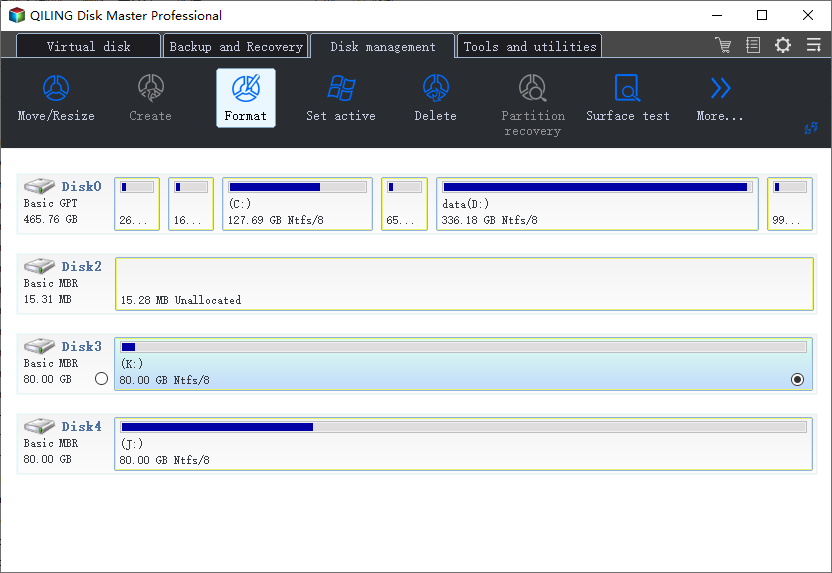
Solution 4. Mark your partition active using third-party partition manager
Diskpart can be complex to operate, so users should be careful when using it. To avoid mistakes, consider using a Diskpart alternative like Qiling Partition Master, a third-party disk and partition magic software that's simple and powerful. This software can help resolve the "we couldn't create a new partition or locate an existing one" error by setting the desired partition primary and active.
How to Format FAT32 Using FAT32 Formatter
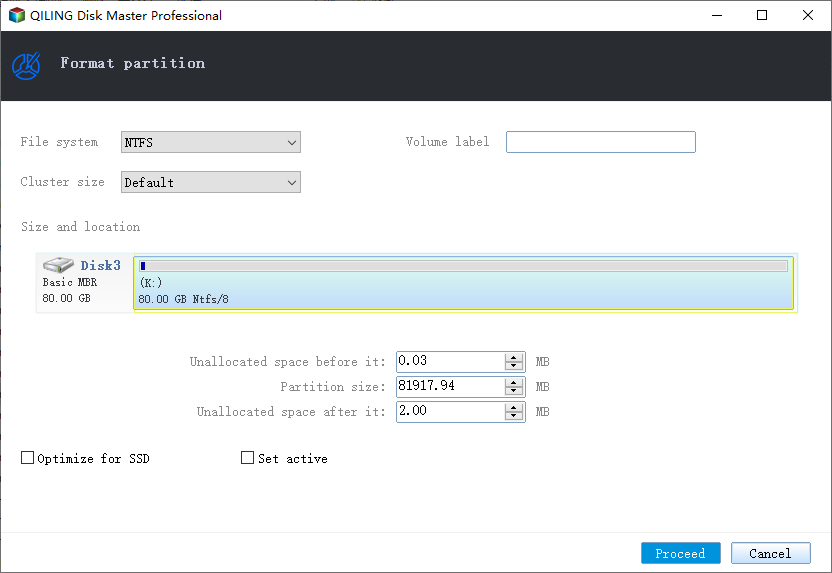
Step 1. Launch Qiling Partition Master, click the partition you intend to format and choose "Format" in "Disk management" page.
Step 2. In the next window, set the Partition label, File system, and Cluster size for the partition, then click "Proceed".
How to Set active for MBR type disk
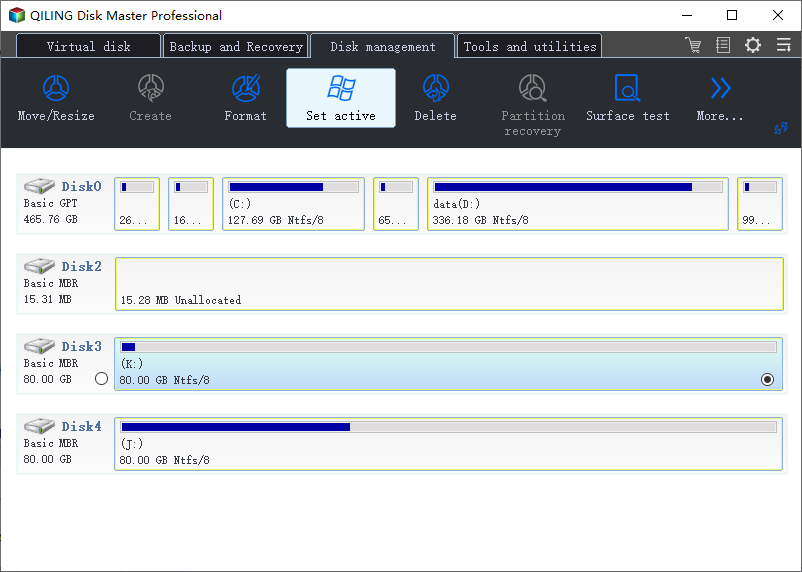
Step 1. Run Qiling partition manager software. On the "disk management" page, select the traget partition and choose "Set active".
Solution 5. Create a bootable USB drive using other tools
If the Media Creation Tool can't create a new partition, try using a third-party tool like Qiling Partition Master to create a bootable USB drive, which can help you format a hard drive, check partitions, or create a new partition on unallocated space, allowing you to install Windows 11/10.
To create a bootable USB drive with Qiling Partition Master, first download the ISO file from the official website. Then, create a bootable USB drive by burning the ISO file to a USB drive using a tool like Rufus or PowerISO.
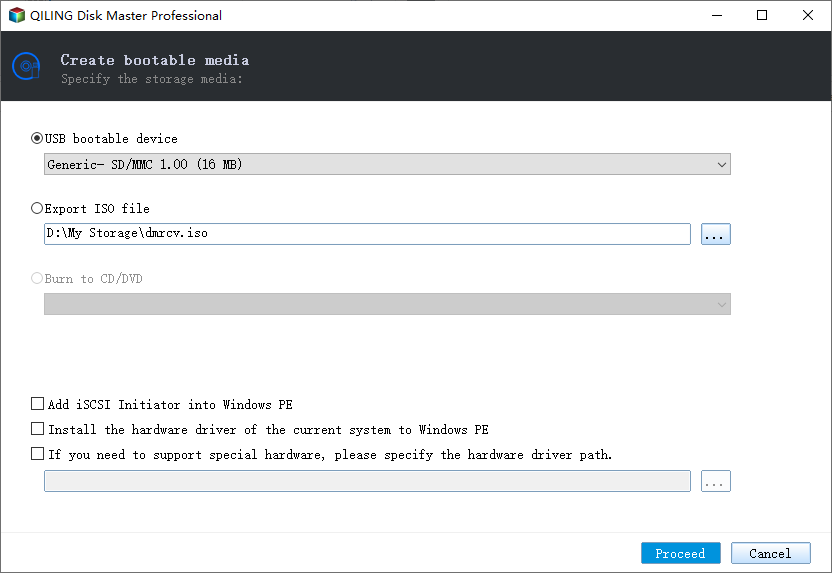
Step 1. To create a bootable disk of Qiling Partition Master, prepare a storage media like a USB drive, flash drive or CD/DVD disc, and correctly connect it to your computer.
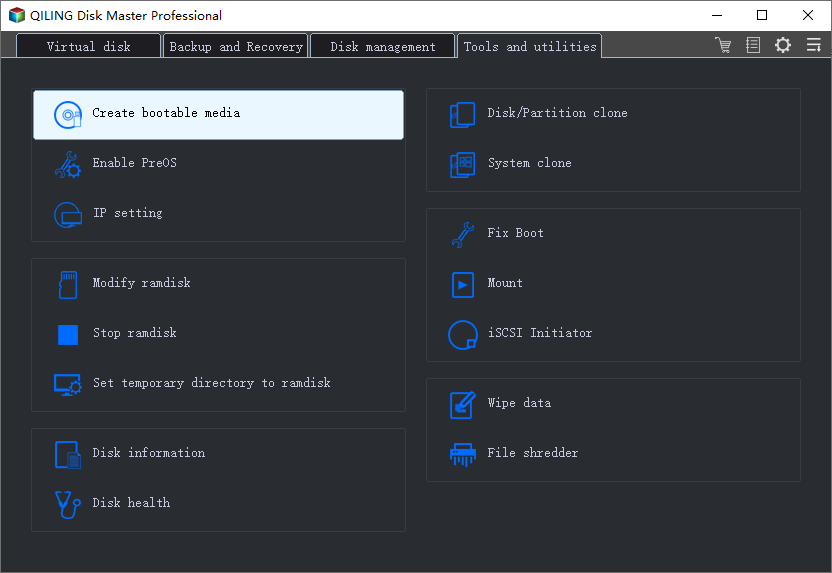
Step 2. Run Qiling Partition Master. And click "Create bootable media" in the tools page.
Step 3. If the USB or CD/DVD drive is available, you can choose it to save the ISO file. Alternatively, you can save the file to a local drive and then burn it to a storage media. Once you've made your choice, click the "Proceed" button to start the process.
After completing the process, you have successfully created a Qiling Partition Master WinPE bootable disk. This allows you to manage your hard disks and partitions through the bootable drive even when your computer fails to boot normally.
To add the RAID driver under WinPE environment, click on the "Add Driver" option from the menu bar, which allows you to install the driver for your device, including RAID drives, that may not be recognized without the necessary drivers installed. This is especially important for devices like RAID or specific hard disks that require the driver to be loaded for proper recognition.
Solution 6. Convert to partition to the GPT format
Partition styles, specifically MBR and GPT, can impact the success of a Windows 11/10 installation. MBR, which has a 2TB drive size limit, may need to be converted to GPT, which has no size limitations, to resolve issues such as the "We couldn't create a new partition" error.
- Method 1. Convert MBR to GPT with Qiling Partition Master
- Method 2. Convert MBR to GPT using Windows Disk Management
- Method 3. Convert MBR to GPT using Diskpart command
To convert MBR to GPT, you can use Qiling Partition Master, which is a safe and data-loss-free method. This tool directly converts the partition table without requiring any manual intervention or data modification, making it the best choice for avoiding data loss when fixing the "Windows couldn't create a new partition" error.
Solution 7. Set the USB drive as the first boot device in BIOS
To fix the issue of Windows not being able to create a partition or locate an existing one, you may need to change the hard drive sequence and set the USB drive as the first boot device, allowing Windows to recognize the correct boot device.
Step 1. Press the key indicated in the motherboard manual, such as F1, F2, F10, F12, or CTRL + ALT + ESC, to enter the BIOS setup.
Step 2. Use the mouse arrow to move the connected USB drive to the top under the boot device menu.
Step 3. Restart the PC and let Windows boot from the USB drive this time. Start the installation process again.
Other Install Windows Errors and Solutions
We couldn't create a new partition or locate an existing one is not the only error message encountered during Windows 11/10 installation. Other commonly known Windows installation errors also prevent the installation of the operating system from the beginning.
1. Windows cannot complete the installation
If you're stuck in a loop with the "Windows could not complete the installation" error and system reboots, you're likely trying to install a 64-bit Windows operating system, such as Windows 7, 10, or 11, or a fresh installation was interrupted before a user account was created. To resolve this issue, you have three possible fixes to consider.
2. Windows won't install from USB
If Windows won't install from USB, you can try fixing the issue by checking if the USB drive is bootable, ensuring your computer supports booting from USB, and setting your computer to boot from the USB.
Related Articles
- Write Protected USB Format Tool / Removal Software Free Download
- How to Make Nintendo 3DS System Read SD Card Over 32GB
- Beginner's Guide - Install A New Hard Drive/SSD in Windows 10/8/7
- Free Download 2021 Best Memory Card Format Tool, Format SD Card for Free
- Clone Hard Drive with Paid/Free Cloning Software Windows 10
- How to Edit Created Backup in Qiling Disk Master
Do you wonder how to edit created backup for more detailed management? This article will tell you how to edit your backup after creating a backup with the help of Qiling Disk Master.