Windows 11/10/8/7 Won't Boot from SSD
"To resolve the issue, you'll need to configure your computer's BIOS or UEFI settings to prioritize the SSD disk as the primary boot device. This can usually be done by entering the BIOS/UEFI settings during boot-up, navigating to the 'Boot Order' or 'Boot Priority' section, and selecting the SSD disk as the first option. Save the changes and exit the BIOS/UEFI settings, then attempt to boot from the SSD again. If you're still experiencing issues, you may need to reinstall the operating system on the SSD.
If you're experiencing the same issue and want to tackle it yourself, try the following solutions: ..
Fix 2. Rebuild SSD and set to active
Causes of Windows not Booting from SSD Error
The error where a Windows 11/10, 8 or 7 computer cannot boot on an SSD drive is a real problem that affects many users. This issue occurs due to various reasons, such as a malfunctioning SSD, incorrect BIOS settings, or corrupted system files. Fortunately, there are solutions available to fix these troubles, and by understanding the root cause of the problem, users can take steps to resolve the issue and get their computer up and running again.
- Upgrading the system disk from a traditional hard disk drive (HDD) to a solid-state drive (SSD) can be a bit tricky, and sometimes the computer won't boot from the new SSD. This can be due to various reasons such as incorrect BIOS settings, improper installation of the SSD, or issues with the SSD itself.
- Windows system error/failure.
- Computer fails to boot after the system update.
- SSD disk internal error.
- The SSD is cloned and won't boot.
If you're experiencing SSD booting errors, you can try the following solutions to resolve the issue. You can also consider reinstalling or migrating your Windows OS to the SSD without boot issues by following the provided page.
Solutions 1. Set Windows to Boot from SSD via BIOS
If your computer won't boot after upgrading to an SSD, it's likely because you forgot to reset the boot order in the BIOS, which can be fixed by reconfiguring the boot mode.
1. Connect the SSD to your computer using a SATA cable.
2. To restart your PC and enter the BIOS setup, shut down your computer, then press and hold a specific key (usually F2, F8, F12, or Del) as you turn it back on. This will allow you to access the BIOS settings.
3. To change the boot order to boot from the cloned SSD, use the arrow keys to select Boot Option, then change the boot order to boot from the cloned SSD.
Solution 2. Rebuild the SSD and Set it as Active
To rebuild the MBR on a damaged SSD, you need to boot from a Windows installation media, go to the Command Prompt, and run the command "bootrec /fixmbr" to rebuild the MBR. Then, run "bootrec /fixboot" to set the active partition. This process will restore the MBR and set the correct boot partition, allowing the system to boot normally.
Qiling Partition Master offers a function to rebuild MBR in case of boot failure due to MBR issues, providing a solution for users experiencing boot problems.
Since your PC cannot boot from the SSD properly, you can either connect the MBR hard disk to another working computer for repair or create a WinPE bootable disk to make your computer bootable.
Step 1. Create a WinPE bootable disk
1. To create a bootable USB drive or CD/DVD disc using Qiling Partition Master, start by preparing the disc or drive. Connect the drive to a bootable computer and launch Qiling Partition Master. Navigate to the "Create bootable media" feature and click on it to proceed.
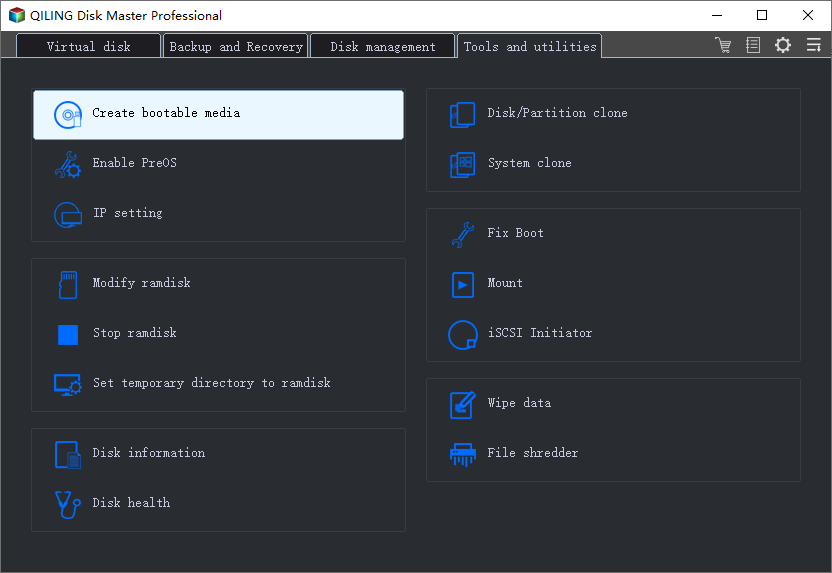
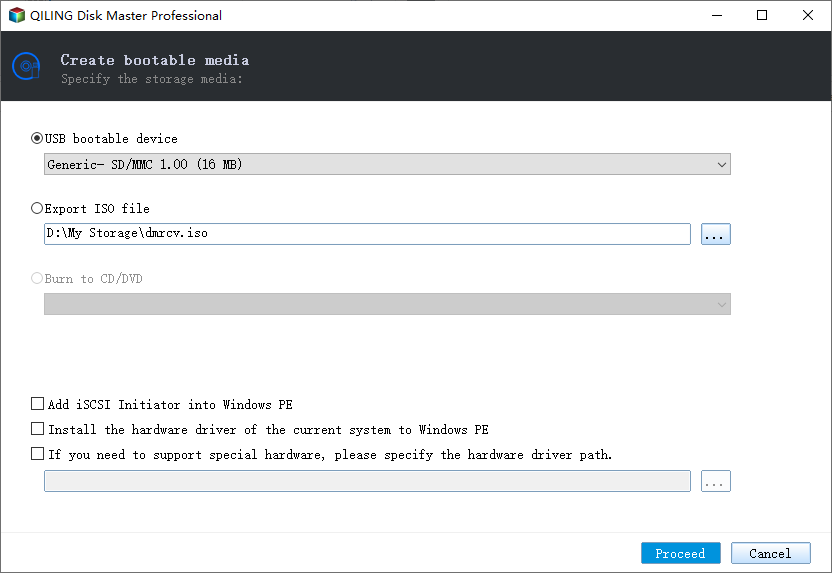
2. To connect a device to your computer, select the appropriate option - either USB or CD/DVD - based on the type of device you are connecting, then click the "Proceed" button.
Step 2. Boot Qiling Partition Master Bootable USB
1. Connect the bootable USB or CD/DVD to your PC.
2. To access the Qiling Partition Master, press F2 or Del when restarting your computer to enter the BIOS screen. From there, set your computer to boot from the "Removable Devices" or "CD-ROM Drive". Once booted, the Qiling Partition Master will run automatically.
Step 3. Rebuild MBR
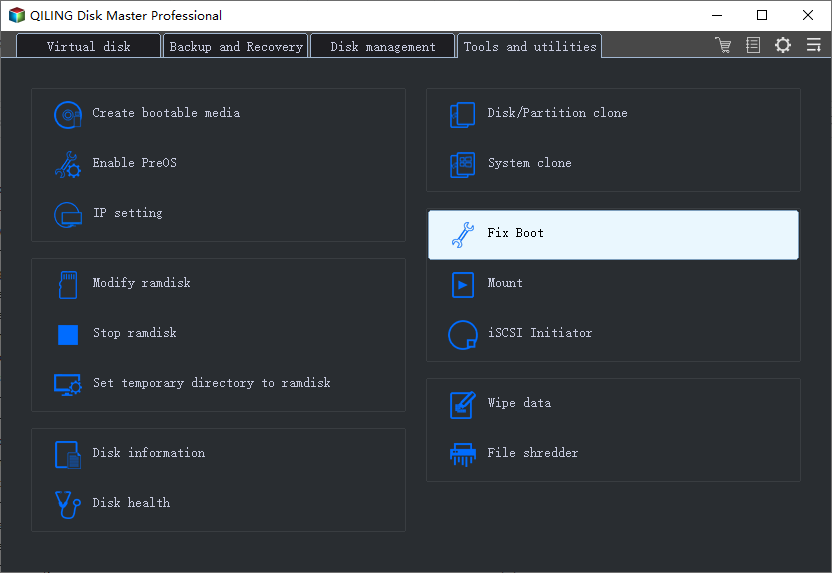
1. Launch Qiling Partition Master and click "Fix boot" on the tools page.
2. Select the disk whose MBR is damaged, and click "Proceed" to rebuild the Master Boot Record.
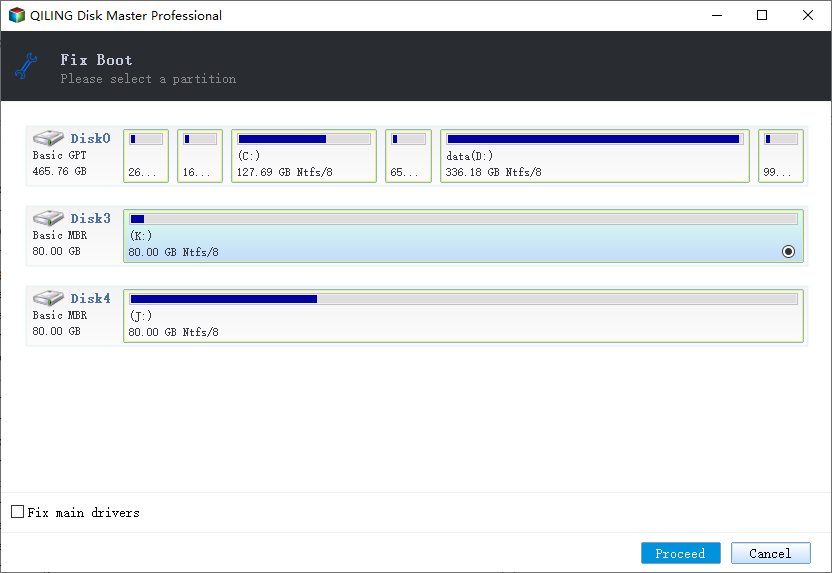
The rebuild MBR feature can fix master boot code issues and help resolve problems when the Windows Operating System won't boot.
Solution 3. Fix the BCD Error to Make the SSD Boot
MBR and GPT SSDs have different steps to resolve BCD errors. If you're using a GPT SSD, you'll need to use the built-in Windows 10 feature called "Automatic Repair" to fix the BCD error.
1 - The SSD is MBR.
Step 1. If the system partition doesn't have a drive letter, assign one for it.
1. To access the Open Disk Management, follow these steps: right-click on "Computer" or "This PC" and select "Manage" from the context menu, which will open the Disk Management utility under the "Storage" section.
2. To assign a drive letter, select the partition, click Add, click the desired letter, and then click OK.
Step 2. Run Command Prompt as administrator.
Here, we suppose the system partition is E: Then, run the command:
bcdedit /store E:\boot\bcd
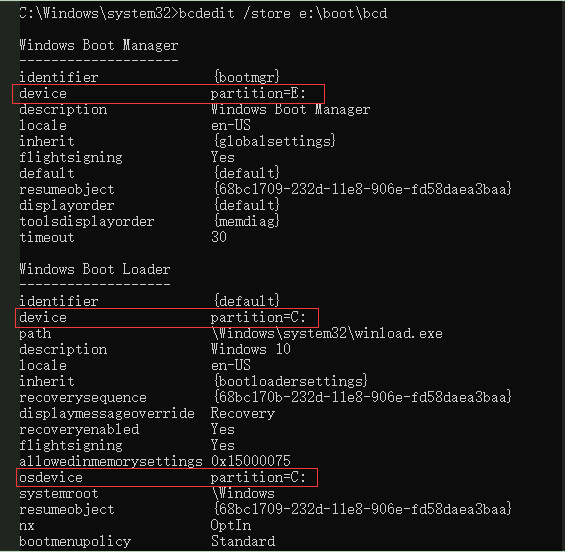
Check that the System and boot pointers are correct after running. If they are not correct, use the /set command to fix them. For example, if the system partition should be M: it becomes E:.
Bcdedit /store M:\boot\bcd /set {bootmgr} device partition=M:
2 - The SSD is GPT.
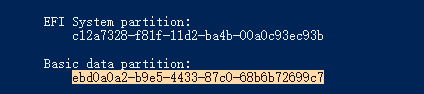
Step 1. Set the partition ID as basic ID.
The BCD mode on the GPT system is similar to the MBR, but the GPT system disk is an EFI partition. To enable BCD, you need to modify the partition ID to the Basic data partition ID using the Diskpart set command on the EFI partition.
set id=ebd0a0a2-b9e5-4433-87c0-68b6b72699c7
Step 2. Assign the drive letter and view BCD information
To assign a drive letter to a partition, follow these steps: Open the Disk Management tool, right-click on the partition you want to assign a drive letter to, and select "Change Drive Letter and Paths." Then, in the "Assign the following drive letter to the selected partition" window, select the desired drive letter from the dropdown menu. Once assigned, the partition will have the selected drive letter.
bcdedit /store M:\EFI\Microsoft\Boot\BCD

If the partition is pointed to an error, use the /set command in BCD edit to correct the modification, which is the same as the MBR. If there's still a startup issue, check if the Active partition is set for the MBR disk, or add a startup item for the GPT system disk. If the problem persists, consider seeking further assistance.
Related Articles
- How to Format Write Protected SD Card [6 Ways]
- How to Clone IDE to SATA HDD/SSD (2 Ways)
- Diskpart Has Encountered an Error Access Is Denied | How to Fix
- 3 Best Free Partition Manager For Windows 7/8/XP 32 Bit and 64 Bit
- Change GPT Disk to MBR Disk Without Formatting
- Full Guide to Format 4K Sector Hard Drive Partitions in Windows 11/10
- How to Backup Your Files in Windows 11 and Downgrade Back to Windows 10
If you're planning to downgrade from Windows 11 to Windows 10, you'll want to back up your files first. Fortunately, backing up your files in Windows 11 is a straightforward process. You can use the built-in File History feature to automatically back up your files to an external drive or network location.