Windows 10 Backup and Restore - Full Solutions to Protect System, Data and Applications
Preparation is key, and when it comes to Windows 10, backing up and restoring your system is crucial. Let's explore the backup and restore options, covering what needs to be backed up and the steps to take to do so.
While there are various Windows 10 backup and restore approaches, a dedicated backup and recovery tool can make the process easier.
Backing up your entire computer, not just important files and folders, provides a quick and easy way to restore your computer to its original state in case of a disaster. This process allows you to take a snapshot of your computer, which can be easily restored without the need to reinstall all software, saving you hours of time and effort.
What Do You Need to Do for Windows 10 Backup and Restore?
The amount and type of data you need to back up depends on how you use your computer. You'll want to back up personal files, photos, videos, and documents, but also consider backing up installed applications, Windows 10 settings, software settings, and any app-generated history records. Additionally, the registry, drivers, and other system-specific data may also require backup.
The process of manually backing up a computer is a time-consuming and labor-intensive task that is often avoided, which is why backup software like Qiling Backup was created to simplify and streamline the process.
There is a free trial version of Qiling Backup available for you to take for a test drive.
Choose A Suitable Method to Backup and Restore Windows 10
The manual option
Your computer contains a vast number of files, including those you've created, Windows 10 files, and files generated by the programs you use. While backing up some files is as simple as copying them to another location, this isn't possible for many Windows files, as they're in use when your computer is on and can't be copied.
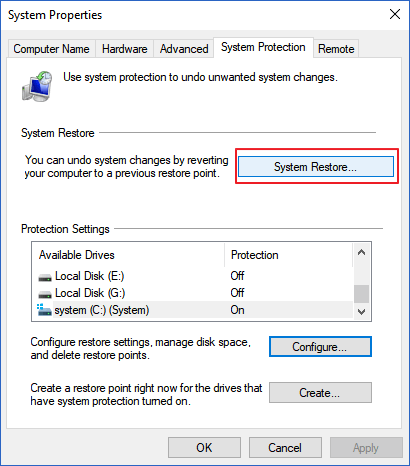
Windows has a feature called System Restore that allows you to create a restore point, backing up the registry, key system files, and installed applications. This feature can be used to manually backup certain things with relative ease.
To access System Restore, click the Start button and search for "Create a restore point". You can then create a new restore point and give it a name. If you encounter issues in the future, such as driver conflicts, you can revert your computer to an earlier time by restoring it to a previously created point.
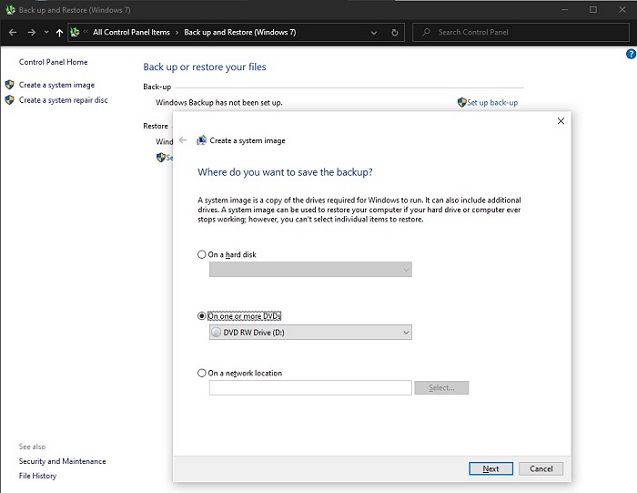
Windows 10 retains the backup tool from Windows 7, but it's slightly hidden. To access it, go to Settings, then Update & Security, click Backup, and select "Go to Backup and Restore (Windows 7)". From there, you can create a system image backup by choosing a location and clicking "Start backup".
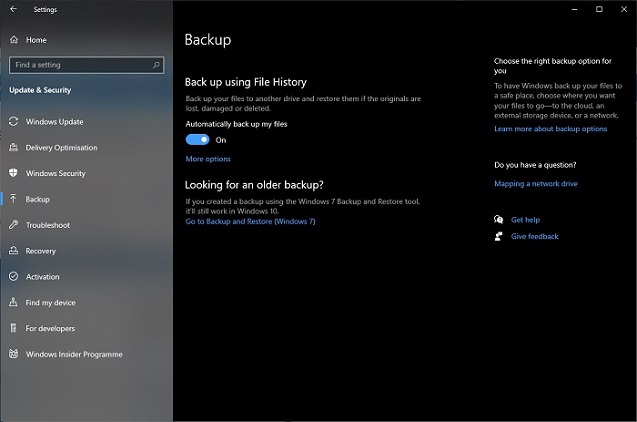
Windows 10 includes the File History tool, which can be found in the Backup section of Update & Security in Settings. To set it up, click "Add a drive" and choose a location to save backups, then enable "Automatically back up my files". Click "More options" to customize settings, including how often files are backed up, how long backups are retained, and which folders are included.
The automated option: Qiling Backup
In Windows 10, manually backing up your system is a complex process, but using Qiling Backup simplifies it, allowing you to back up your entire system, including the contents of one or more hard drives, with just a few clicks.
The PC backup and restoration program, Qiling Backup, offers three main versions: a free edition for home users to back up personal data, a home edition with additional features, and a Mac version for Mac users to do data backup and protection.
Creating a full system backup is incredibly simple. To start, fire up the application and click the System Backup button in the panel to the left. Next, choose where the backup will be saved, such as an external hard drive, NAS drive, or other networked devices. That's it!
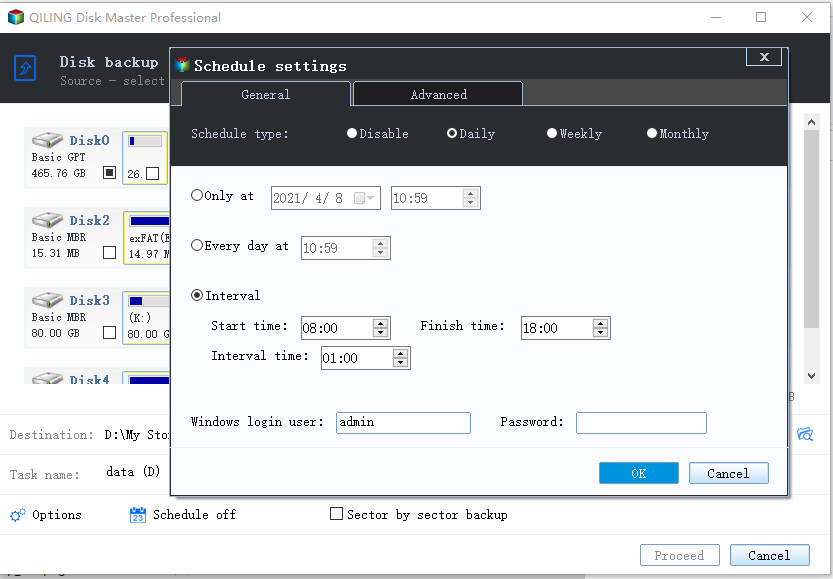
To schedule a backup, click the Schedule link and configure settings to keep your backup up-to-date, choosing between full, incremental, or differential backups. You can also click the "Backup options" button for more advanced settings or simply click Save to start the process on a schedule or immediately by clicking Backup.
To do a Windows 10 backup and restore with Qiling Backup, follow the detailed tutorial below.
Step 1. Launch and run Qiling Backup on your Windows 10 PC and choose "System backup" to back up Windows 10.
Step 2. Select the backup destination, the software will choose the most suitable location by default.

Step 3. To schedule a backup of your Windows 10, click on the "Schedule" option which will open the Backup Scheme window. Here, you can set up a plan to automatically back up your system at a later time, on a daily, weekly, or monthly basis. This ensures that your Windows 10 is backed up regularly without any manual intervention.
Step 4. Save all of the changes. Click "Proceed" to start Windows 10 system backup.

If your Windows 10 system encounters any disasters or damaged issues, run the system recovery feature in Qiling Backup to resolve the problem.
Step 1. Open Qiling Backup, click the "Recovery" button on System Backup column.
Click "Browse for recovery" to select the system backup you created in advance.

Step 2. Choose one History version of the backup image, after confirming the contents, click the "Next" button.
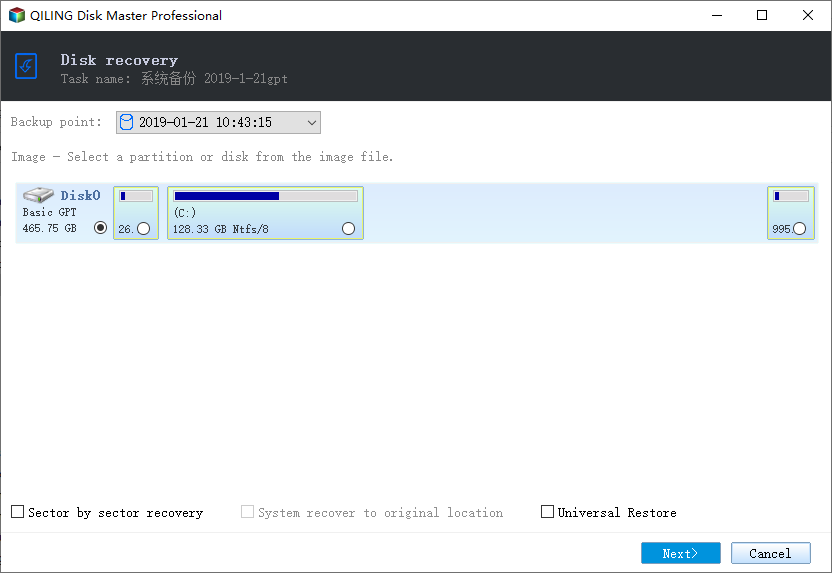
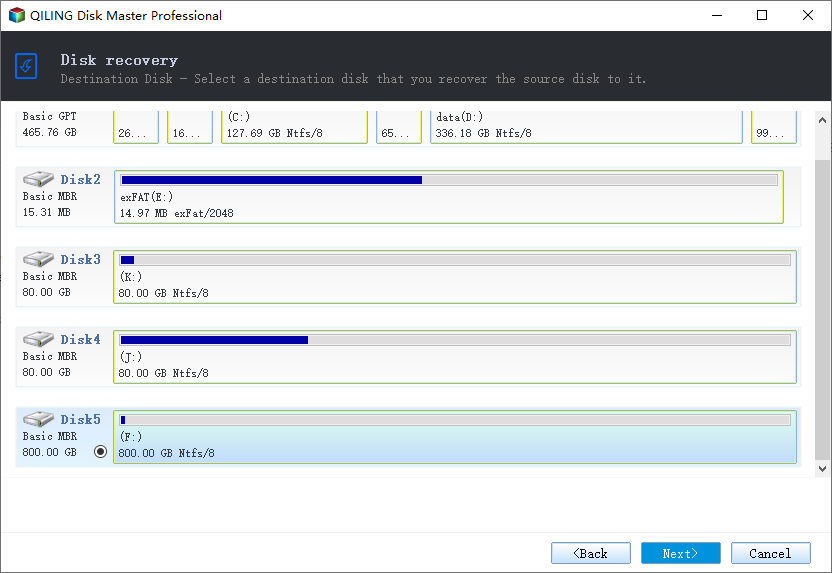
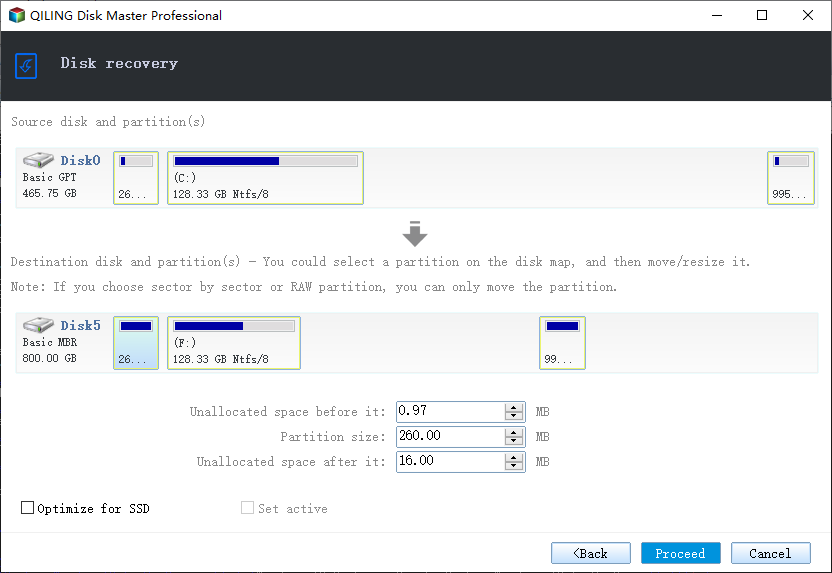
And select the target location to restore your Windows.
Step 3. Then click "Proceed" to start backup recovery.
Wait for the process to complete, restart your computer, and then you should be able to run Windows OS on your computer again.
In summary
While Windows 10 offers various backup tools, using a dedicated program like Qiling Backup is a more straightforward and reliable option. This is because it allows you to manage all your backups in one place, ensuring they are automatically kept up to date, which is crucial since an outdated backup is essentially useless.
Related Articles
- How to Copy/Move Recovery Partition to USB or Another Hard drive [2 Ways]
- Windows 10/8/7 System Restore Points Not Working
- [Solved] This Application Was Unable to Start Correctly (Error Code: 0xc000007b)
- How to Create and Restore (Windows 10) System Image to Different Computer
- Hard Disk Backup in Windows 10/8/7 [Beginners' Guide]
- How to Clone Hard Drive with Different Sector Size
If you're wondering how to clone a hard drive with different sector sizes, this guide can help. By the end of it, you'll know the process of cloning a hard drive with varying sector sizes.