BitLocker Recovery Key Requested After Cloning Windows to SSD
Cloning Windows to a new SSD can change the storage and boot environment measured by BitLocker. A recovery-key prompt does not by itself mean the clone failed. Do not re-clone or erase either drive until you have identified which disk is starting and located the matching recovery key.
Identify the prompt and recovery key
Step 1. Note the recovery-key ID shown on the blue BitLocker screen. Locate a matching 48-digit recovery key in the Microsoft account, work or school account, printed record, or other location where it was saved. Match the ID, not just the computer name.
Step 2. If you cannot find the key, do not attempt to bypass encryption or format the disk. Contact the organization that manages the device if it is work-owned. A cloning tool cannot recover an unknown BitLocker key.
Check which disk Windows is booting
Step 1. Shut down the PC and check the firmware boot list or manufacturer boot menu. Confirm the selected Windows Boot Manager belongs to the intended SSD. Do not alter Secure Boot or TPM settings merely to dismiss a recovery prompt.
Step 2. If both original and clone are installed, distinguish them by model and capacity before changing boot order. If safe under the computer's hardware instructions, test the clone with the original disconnected after power-off; do not hot-remove an internal drive.
Review the clone scope before trying again
Repeat the clone only if you have confirmed that the first clone is incomplete or cannot boot for a reason other than a missing BitLocker key. The original Windows drive must still be readable. Save its recovery key, keep a separate backup, and copy anything needed from the target SSD before continuing: cloning will erase the target. System clone copies the Windows boot partitions; back up separate data partitions independently.
Step 1. Connect the target SSD to the working Windows PC and check that it appears with the expected model and capacity. In Qiling Disk Master Pro, open Tools and utilities > System clone.
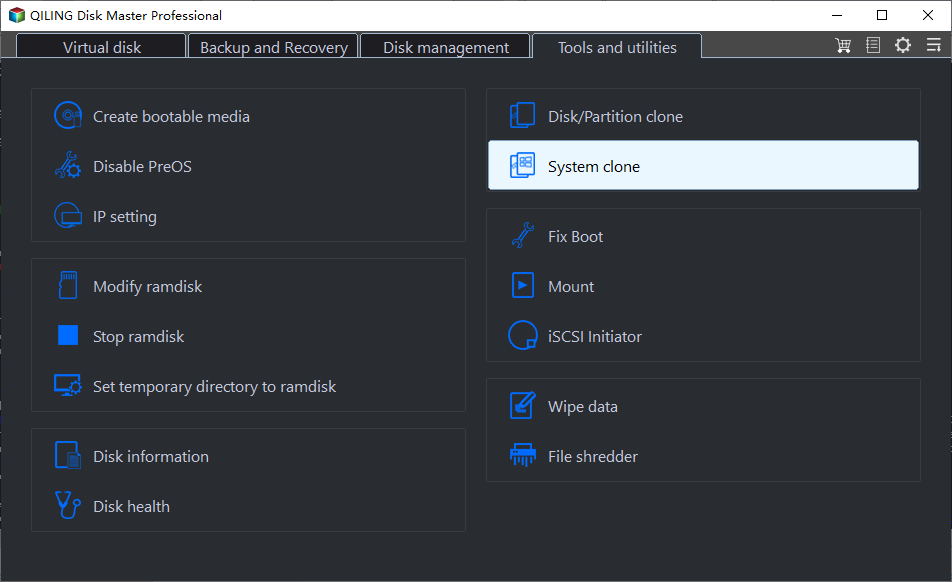
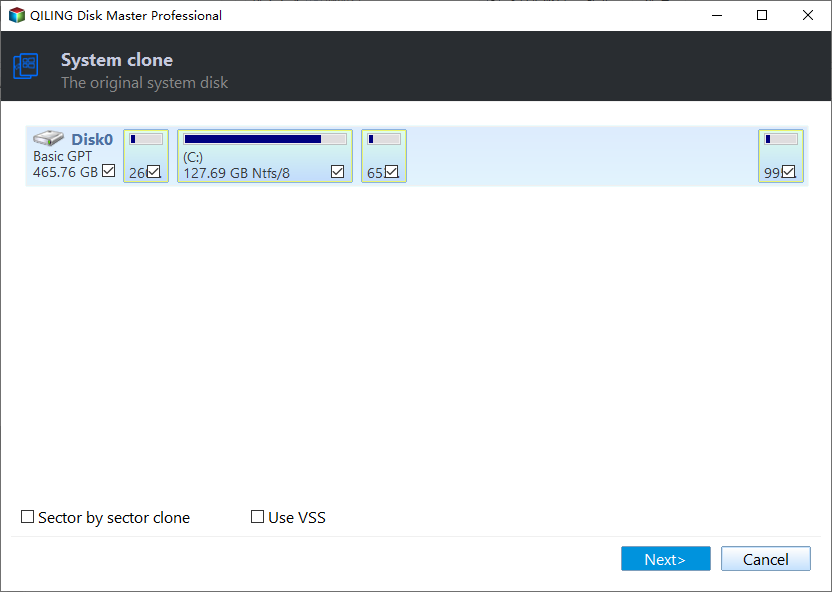
Step 2. On The original system disk screen, confirm that the automatically selected disk is the original Windows drive and that its boot-related partitions are included. Do not select the new SSD as the source. Click Next.
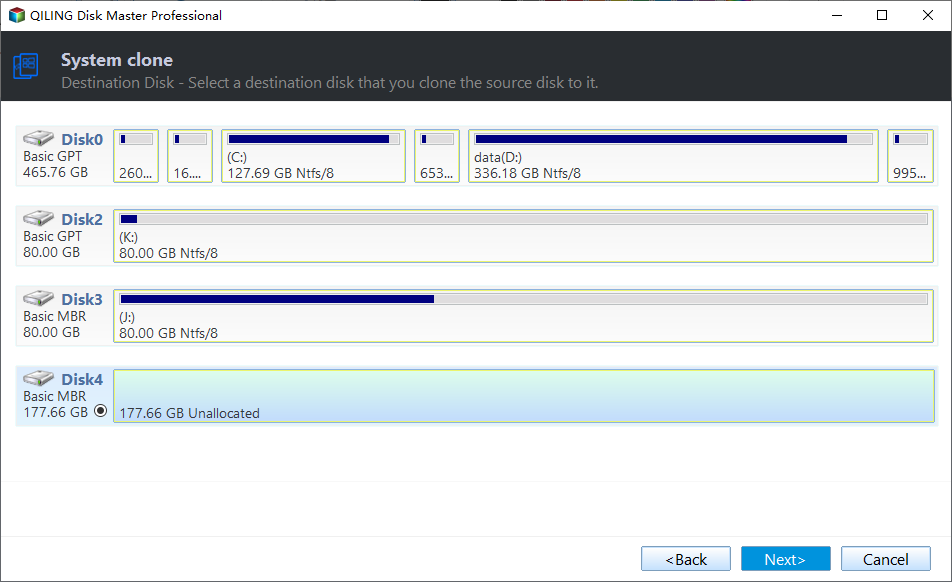
Step 3. On Destination Disk, select the target SSD by its model, capacity, and disk number. Check again that it is not the original drive or your only backup disk, then click Next.
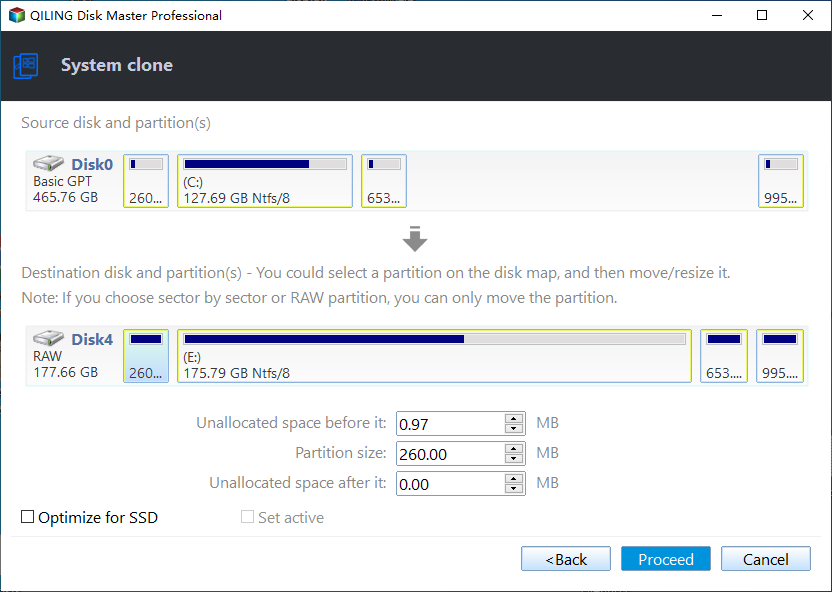
Step 4. In the preview, follow the arrow from source to destination and confirm the proposed system partitions fit on the target. If the target is an SSD, select Optimize for SSD. Stop and go back if the disks are reversed or the layout is wrong.
Step 5. Click Proceed. When the warning says that data on the destination disk will be lost, compare the target disk one last time with your notes and confirm only if its existing files have been backed up or are no longer needed.
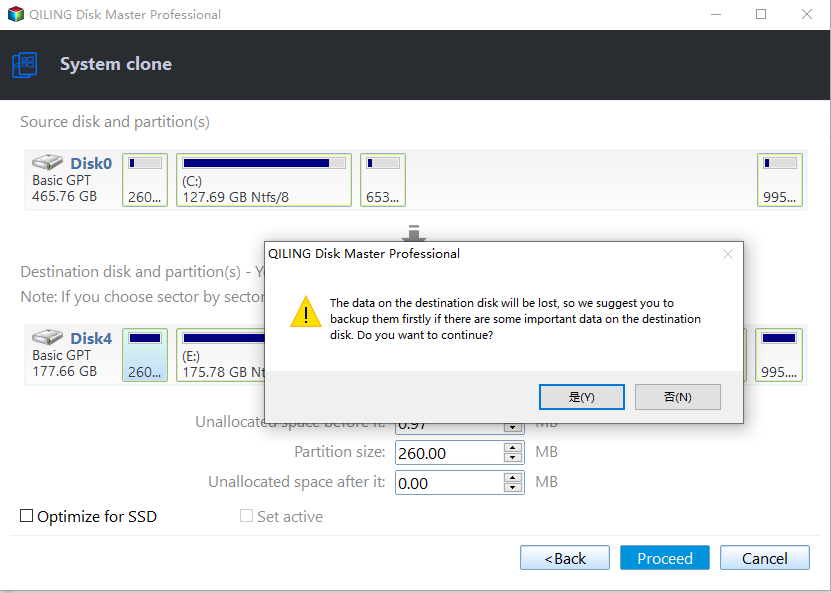
Step 6. Keep both drives connected and the PC powered on until Qiling reports that the clone has completed. Do not interrupt the task or treat a progress percentage alone as proof of success.
Step 7. Shut down the PC. Install or select the cloned SSD as the boot drive using the computer manufacturer's instructions, ideally testing it with the original drive disconnected after power-off. If BitLocker requests a key, match the displayed key ID and enter the corresponding recovery key. Check that Windows starts, files are accessible, and the expected disk is the boot disk before repurposing the original.
If Windows boots after the correct key is entered, check BitLocker protection status and back up the recovery key before further hardware changes. Do not assume turning off encryption is required for every clone; follow the device's policy and vendor instructions.
Related Articles
- BitLocker Key After a Windows Update
Find the matching key and distinguish common recovery triggers. - Move from HDD to SSD Safely
Plan the source, target, and data protection before migration.
Products
Articles & Tutorials
- Data Recovery
- Data Backup
- File Recovery
- File Backup
- System Backup and Restore
- Disk and Partition Clone
- Technical articles
- Mobile articles
- Disk Master Help
- Windows Data Recovery Tutorials
- Windows Secure Delete Tutorials
- Windows Partition Management Tutorials
- Windows File Backup and Restore Tutorials
- Windows System Backup and Restore Tutorials
- Windows Disk Backup and Restore Tutorials
- Windows Clone Tutorials