How to Change Network Names on Windows
Changing network names on Windows 10 is a relatively simple process, but one that many people are unaware of. Despite regularly connecting different networks to our computers, few know how to modify network names on Windows 10. However, for those looking to change network names on Windows 10, there's no need to worry as this can be done with ease.
If you're using Windows 10, you can change the name of your network by following the steps outlined in this post. We'll be sharing two methods to change network names, so make sure to read the full post to see which method will work best for you.
Why Would You Need to Change Network Names on Windows 10
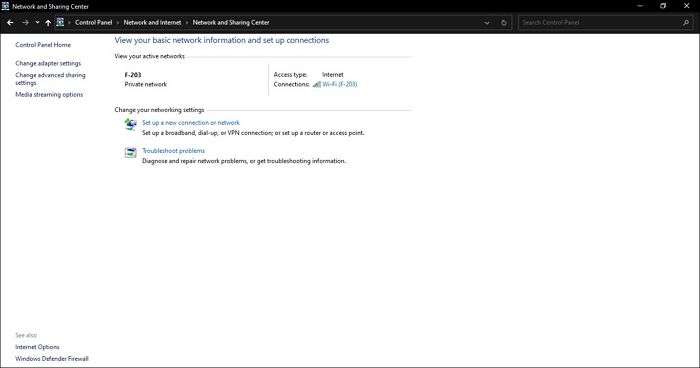
Changing the network name on your Windows computer can have a lot of benefits, especially if you connect your computer to many different Internet connections regularly. Whenever you connect your computer to a Wi-Fi or LAN network, these networks automatically get assigned a specific network name that can be seen in the connectivities dialog box.
Methods to Change Network Name
On Windows 10, you can change network names using two methods, depending on your edition. If you're running Windows 10 Home, you can utilize the Windows Registry to make this change. However, if you're using Windows 10 Pro, Education, or Enterprise, you can leverage the Local Security Policy to access the option to change network names.
Method 1. Using Windows Registry
To change your network name on Windows 10 Home, open the Settings app, click on "Network & Internet," and select "Status" from the left menu. Then, click on "Network" and select the network you want to change the name for.
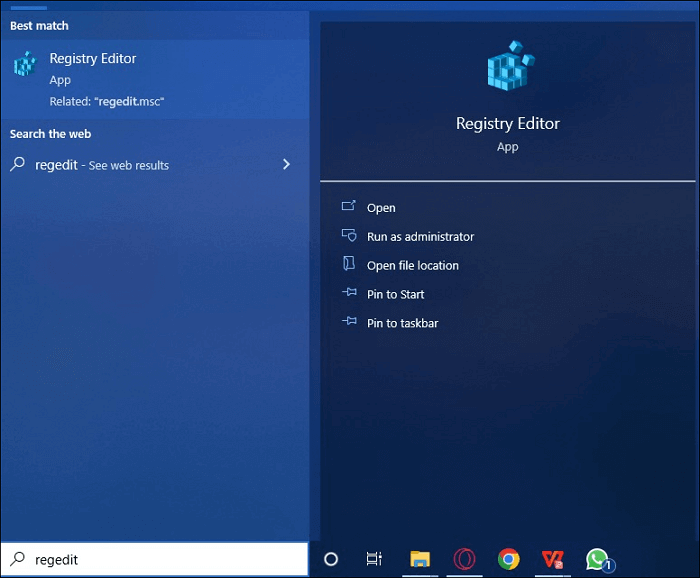
Step 1. To open the Registry Editor, press the "Windows Key" or click on the search bar and type in regedit.msc, and then click on the Registry Editor app in the search results.
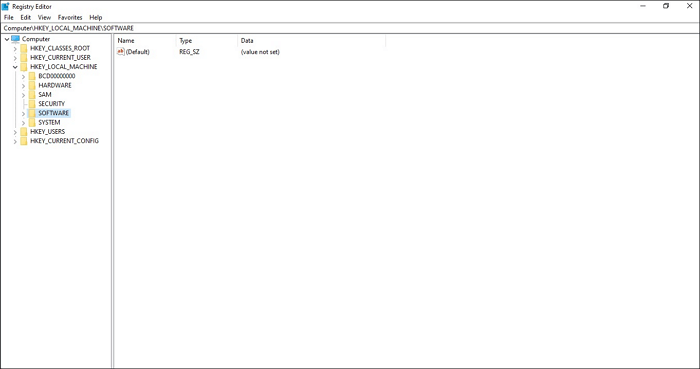
Step 2. Once you open this app, click on "Computer" in the left bar of the app window.
Step 3. To access the HKEY_LOCAL_MACHINE folder, navigate to the Windows Registry Editor and locate the "HKEY_LOCAL_MACHINE" folder. Once you've found it, click on it to access its contents.
Step 4. To find the "SOFTWARE" folder, you can search for it in the file explorer. Once you locate it, click on it to open it.
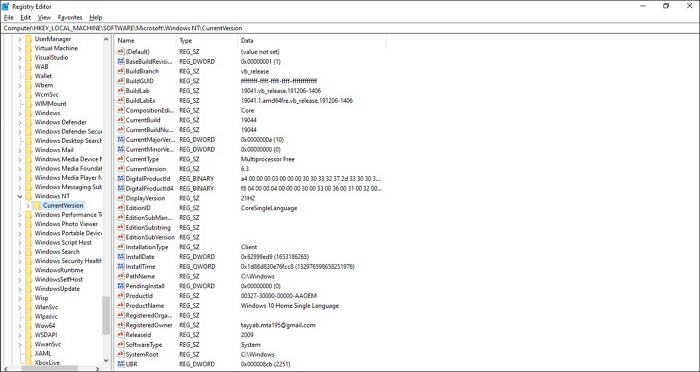
Step 5. Open the folder and search for the subfolder named Microsoft, then click on it.

Navigate to the "WindowsNT" folder within the Microsoft folder and open it.
Step 6. Open the folder called "CurrentVersion."
In the CurrentVersion folder, locate the "NetworkList" folder, click on it, and proceed to the "Profiles" folder.
Step 7. Once you've clicked on the Profiles folder, you'll see many different folders with names in brackets, each corresponding to a network you've connected your computer to.
To change the name of a network, click on each folder until you find the one corresponding to the network you want to rename, then change its name.
Step 8. In our case, the fourth folder in the Profiles folder was for the network we wish to rename.
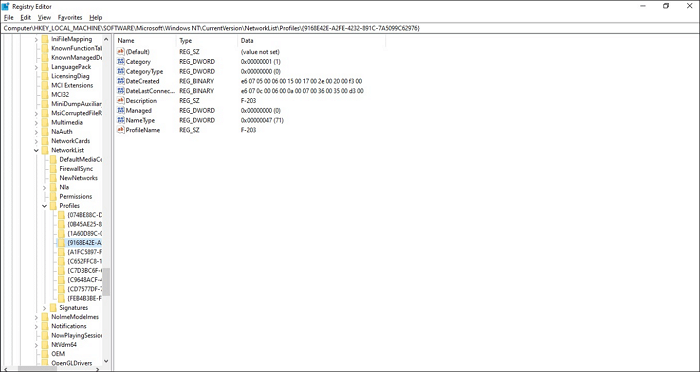
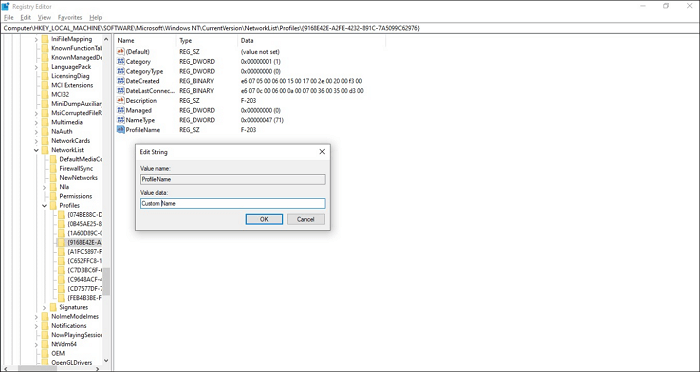
Step 9. In this folder, the file at the bottom of the list is named ProfileName, which indicates the current name of the network. To modify the network name, simply right-click on the "ProfileName file."
A dialogue box titled "Edit String" will open, where you can click on the text bar under "Value Data" to type in the name you wish to use for this network.
Method 2. Using Local Security Policy
In Windows 10 Pro, Enterprise, or Education, you can't change your network name using the Registry Editor, instead you need to use the Local Security Policy to make this change.
Step 1. To access the Local Security Policy, you'll need to type "secpol.msc" in the Windows search bar and open the "Local Security Policy".
Step 2. To view and manage network connections in the Local Security Policy, click on "Security Settings" and then navigate to the "Network List Manager Policies" folder. Within this folder, you'll see a list of networks that your computer connects to.
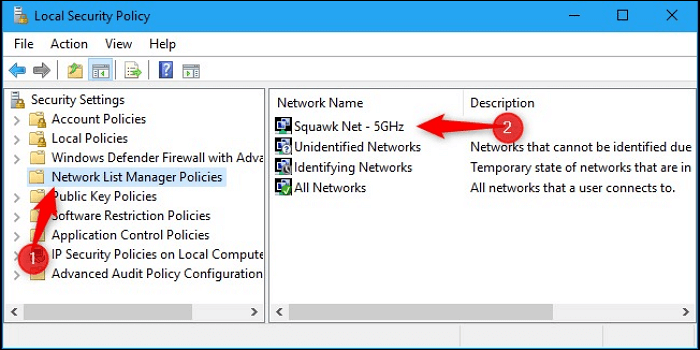
Step 3. To change the name of a network, locate the network you want to modify, click on it, and a dialogue box will appear with its properties. In this box, navigate to the "Network Name" page and type the new name in the text box labeled "Name".
Step 4. After changing your network name, click on "OK" to save the changes and your network will be renamed. It will now be visible on your computer with its new name.
Conclusion
To change the network name on a Windows 10 computer, you can use either the Registry Editor if you're running Windows 10 Home, or the Local Security Policy if you're running Windows 10 Pro, Enterprise, or Education. This allows you to modify the network name to suit your needs.
Related Articles
- How to Solve Webcam Freeze Up in Windows 10 Error?
- How to Recover Data from SD Card Formatted As Internal Storage
- Easy Ways to Fix "Unrecognized Database Format" Error
- Fixed: ATA/SATA Hard Drive Not Detected or Recognized in BIOS
- [Detailed Info] The Elder Scrolls V: Skyrim Saves Location
This post will guide you on where to find The Elder Scrolls V: Skyrim saves location and provide tutorials to help you back up these important game saves with Qiling Disk Master software. Also, ways of deleting and transferring Skyrim saves are offered too. - What Is SoftThinks Agent Service and How to Fix Its High Disk and CPU Usage
SoftThinks Agent Service is one of the nagging issues in Dell computers, as it takes a lot of Disk and CPU usage. This article will tell you why exactly that happens and how you can stop this service from slowing down your computer.