Fix macOS Ventura Update Not Showing Up on Mac in 5 Proven Ways
| Workable Solutions | Step-by-step Troubleshooting |
|---|---|
| Fix 1. Check the Supported Devices | Click the black Apple icon in the corner of your screen. Click "About this Mac"...Full steps |
| Fix 2. Check the Internet Connection | Choose the Apple menu by clicking the Apple icon. Click the "System Preferences"...Full steps |
| Fix 3. Check the Apple System Status | Sometimes the Software update servers may not available, but this situation is not happening frequently...Full steps |
| Fix 4. Refresh the Software Update | Click the "Advanced Settings". Click the first option, "Check for updates". Then the...Full steps |
| Fix 5. Search in App Store | Go to open the App Store window on Mac. Type in macOS Ventura and search...Full steps |
5 Ways to Fix macOS Ventura Update Not Showing Up [Tested]
macOS Ventura, a brand new macOS base system, was published in Oct 2022, bringing features like Continuity Camera, Stage Manager, and scheduled email. While most users upgrade successfully, some may encounter issues, such as the update not showing up, due to various reasons.
- Unstable internet connection.
- Unsupported Mac devices.
- Incorrect time settings.
- Mac Software Update servers are down.
If you're experiencing issues with the macOS Ventura update not showing, there are several potential solutions you can try. Firstly, ensure that your Mac meets the system requirements for the update, as specified by Apple.
Many reasons may cause the macOS Ventura update not to appear on your Mac or MacBook, and similar issues can occur during upgrades, such as Mac check for update stuck or installation failed. Don't worry, as we can help solve the problem and install macOS without data loss.
Fix 1. Check the Supported Macs or MacBooks of macOS Ventura
macOS Ventura is not available for all Mac devices, and you should check your Mac model to see if it's compatible.
Step 1. Click the black Apple icon in the corner of your screen.
Step 2. Click "About this Mac".
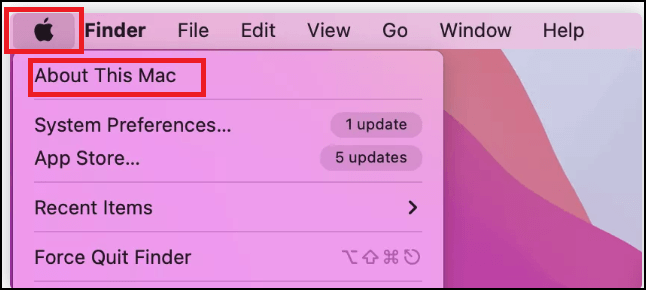
Step 3. You will see detailed information about your Mac.
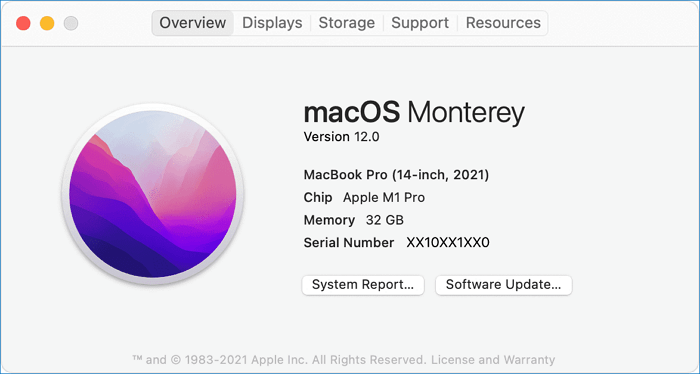
If you're unsure about your Mac model, you can find it by clicking the Apple logo in the top left corner of your screen, then selecting "About This Mac." This shows you the model name and other details about your Mac. Once you know your Mac model, you can check the list of compatible models for the MacBook Air M2, MacBook Air M2 Pro, MacBook Air M2 Max, MacBook Pro M2, MacBook Pro M2 Pro, and MacBook Pro M2 Max.
- iMac 2017 and later
- iMac Pro 2017 and later
- MacBook Pro 2017 and later
- MacBook 2017 and later
- MacBook Air 2018 and later
- Mac Mini 2018 and later
- Mac Pro 2019 and later
- Mac Studio 2022
If you can't find your Mac model in the list, it's likely that your Mac can't download and install macOS Ventura. You might be able to install it on your Mac using OpenCore Legacy Patcher instead.
Fix 2. Check the Internet Connection on Mac/MacBook
If your Mac is running macOS Ventura, the first thing to check is your internet connection. This can be done by opening a website in Safari or sending a message on social media. Alternatively, you can check your network status in system settings.
Step 1. Choose the Apple menu by clicking the Apple icon.
Step 2. Click the "System Preferences".
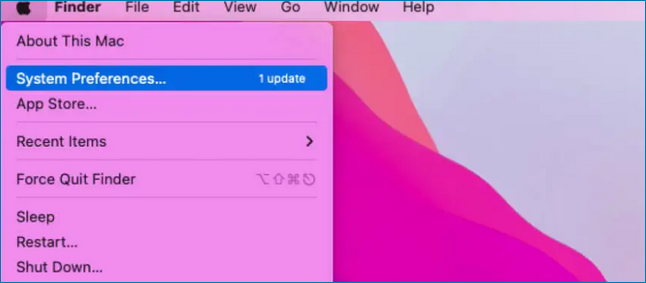
Step 3. If you're having internet connectivity issues, you might want to check your router or Wi-Fi connection, rather than assuming the problem lies with your device. Click the "Network" option to see if you're connected to your home Wi-Fi, and if so, try checking the router itself to see if it's the source of the issue.
Fix 3. Check the Apple System Status to Solve Update Not Showing
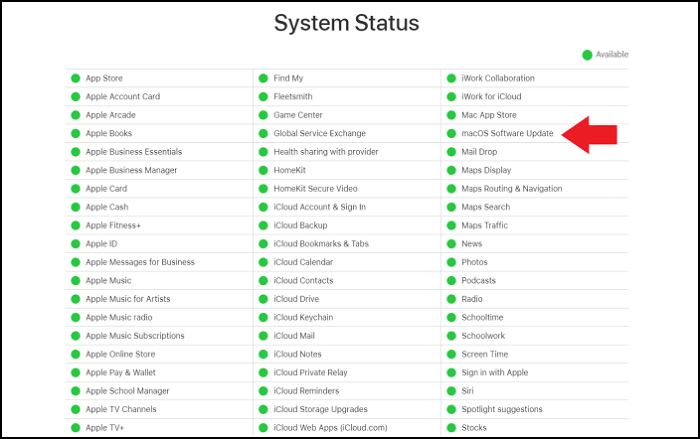
Occasional software update issues may occur due to unavailable update servers. This is usually a temporary problem that happens when many users request updates simultaneously, such as after a new macOS operating system is released. To check the status of Apple's servers, you can visit the Apple System Status website.
Fix 4. Refresh the Software Update to Show macOS Ventura Update
If you're experiencing issues with your Mac's Software Update, such as seeing no available updates or getting an "Unable to check for update" error, try pressing the Command and R keys together to refresh the Software Update. If that doesn't work, you can try this alternative method.
Step 1. Click the "Advanced Settings".
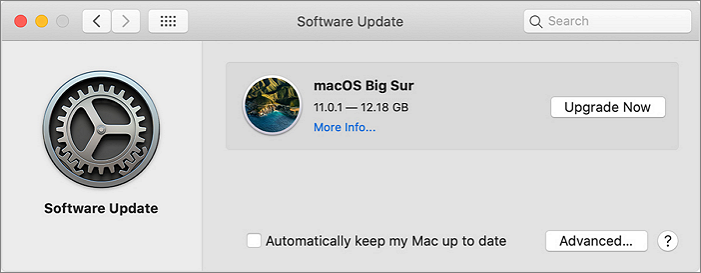
Step 2. To check for updates, click on the "Check for updates" option. This will refresh the Software Update.
Step 3. If you're still unable to see the macOS Ventura update, restart your Mac. This should resolve the issue and allow you to see the update.
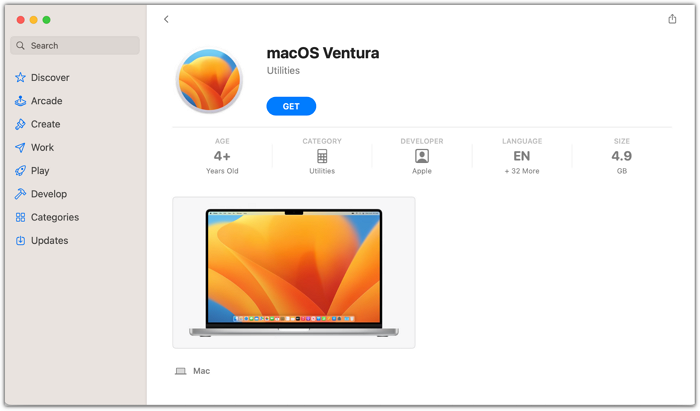
Fix 5. Search and Download macOS Ventura in App Store
If you can't upgrade to macOS Ventura through Software Update, you can try downloading and installing it through the App Store on your Mac. It's a simple process that involves searching for macOS Ventura in the App Store.
Step 1. Go to open the App Store window on Mac.
Step 2. Type in macOS Ventura and search.
Step 3. To access your iCloud account, click the "Get" button and enter your Apple ID if prompted. This will allow you to view and manage your iCloud data, including photos, contacts, calendar events, and more.
How to Retrieve Lost Files After macOS Ventura Update
Users who upgrade to macOS Ventura directly or automatically may risk losing essential files, and issues like failed upgrades, stuck downloads, or installation problems can cause data loss on their Mac.
To recover lost files after a macOS Ventura update, use a data recovery software like Deep Data Recovery for Mac, which supports Mac Trash recovery even after emptying the Trash, allowing you to easily retrieve your lost files.
Retrieve Lost Files on macOS Ventura
- If you've deleted files on your Mac, including documents, photos, audio, music, and emails, and are looking to recover them after the macOS Ventura update, there are still options available. You can try using built-in tools like Time Machine or the Finder's "Recently Deleted" folder to recover deleted files.
- Recover files from formatted hard drive, emptied recycle bin, memory card, flash drive, digital camera, and camcorders on Mac with ease. Use a reliable data recovery software that supports Mac OS and is compatible with the device you're trying to recover from.
- Data recovery solutions can help recover lost data due to sudden deletion, formatting, hard drive corruption, virus attacks, and system crashes, providing support in various situations.
Step 1. Select the location to scan
Launch Deep Data Recovery for Mac, select the storage device where your lost data is located, and click "Search for lost files" to initiate the scanning process.
Note: Before attempting data recovery, it's recommended to click "Disk Backup" from the left sidebar to create a backup of your Mac, which will prevent further data loss. Once backed up, the software can recover data from the Mac backup, allowing your computer to be used again while new data can be written.

Step 2. Filter lost Mac data
The software automatically scans MacBook/iMac for lost data, and after scanning, users can filter the found data by type and path.

Step 3. Recover lost data or files
Double-Click a file to preview it, then click the "Recover" button to restore the lost data to another location.

Bottom Line
If you're experiencing issues with the macOS Ventura update not showing, this article may be able to help. For those who have encountered data loss after upgrading to macOS Ventura, recovering lost or deleted data with Deep Data Recovery for Mac is a viable option.
macOS Ventura Update Not Working FAQs
If the macOS Ventura update isn't showing up, reading the following questions and answers may help resolve the issue.
How to fix the macOS Ventura upgrade failure?
To resolve the macOS Ventura upgrade failed issue, you can try various methods. Firstly, ensure that your Mac meets the minimum system requirements for the upgrade.
- 1. Restart your Mac device.
- 2. Run a Virus scan or remove the virus.
- 3. Check your internet connection and ensure you're in a stable network environment.
- 4. Check your Mac model.
- 5. Check your storage space on your Mac.
Why is the macOS Ventura update not showing up on my Mac?
The problem can occur due to various situations, such as being in an unstable internet environment, having a Mac that's not updated to the latest macOS version, or turning off the Software Update. To fix it, you can try rechecking all the settings on your Mac or refreshing the Software Update.
How to fix the "Unable to check for update" error on Mac?
If you're experiencing the "Unable to check for update" error on your Mac, you can resolve it by pressing the Command and R keys together or accessing the advanced settings to refresh the Software Update. This should allow you to successfully check for updates.
How to recover lost files after the macOS Ventura update?
You can recover lost files after the macOS Ventura update from Time Machine, iCloud, or with professional recovery software like Deep Data Recovery for Mac.
- 1. Select the target disk to scan the lost files.
- 2. Filter lost files, and you can preview the files.
- 3. Recover lost data or files after the macOS Ventura update.
Related Articles
- Top 8 SSD Temperature Monitor Software Recommended in 2023
- 7 Best Ways to Fix CD/DVD Missing or Not Showing Up in Windows 10/8/7
- How to Open RAR Files on Windows
- Fix 'DCIM Folder Shows Empty But Not' Error on PC/Android/iPhone