Disk2vhd: Detailed Introduction to Convert Physical to Virtual Machine
Virtual machines can be used in various scenarios and significantly improve computer efficiency and flexibility. A tool called Disk2vhd can assist in this process, and this passage will guide you through using this free tool to explore its capabilities and learn how to utilize it.
What Is Disk2vhd?
Disk2vhd is a free utility that converts a physical machine into a virtual machine, allowing you to capture the operating system online. It creates volume snapshots using Windows' Volume Snapshot, making it convenient to choose which system volumes and data volumes to include in the VHD.
What Is Disk2vhd Used for?
Disk2vhd is a utility that creates VHD versions for a Microsoft Virtual PC or a Microsoft Hyper-V virtual machine, allowing you to convert disks while the system is online. This makes it a convenient choice for creating a VHD version that can be used for various purposes.
- Store contents of a hard disk drive.
- Use different operating systems.
- Create disk sectors, files, and folders.
- Encrypt files to get data protection.
- Backup and recover files and programs.
- Control multiple virtual machines through one central console.
Using virtual machines for different tasks and experiments can save hardware costs and minimize the trouble caused by operational errors, making it a cost-effective and efficient approach.
Pros and Cons of Disk2vhd
Creating virtual disks with Disk2vhd can bring a lot of convenience to your computer work. However, this tool also has its points and drawbacks that you can consider when choosing the right tool for your needs.
Pros:
- It is a free and easy-to-use tool.
- It can perform P2V migration and simplify the P2V process.
- The software works on various versions of Windows, including Windows 11, 10, 8, 7, Windows Vista, and Windows Server 2008.
Cons:
- Storage Limit: It can only use VHD files below 127GB
- Function Limit: It lacks automation
- Speed limit: The conversion speed is slow.
Understanding the features of Disk2vhd is crucial to avoid unreasonable use, such as converting multiple physical disks at once, as it only allows converting one physical disk at a time. This limitation makes it unsuitable for scenarios where multiple disks need to be converted.
How Do I Run Disk2vhd?
Before running Disk2vh, make sure there is sufficient disk space for the virtual disk. There are two methods to create a virtual disk, and you can choose one of them. The detailed steps for running Disk2vh will guide you through the process.
Method 1: Convert a Physical Disk to a Virtual Disk
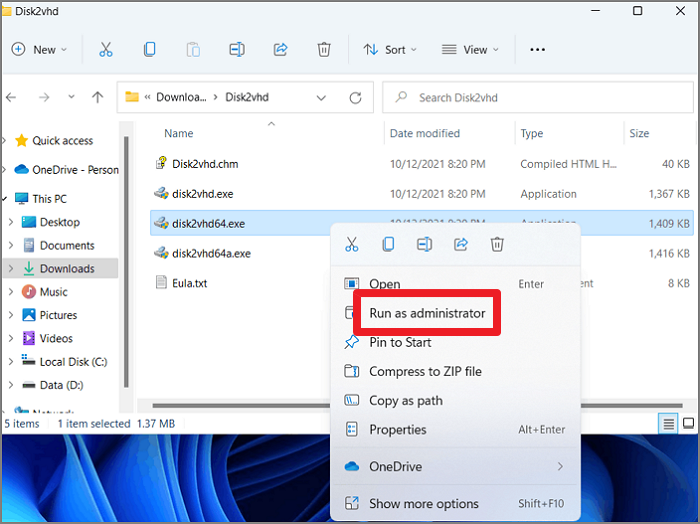
Step 1: Install Disk2vhd, Right-click on the version that best suits your device and select "Run as administrator."
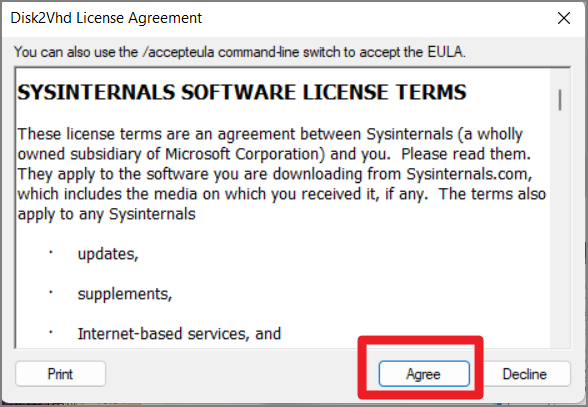
Step 2: Click "Agree" on the Disk2Vhd license agreement page.
Step 3: Select "Use VHDX" and "Use Volume Shadow Copy" and choose a destination for the VHDX file created.
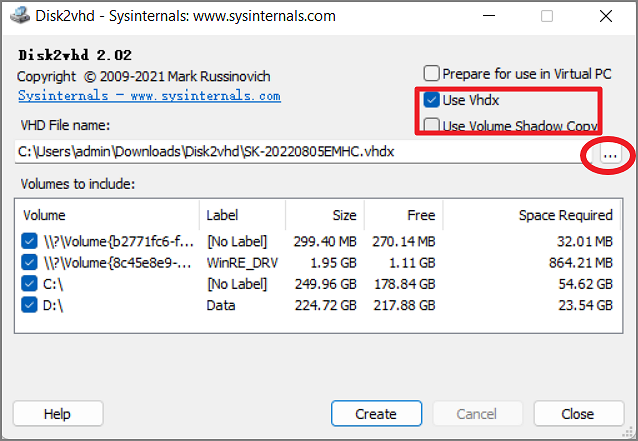
- Notice:
- To convert a physical machine to a virtual one, it's crucial to select "Use Volume Shadow Copy" to capture the machine's state at a specific point in time, ensuring that you get a snapshot of the machine's files and registry at that moment, rather than the current live state. This is essential for a successful conversion.
Step 4: To convert the disk to VHDX format, click "Create" and wait for the process to complete.
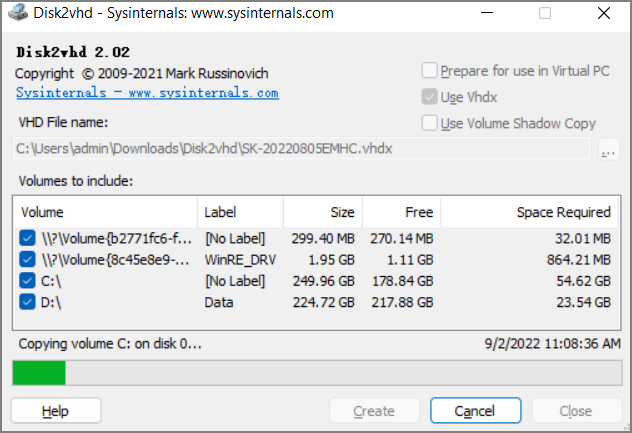
Step 5: Once the export to disk to VHD is complete, close the window.
Step 6: To create a new virtual machine, locate the VHD file you've chosen to store it, and use it to create a new VM.
Method 2: Use Disk2vhd Via Command Line
In addition to the steps above, you can create a VHD with Disk2vhd by using either the GUI or the command-line option. If you're comfortable with the command line, you can specify the volumes to include by drive letter (e.g. c:) or use the "*" wildcard to include all volumes. This allows you to automate the process and include snapshots by drive letter, making it easier to manage and create VHD versions.
Usage: disk2vhd <[drive: [drive:]...]|[*]>
Example: disk2vhd * c:\vhd\snapshot.vhd
You can automate Disk2vhd or operate it remotely with this command line, allowing you to complete the task efficiently.
Conclusion
Disk2vhd simplifies virtualization by converting physical machines into virtual machines, allowing for more efficient work and better data management. By running disk2vhd, you can easily convert a physical machine into a virtual machine, streamlining your work and improving data organization. This process enables you to take advantage of the benefits of virtualization, making it easier to manage and utilize your data.
Related Articles
- How to Backup Sticky Notes Windows 11 [Step-by-Step Guide]
- Delete OS from A Hard Drive
- [Solved] Windows 10 Fails to Shut Down
- How to Fix Windows 10 Update with Error Code 0x800F0922 Issue
- Qiling Disk Drives Stats 1 (Size/Brands/Type) for 2024
Choosing hard drive type, brand, and capacity has always been a dilemma for users. To better answer these questions for you, we surveyed 207,797 users and 754,142 hard drives over the past three months, including 346,477 SSDs, 200,818 HDDs, and 206,847 USB drives. - Qiling Disk Drives Stats 2 (Disk Number/Disk Types/C Drive Size) for 2024
Qiling summarized the number and capacity of hard drives owned by users, the type of disk, the size of the C partition, and the status of the user's hard drive operating system in 2024 through user research. This article will provide observations and insights into the data obtained and offer some constructive suggestions.