3 Ways | How to Enable and Disable Offline Files in Windows 10
Offline files in Windows 10 offer great utility to end-users, allowing them to access, edit, and update files on the go even without internet availability. To enable and disable offline files, there are three practical ways, which will be described in this article. These methods will provide users with the flexibility to choose the approach that suits them best. Prior to diving into the practical methods, a brief introduction to offline files is provided, explaining what they are and their functionality.
What Are Offline Files
Files stored on a computer network can now be accessed and edited even when there's no network connection, thanks to the Sync Center in Windows 10, which keeps a copy of the network files as offline files.
Having offline copies of the files stored on a network is a great utility, but there are some prerequisites of enabling and disabling them. Let's have a detailed look at them.
Prerequisites of Enabling and Disabling Offline Files
To enable and disable offline files, it's best to have any edition of Windows 10, as it works best with this OS. However, offline files also function with earlier versions such as Windows 7, 8, and 8.1, which are still widely used.
If you have Windows 8 or 8.1, you can use offline files to work on the go. However, if you're still on Windows 7, you need to check if you have the Professional, Ultimate, or Enterprise edition, as offline files are only available on these versions.
To check which edition of Windows 7 you're using, click the Start button, type "Computer" in the Search Box, and press Enter. Then, right-click on "Computer" and open Properties, where you'll see the edition installed on your PC.
3 Ways to Enable or Disable Offline Files in Windows 10
To enable or disable offline files in Windows 10, there are three practical methods. You can follow these steps to perform the operation within a couple of steps.
Way 1. Enable/Disable Offline Files by Sync Center
To enable and disable offline files in Windows 10, use Sync Center, a built-in tool that creates copies of files stored on connected networks or servers. To access Sync Center, search for it in the Start menu, then click on it to open. From there, you can enable or disable offline files, view sync status, and manage your offline files. Simply click on the "Enable Offline Files" or "Disable Offline Files" button to make the necessary changes.
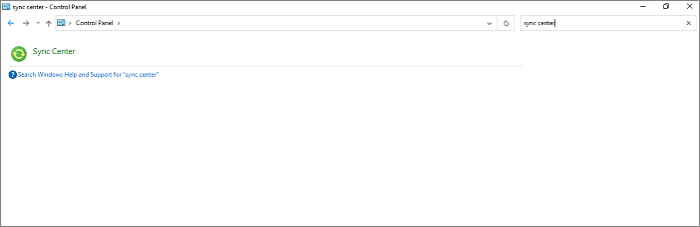
Step 1. To access Sync Center in Windows 10, click the search bar, type "Control Panel", and open it. If Sync Center is already set up, you'll find it in Control Panel. Otherwise, search for Sync Center within Control Panel. Click on the Sync Center icon to access it.
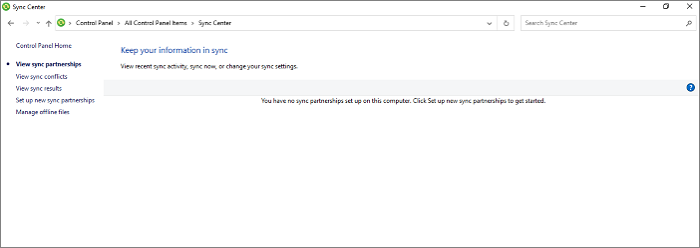
Step 2. Click on the "Manage offline files" option on the left side of the screen to proceed further.
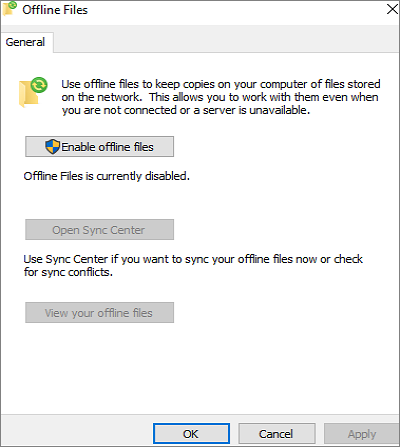
Step 3. To enable offline files, click on the "Enable offline files" option and then click the "OK" button at the bottom.
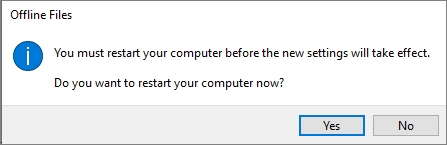
Step 4. To enable offline files, a pop-up window will prompt you to restart your computer to apply the new settings. Simply click on the "Yes" button to successfully enable offline files.
Step 5. To disable offline files, open the Manage offline files window, click on the Disable offline files option, and then click on the OK button.
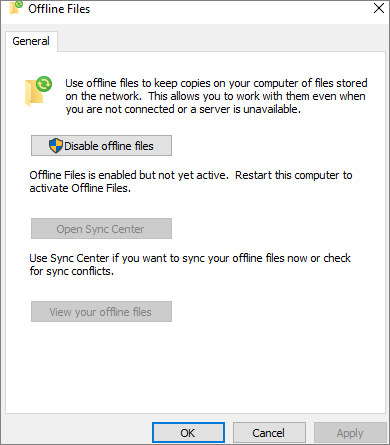
Step 6. To disable offline files, restart your computer, and when the "Restart your computer" pop-window appears, click on the "Yes" button. This will successfully disable offline files.
Way 2. Enable and Disable Offline Files via Group Policy Editor
To enable or disable offline files in Windows 10 using the local group policy editor, follow these steps: First, open the local group policy editor by searching for "gpedit.msc" in the Start menu. In the editor, navigate to Computer Configuration > Administrative Templates > Network > Offline Files. Here, you'll find the policy settings for enabling or disabling offline files.
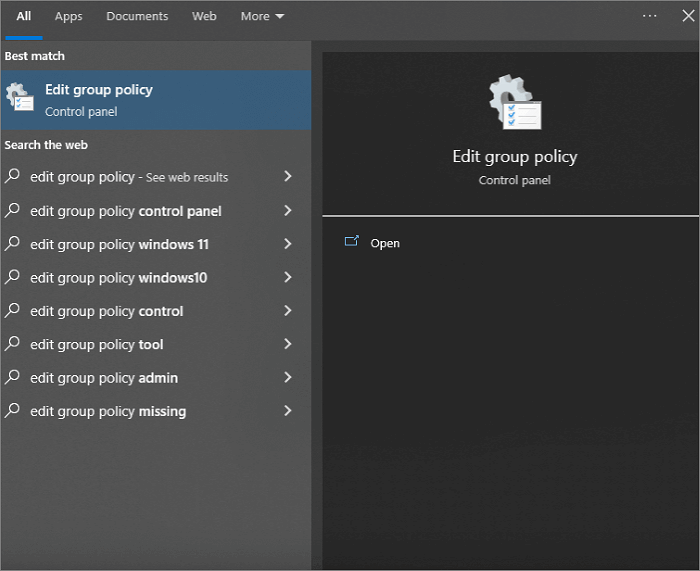
Step 1. To open the Local Group Policy Editor, you can type "gpedit.msc" in the Run dialog box (accessible by pressing the Windows key + R on your keyboard), or simply type "Edit group policy" in the Search Bar of your Windows computer.
Step 2. To follow the below-given navigation pattern in the left pane of Local Group Policy Editor, you can simply go to Computer Configuration -> Administrative Templates -> System -> Logon -> and finally, select "Run" from the list of options. This will allow you to configure the Run policy setting.
Computer Configuration > Administrative Templates > Network > Offline Files
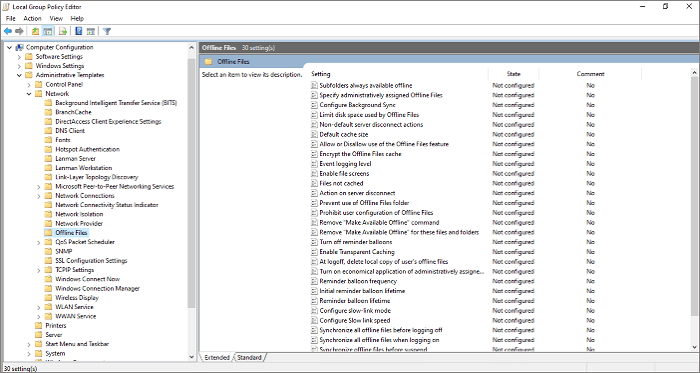
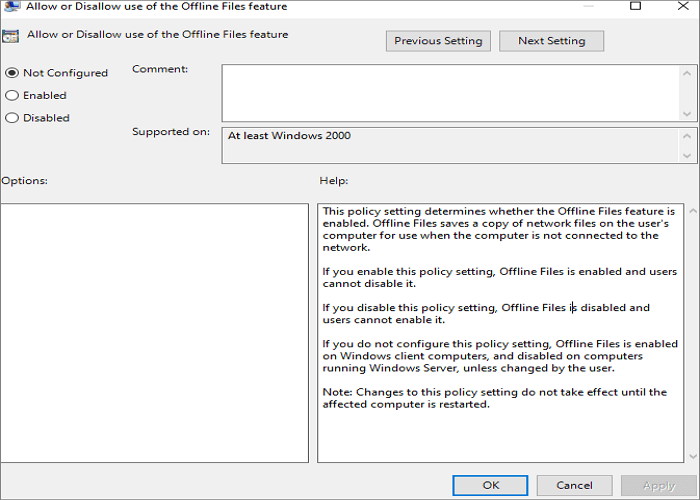
Step 3. In the Local Group Policy Editor, navigate to Computer Configuration > Administrative Templates > Network > Offline Files, find the Allow or Disallow use of the Offline Files feature, and double-click on it.

Step 4. To enable or disable the Windows Defender Firewall, open the Control Panel and navigate to System and Security > Windows Defender Firewall. A new window will open with three options: Not Configured, Enabled, and Disabled. Select the desired option and click OK to complete the process.
Way 3. Enable/Disable Offline Files Using Registry
To enable or disable offline files in Windows 10 using the Windows Registry, follow these steps: you can enable or disable offline files by creating or modifying a registry key. To do this, open the Registry Editor by searching for "regedit" in the Start menu, then navigate to the "HKEY_CURRENT_USER\Software\Microsoft\Windows\CurrentVersion\Explorer\MyComputer\MapNetworkDrive" key. In the right-hand pane, look for the "OfflineFiles" DWORD value.
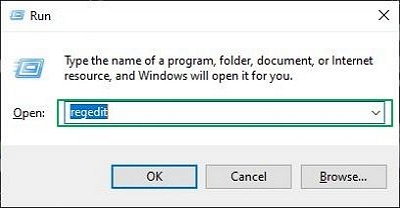
Step 1. Press the Windows key + R to open the Run command.
Step 2. To open the Registry Editor, type "regedit" in the Run dialog box and press Enter. If prompted, click "Yes" to allow the application to make changes.
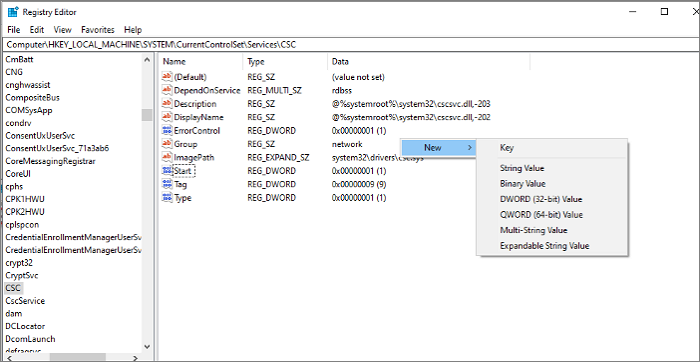
Step 3. Follow the below-given navigation pattern in the left pane of the Registry Editor.
Computer\HKEY_LOCAL_MACHINE\SYSTEM\CurrentControlSet\Services\CSC

Step 4. To create a new DWORD (32-bit) Value in the Registry Editor, right-click in the right pane of the Registry Editor and select "DWORD (32-bit) Value".
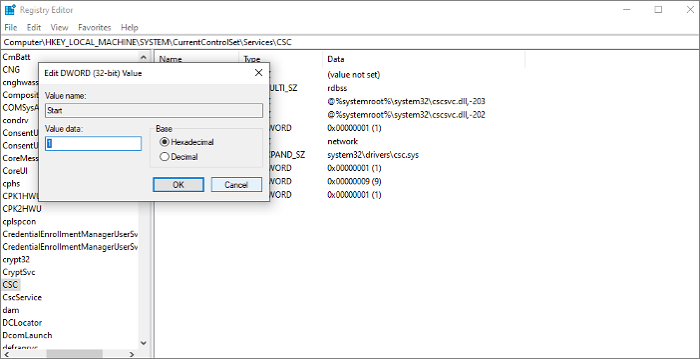
Step 5. Rename its value as Start and change it from 20 to 1 in the value data box.
Step 6. To enable offline files on your computer, open the Cscservice folder, which is located below the CSC, and create a new Start DWORD value with a value data of 2. This will enable offline files on your computer.
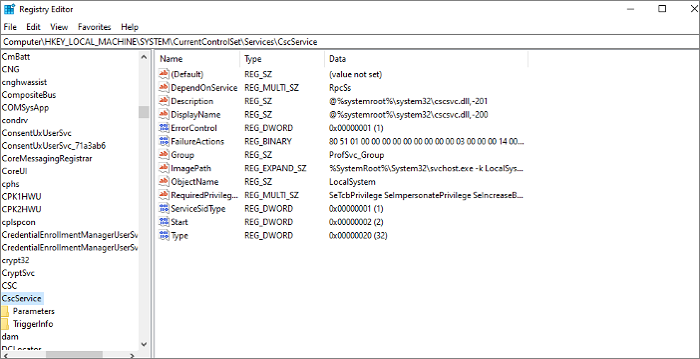
Step 7. To disable offline files in Windows 10, you need to update the Start values for both CSC and Cscservice to have a value data of 4. This can be done in the Registry Editor.
Bonus Tip: Backup your Files with Cloud Backup Software
As your computer accumulates vital files over time, they can take up storage space and become vulnerable to computer viruses. To mitigate this, using professional backup software is a good solution. Qiling Backup, a practical file backup software, can help you safeguard your files.
Qiling Backup Home is a multi-functional backup tool for Windows that allows users to back up systems, disks, partitions, and more, with features like automatic file backups to external hard drives, scheduled backups, and full, incremental, and differential backups. It also enables easy hard drive migration and cloning, and offers 250G of free cloud storage.
The following are the steps to back up your files on your computer.
Step 1. To initiate a backup, click the File backup button.

Step 2. On the left, both local and network files will be shown, allowing you to browse and select the desired backup files from the directory.

Step 3. Please follow the on-screen instructions and choose a location to store the backup.

Step 4. To encrypt the backup with a password, click on the "Options" tab in the "Backup Options" section, allowing you to customize the backup process according to your specific needs.

To specify the backup schedule, click the Backup Scheme button, then select the desired backup frequency and start the backup at a specific event.

Step 5. The backup may be stored on a local disk, Qiling's online service, or NAS.

Step 6. Qiling Backup allows customers to back up data to both a third-party cloud storage service and its own cloud storage service, providing users with flexibility and options for data storage and protection.
To back up data to a cloud drive, select Local Drive, scroll down to add Cloud Device, and then add and log in to your account provided by a third party.
Step 7. Click Proceed to start the backup process. Once finished, the backup job will be listed on the left side of the panel, allowing you to manage it further.

The Bottom Line
The shift to hybrid working has increased the need for offline files, making it essential to access, edit, and update shared files while working remotely. Windows 10 offers a feature to create offline files, which can be easily enabled and disabled in just a few steps, and this article provides three practical ways to do so.
FAQs
1. What happens if I disable offline files?
If you disable offline files, the Windows Sync Center will no longer create copies available on the connected server or network.
2. How do I get my folder back online?
To get back online, open File Explorer, click on the drop-down ribbon tab, and then click on the "Easy Access" drop-down ribbon to open Map as drive. This will help you regain connectivity.
3. How do I change offline files to online?
To enable offline files, open the Sync Center from the Control Panel, select Manage offline files from the left side, and under the General tab, check the box next to Enable offline files before clicking OK.
4. How do I know if Offline files are enabled?
To check if offline files are enabled or disabled in Sync Center, go to the General tab. If you see "Enable offline files", it means they are currently disabled. On the other hand, seeing "Disable offline files" indicates that files are currently enabled.
Related Articles
- How to Fix Windows 10 Stuck at Getting Files Ready for Installation
- [3 Solutions] Fix Corrupted USB on Mac Without Losing Data
- How to Stop Windows 10 Deleting Files Automatically
- How to Delete File PowerShell [with Precise Command Lines]
- How to Fix Drive Is Not Accessible Access Is Denied on Windows 11
Feeling distressed when Windows 11 prevents you from using an external hard drive? You can fix the 'disk is not accessible access denied' error and use Deep Data Recovery to retrieve deleted files from inoperable disks, making it possible to recover lost data. - Atomic Heart Save File Location on a PC [2024 Tips]
Where are the save game files located? How to find Atomic Heart save file location? You can get all the answers here. Besides, If you lost Atomic Heart game data, run Deep Data Recovery to get them back.