How to Enable Windows Defender on Windows 11/10/8
Windows provides built-Windows Defender, a built-in antivirus protection, safeguards Windows users from viruses, malware, and threats. It's automatically enabled on Windows 10 and 11, but can be manually enabled if disabled.
This article explains how to enable Windows Defender to comply with your company's antivirus policies and fix accessibility issues.
What Is Windows Defender
Windows Defender is a software program that protects personal computers from viruses and threats, and has been available for free download since the release of Windows Vista. It was previously known as Microsoft AntiSpyware and is the main antivirus program on the device when active, remedying risks, checking files, and listing threats.
How to Enable Windows Defender [With Steps]
Windows Defender is a free tool that comes with Windows 8/10/11 operating systems, providing protection against viruses, spyware, and malware, and is a feature of Microsoft Windows' anti-malware program.
1. Enable Windows Defender on Windows 11
2. Turn on Windows Defender on Windows 10
3. Turn on Windows Defender on Windows 8
1. Enable Windows Defender on Windows 11
Windows 11's settings are centralized in one place, allowing users to configure systems, add new users, and update Windows from the System Settings pane. Additionally, users can also manage and enable Microsoft Defender, which can be turned off, by following the steps to re-enable it.
Step 1. To get to System Settings, click on the "Start" button and then click on "Settings".
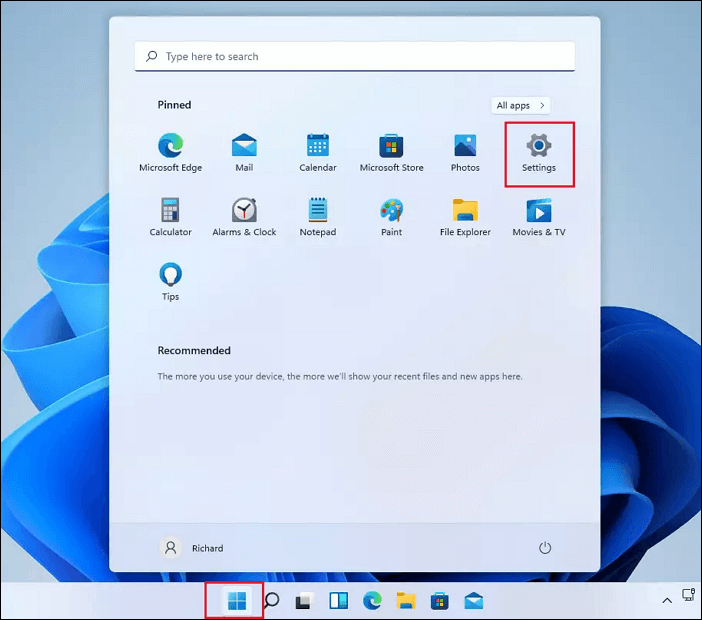
Step 2. To access Windows Security settings, go to Settings, click on "Privacy & Security" and then select "Windows Security" from the right-hand side of the screen.
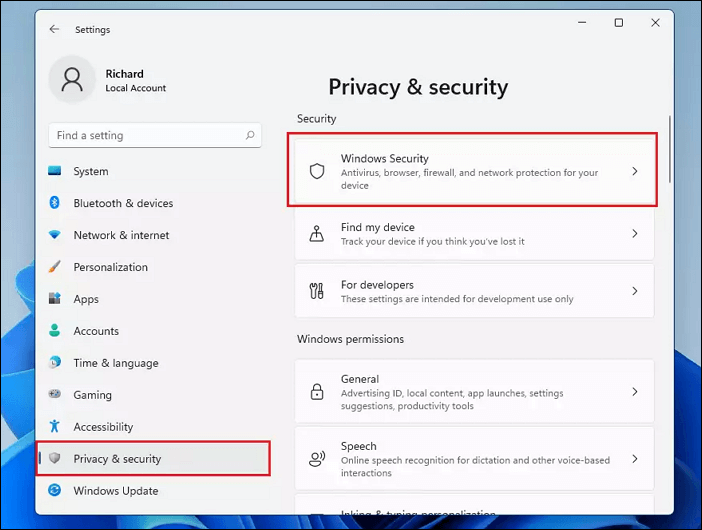
Step 3. On the Windows Security setting pane, click the "Open Windows Security" button as highlighted below.

Step 4. You can go into each network profile above and turn on or turn off the "Microsoft Defender firewall" for each.

Step 5. Select the "network profile" option and toggle it on or enable it if it's currently disabled.
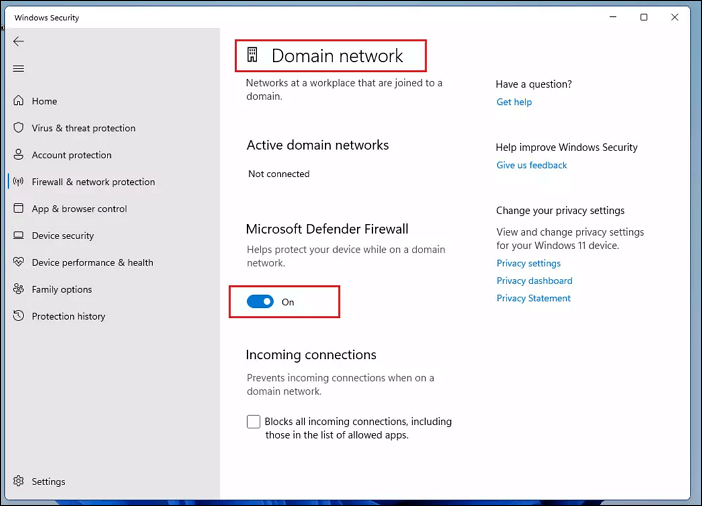
Step 6. If the profile is enabled, you can turn it off or disable it.

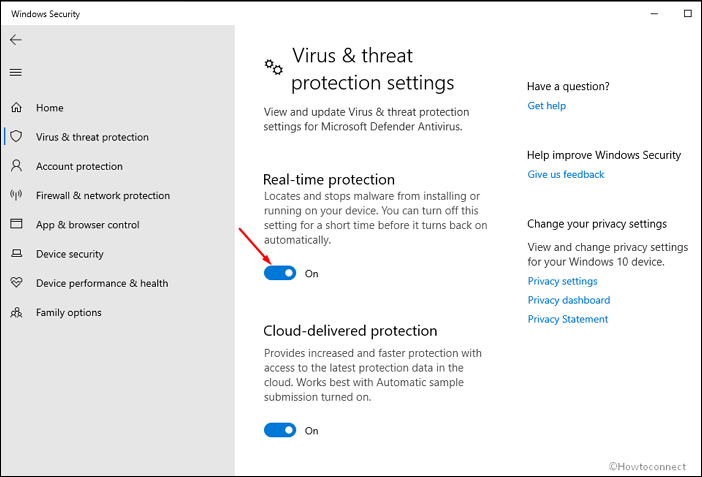
Step 7. To enable real-time and cloud-delivered protection, go to the "Virus & threat protection" section on the left menu, click "Manage" settings on the right pane, and toggle on "Real-time protection" and "Cloud-delivered protection".

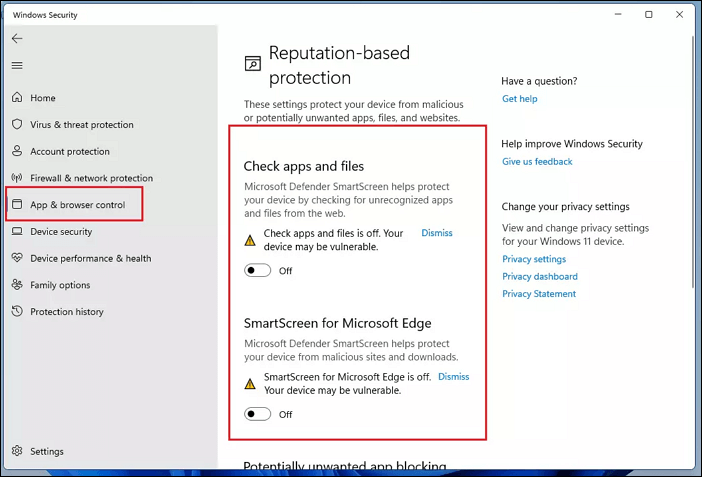
Step 8. You can disable app and browser control by turning it "Off" or disabling it.
2. Turn on Windows Defender on Windows 10
After numerous improvements and updates, it is now quite easy to disable or enable Windows Defender in Windows 10 at this moment. The Windows 10 built-in protection app will be made available when you complete this process.
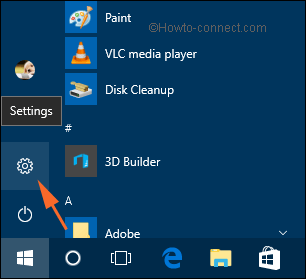
Step 1. To begin with, click the "Win" logo on the taskbar and select the "Settings" icon.
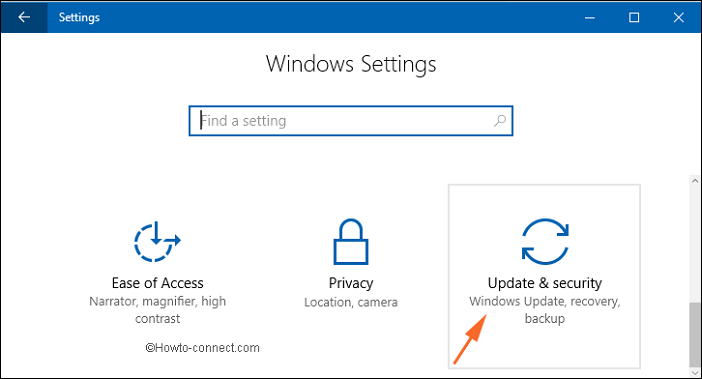
Step 2. Click on "Update & Security."
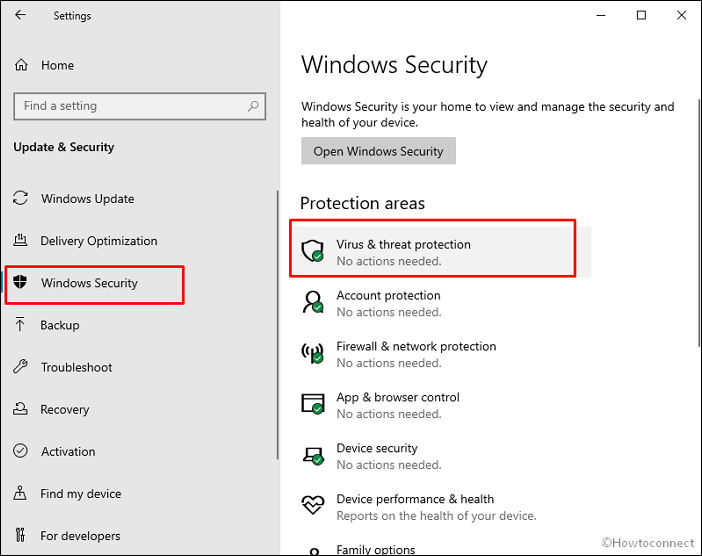
Step 3. Click on Windows Security and select "Virus & threat protection."
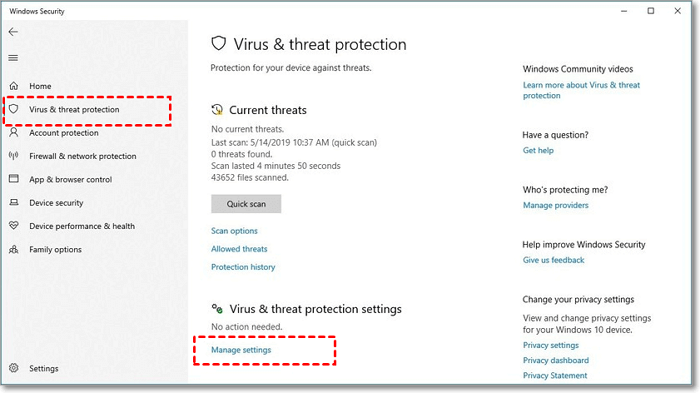
Step 4. Under Virus & threat protection settings, click the "manage" settings link.
Step 5. Click on the toggle switch under "Real-time protection."
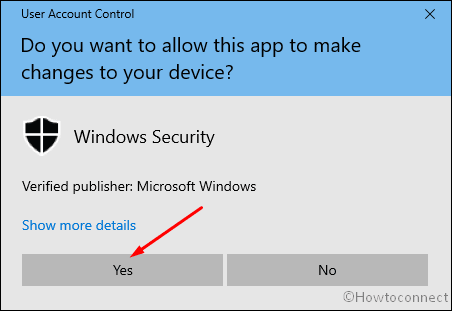
Step 6. Select "Yes" when the User account control prompt appears.
3. Turn on Windows Defender on Windows 8
If you find that Windows Defender has been disabled on your Windows 8, you can check its status using Action Center and then enable it by following these steps. To do this, go to Control Panel, click on System and Security, and then click on Action Center.
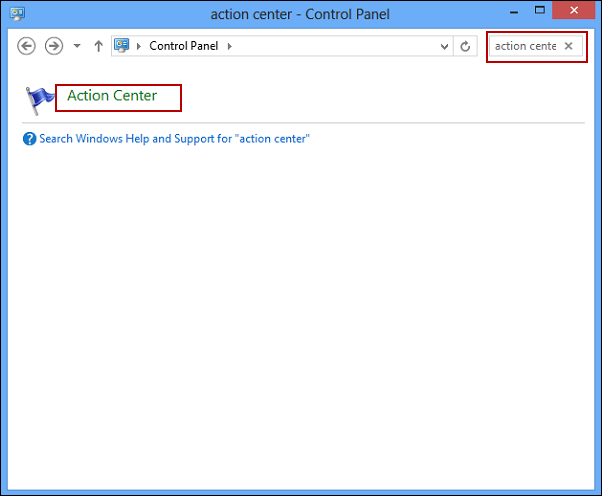
Step 1. To enter the Action Center, open the Control Panel, click on the top-right search box, and type "Action Center", then click on it to enter.
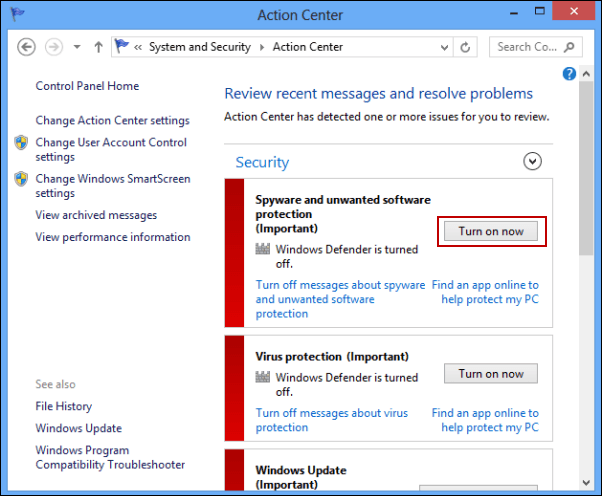
Step 2. Turn on the "Spyware and Unwanted Software Protection" feature by clicking on the "Turn on" now button in the box to the right of the feature name.
Conclusion
Installing a third-Microsoft Defender is the best antivirus option for Windows computers, making a third-party antivirus program unnecessary. Using a different antivirus only changes the source of the malware definitions, and installing multiple antivirus programs can cause problems such as inadequate protection and shutdown issues.
Related Articles
- TF Card vs. SD Card: 10+ Things You Want to Know
- How to Free Up Space on SSD in Windows 10/8/7
- How to Recover Deleted Emails from Hotmail
- How to Format SD Card in Canon Camera [Step-by-Step Guide]
- How to Recover Deleted Files by Date/Time
While selecting recovered files from third-party data recovery software, you may get stuck at finding the target files by file types. If some software allows you to recover deleted files by time, isn't it nicer and quicker to find the files you are looking for? - Recover Deleted NetFlix Profile & History
Your NetFlix profile disappeared or Netflix profile keeps getting deleted by itself? With Profile gone, so the NetFlix viewing history. This page collects some easy ways to help recover deleted NetFlix profile and history.