How to Free Up Space on SSD in Windows 10/8/7
Compared to traditional hard disk drives (HDDs), solid-state drives (SSDs) offer faster reading and writing speeds, improved performance and reliability, and greater durability. However, they typically have smaller storage capacities, with common sizes ranging from 120 to 512 GB, although larger sizes up to 100 TB are available.
[Top 6 Ways] How to Free Up SSD Space in Windows 10/8/7
The commonly used SSD sizes range from 120 to 512 GB, which can quickly become full due to their limited capacity. As a result, many people are seeking ways to free up SSD space.
- Fix 1. Clean Up Junk Files
- Fix 2. Disable System Restore
- Fix 3. Empty Recycle Bin
- Fix 4. Use Disk Cleanup
- Fix 5. Disable Hibernation
- Fix 6. Uninstall or Transfer Programs
To determine what's taking up space on your SSD, open the Disk Cleanup tool, which is built into Windows. This tool shows you a list of files and folders on your SSD, including temporary files, system files, and user files.
What's Eating Up SSD Space
If you're running low on space on your SSD in Windows 10, there are steps you can take to identify what's taking up space. By following these steps, you can help figure out what's consuming your storage.
Step 1. Go to "Start > Settings > Storage".
Step 2. In the Storage window, you'll get a view of the space usage situations on all your drives and partitions, similar to the image shown below.
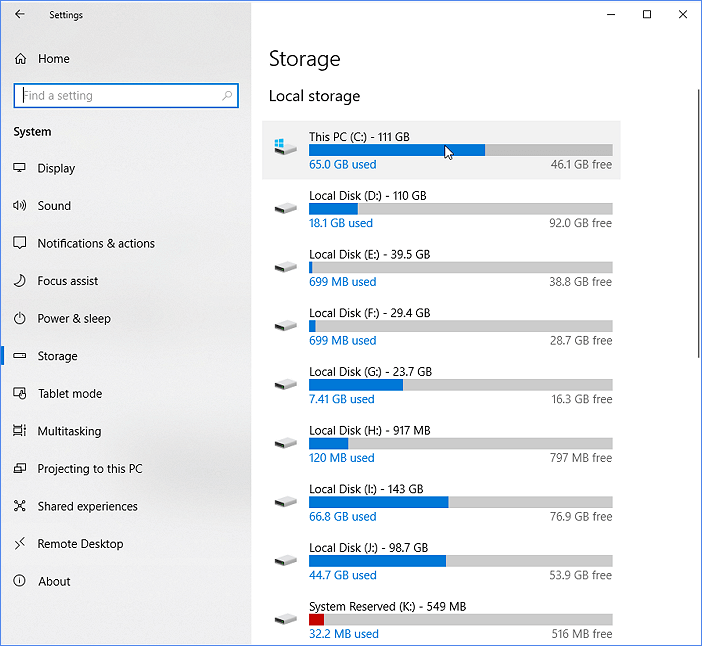
Step 3. To free up space on your computer, select the SSD which often includes the C drive. Click on it to see what's taking up the most space on the partition.
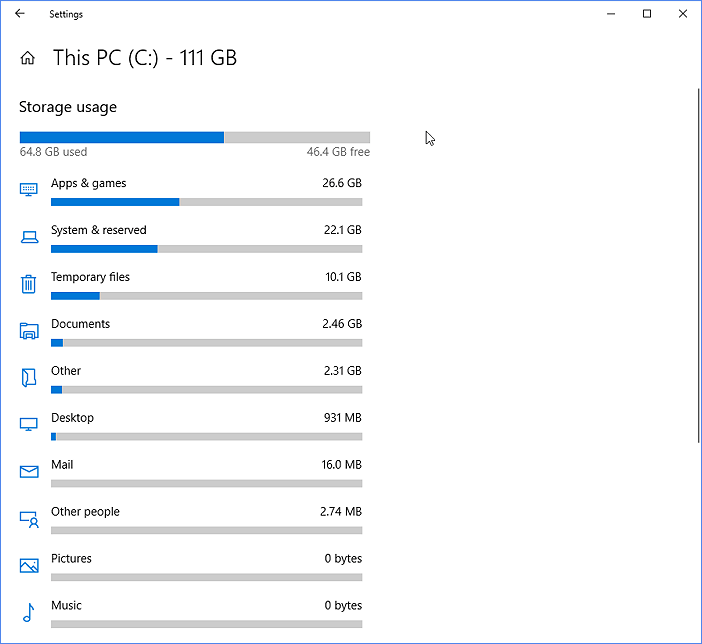
You've identified the space-hogging culprit on your SSD. Now, it's time to apply the tried-and-true solutions to reclaim that space and breathe new life into your drive.
Solution 1. Clean Up SSD Junk Files in Windows 10/8/7
To clean up junk files quickly and easily, consider using third-party software, such as Qiling Tools, which can remove files eating up your SSD space in Windows 10/8/7 without any cost. This software not only supports system cleanup but also large file cleanup, disk repair, and more, making it a reliable option for managing your SSD space.
To clean up SSD junk files and system, follow these steps: Delete unnecessary system files, clear browser cache and cookies, remove temporary files, and empty the recycle bin. Additionally, consider using a disk cleanup tool to remove system logs, temporary files, and other items that are no longer needed.
Step 1. Download and install Qiling Partition Master Suite.
Step 2. Click PC Cleaner and install Qiling CleanGinus. Then, click "Cleanup" and click "Scan" to start cleaning up the system and make your PC as good as new.
Step 3. The software scans your computer to identify large, unnecessary files, system junk, and Windows invalid entries, allowing you to select and delete them with a single "Clean" click.
Step 4.When the scan is complete, click "Done" to finish cleaning system junk files.
Solution 2. Disable System Restore to Free Up Space
System Restore is a Windows feature that can fix certain crashes and problems, but it takes up space and is not very effective. A system clone utility is a better choice for fixing system issues, so it's recommended to disable System Restore.
Step 1. Right-click "This PC" and then click "Properties".
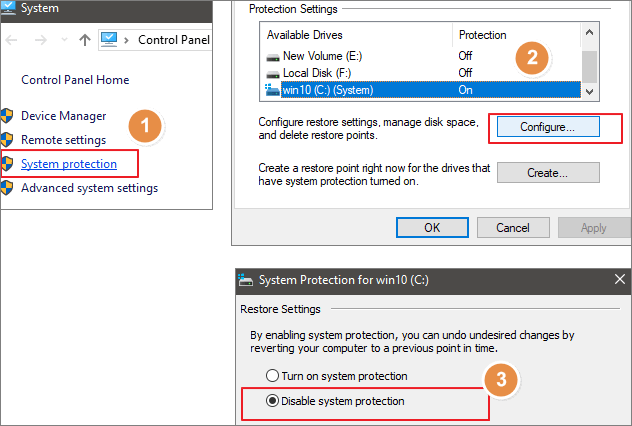
Step 2. Select "System Protection" on the left pane.
Step 3. To turn off System Protection for a specific disk, select that disk from the list and click the "Configure" button.
Step 4. Select "Disable system protection", and click "OK".
Solution 3. Empty Recycle Bin to Get More Free Space
To empty a Recycle Bin, click on the Recycle Bin icon on your desktop, right-click on it, and select "Empty Recycle Bin" from the context menu. This will permanently delete all files in the Recycle Bin and free up space on your computer.
Right-To empty the Recycle Bin, click on the Recycle Bin icon on your desktop and select "Empty Recycle Bin". Alternatively, you can set up the Recycle Bin to automatically delete its contents at regular intervals by following your computer's specific instructions.
Step 1. To open Task Scheduler, go to the Start menu, type "Task Scheduler" in the search bar, and press "Enter" to open it.
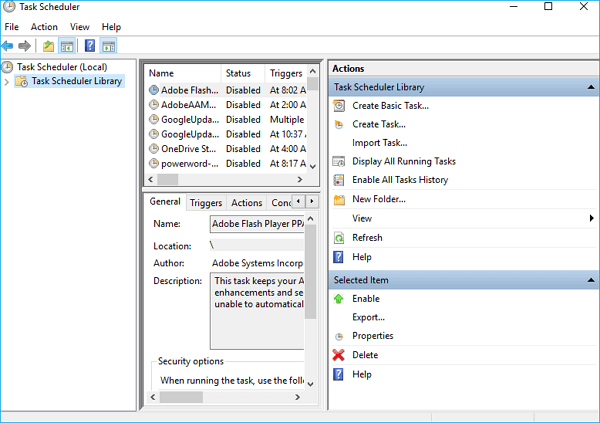
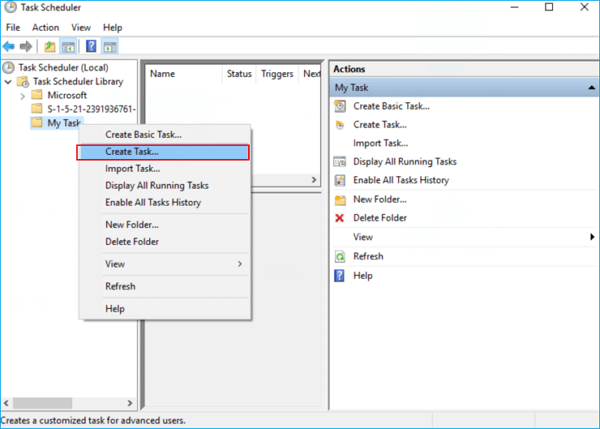
Step 2. To organize tasks, right-click the "Task Scheduler Library" and create a new folder, naming it something descriptive such as "My Tasks". Then, right-click the folder and select "Create task" to create a new task within it.
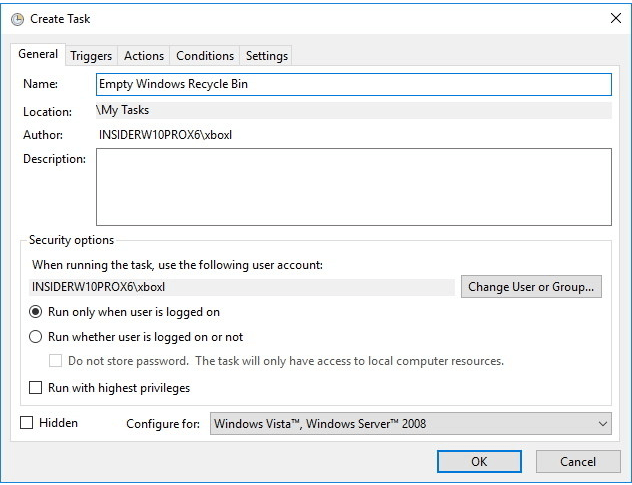
Step 3. On the General tab, enter a name for the task, such as "Empty Windows Recycle Bin" and proceed with the rest of the task setup.
Step 4. On the Triggers tab, click New to create an action that will trigger the task.
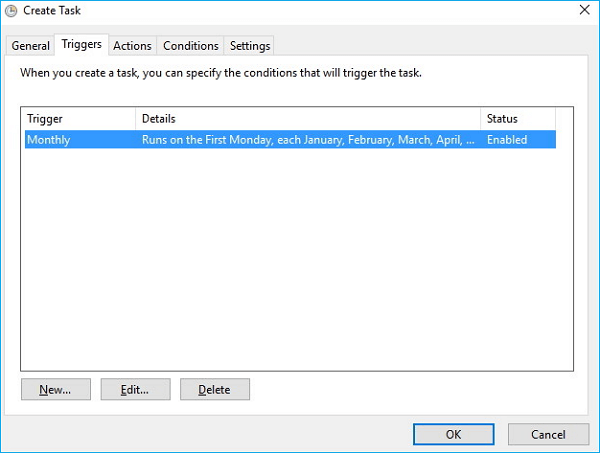
Step 5. The guide will select and configure a trigger action on a schedule, but you can choose from various options such as At log on, At startup, On an event, and more.
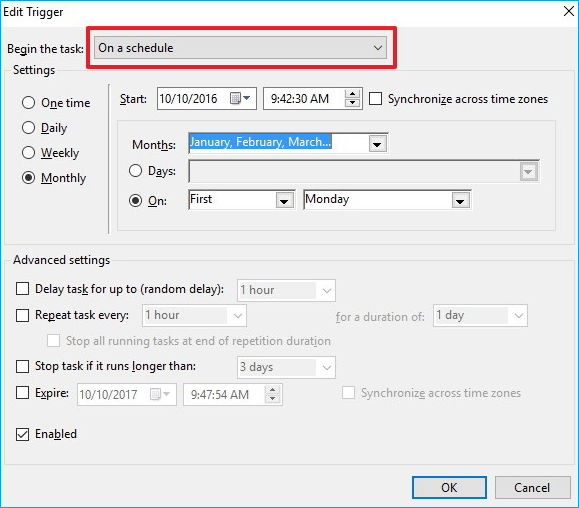
If you're using the schedule option as a trigger, consider using the Weekly or Monthly option instead, which provides you some time to recover deleted files.
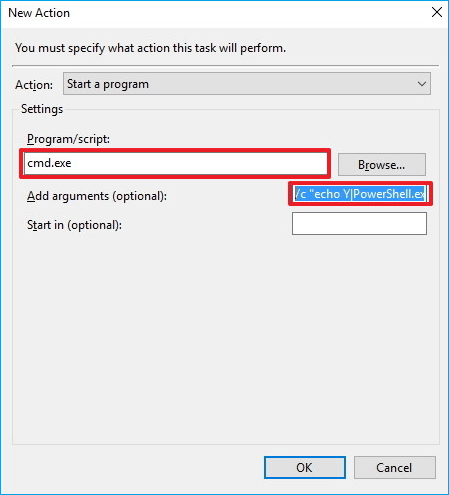
Step 6. To create a new action on the Actions tab, click the "New" button, which will prompt you to follow a series of steps.
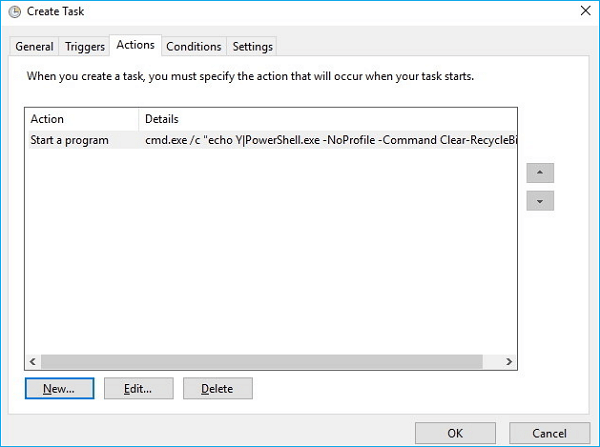
- Under Settings, on Programs/script enter cmd.exe.
- Under Settings, on Add arguments enter the following argument and click OK:
- /c "echo Y|PowerShell.exe -NoProfile -Command Clear-RecycleBin" Then click OK to complete the task.
Once you've completed the steps, the task will run automatically at the trigger condition you've set, without needing further action from you.
Solution 4. Use Disk Cleanup to Delete Temp Files
Temp files can take up a lot of space on an SSD, but using Disk Cleanup to delete unnecessary temporary files can help free up space.
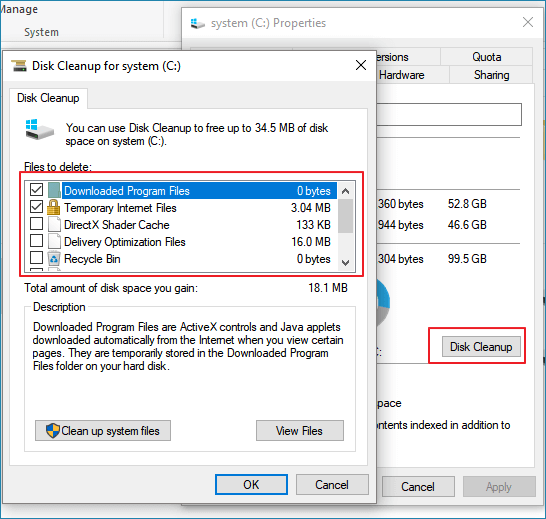
Step 1. To run Disk Cleanup, start by opening the Start menu, then type "Disk Cleanup" in the search bar, and select the top result to launch the tool.
Step 2. To delete files from the C drive or other drives, select the files you want to delete, and then click the "OK" button.
Solution 5. Disable Hibernation in Windows 7
To make hibernation unavailable on Windows 7 installed on an SSD, you can follow these steps: The Windows Kernel Power Manager creates the Hiberfil.sys file, which takes up lots of space, but since Windows 7 boots quickly on an SSD, hibernation is no longer needed. To disable hibernation, you can disable the Hiberfil.sys file by following the steps below.
Step 1. To begin, search for "cmd" in your system. Once found, right-click on "Command Prompt" and select "Run as Administrator" from the context menu. This will allow you to execute commands with elevated privileges.
Step 2. To disable hibernation, open the command prompt and type 'powercfg.exe /hibernate off' followed by pressing the "Enter" key.
Step 3. Type exit, and then press "Enter" to close the Command Prompt window.
Solution 6. Uninstall or Transfer Programs to Another Drive
To free up space on your device, you can remove apps that you don't need by following these steps: uninstall them.
To uninstall an app or game, go to the "Settings" app, navigate to "Apps" or "Apps & features" depending on your device, select the app you want to remove, and click the "Uninstall" button.
To free up space on your SSD, consider moving apps or games to another drive, allowing you to keep programs while freeing up SSD space. You can use Qiling Disk Master to easily transfer programs to another hard drive or partition, saving space on your SSD.
Step 1. Launch Qiling Disk Master and select transfer mode
On the main screen of Qiling Disk Master, go to the "App Migration" section and click "Start" to proceed.
Step 2. Select apps and another drive to transfer
1. Select the source partition and tick the applications, programs, and software that you'd like to migrate.
2. To transfer data from one drive or disk to another, select the source drive or disk as the target device and click the "Transfer" button to initiate the migration process.
Step 3. Finish the migration process
When the transferring process finishes, click "OK" to complete.
To ensure all changes are saved and your migrated apps can run on the other drive, simply restart your PC. This will preserve the changes and allow you to access your migrated apps again.
To free up disk space, you can transfer unused space from one partition to another, regardless of their location on the same or different disks. If the partitions are on the same disk, you can add space to the other drive. If they are on different disks, you'll need to convert the drives to dynamic ones to add space to your SSD.
Extra Tips - Extend Your Drive with Qiling Partition Master
You can extend or increase your hard drive or partition with a professional tool like Qiling partition software, which allows you to resize, create, or extend your hard drive or SSD space with ease.
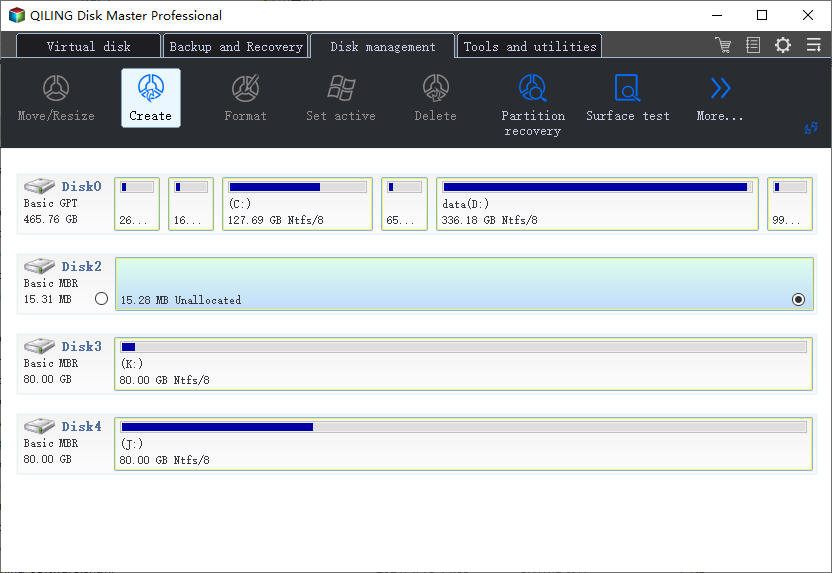
Step 1. Check for free space
To divide a disk partition into multiple ones, you must ensure that there is adequate free space available to be allotted.
Step 2. Shrink a disk partition to create unallocated space
To resize a partition, start by clicking on the "Resize/Move" feature, then select the partition with a lot of free space.

To free up space, drag the partition to the right or left, reducing its size as indicated by the red arrow, and create unallocated space. The "Partition size" area will display the amount of space decreased.

To finalize the resizing of the disk, click the "Proceed" button to save the changes. This will create unallocated space on the same disk, making room for the resized partition.
Step 3. Create a new partition on unallocated space
To turn the unallocated space into a usable partition drive with a recognized file system, right-click on the unallocated space and choose "Create".
You can customize the partition information by selecting a drive letter, partition label, and file system (such as NTFS, FAT32, EXT2/3/4, or exFAT) among other settings in the Advanced Settings.
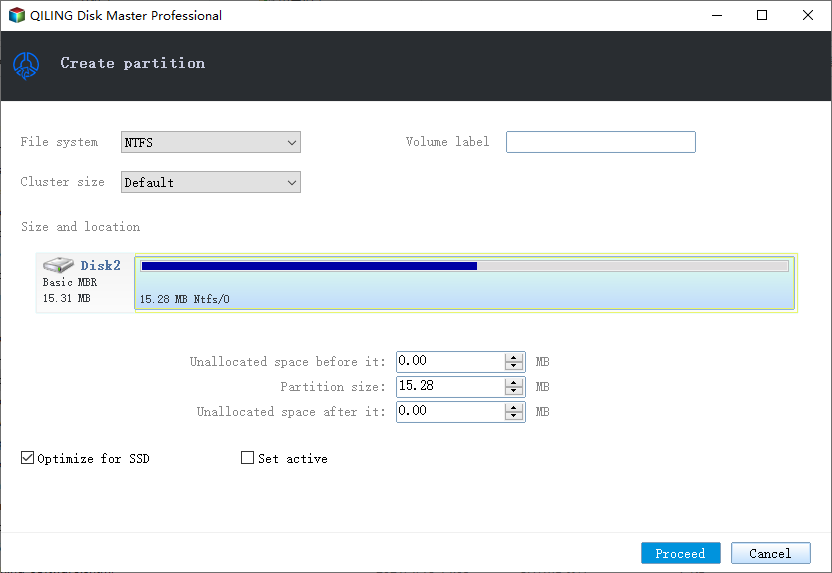
To create a partition on unallocated space, select the partition size and click "Proceed" to confirm, then repeat the process to create multiple partitions on a hard drive.
Related Articles
- Restore Deleted/Crashed Notepad ++ Files from Backup
- Solved: PS3 System Storage Not Enough, Not Found or Corrupted
- Adobe Illustrator AutoSave, Backup and Protect Illustrator from Crash Error
- Fix WD External Hard Drive Not Working/Recognized/Showing Up Error
- Download Best Steam Mover Software to Transfer Steam Games in Windows 10/8/7
Is your C: drive running out of space? You can use a Steam mover software to transfer Steam games to another hard drive or new PC in just three steps. This software can help you move your Steam games to a new device, such as a super-fast new SSD or a new gaming laptop. - What's The Best Way to Backup A Nas? We Compared 3 Free Ways
Do you know how to backup a NAS and what is the best way to backup a NAS? Backing up NAS devices was once considered a challenge. But now, you have several options for proper NAS backup. This article will provide a guide to selecting the best way to create a NAS backup.