Solutions for Disk Not Ejected Properly on Mac
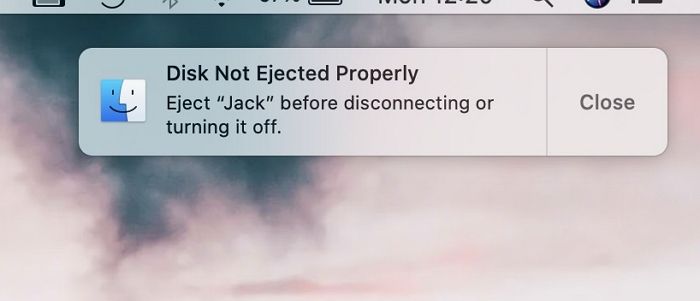
When you eject your disk for safe removal but unexpectedly see a "disk not properly ejected" notification, the issue is quite bothersome. An improper ejection can immediately stop the disk reading/writing process and leave bits of data on your system.
When you eject your external disk, you might be surprised to find that some of your data is lost, which can be frustrating and cause a significant loss. Despite your best efforts to eject it safely after use, it can fail, leaving you with a problem to solve. If you're looking for solutions to the issue of a disk not ejecting properly on a Mac, you're in luck because we've got you covered.
Why Do You Need to Eject The Disk on Your Mac
If you've previously used Windows, you may have physically disconnected a disk from your PC. While ejection is important, it's less critical for Windows users. In contrast, Mac users are more likely to experience data loss if they abruptly disconnect a disk, as the operating system may still be processing data. This can lead to slower data transfer speeds and potentially result in data loss if the connection is interrupted.
When you safely remove a drive, all your data is saved and the system stops transmission, ensuring safe removal and preventing disk and data corruption. This is achieved by ejecting the disk, which dismounts it for safe removal.
What Are The Reasons for Disk Not Ejected Properly on Mac
When you disconnect a disk from your Mac without completing the data processing procedure, the system may abruptly stop the process, potentially resulting in lost data. However, if you encounter a "Disk Not Ejected" error, it's essential to avoid disconnecting the disk until the ejection is successful. Various reasons can cause this issue, including system glitches, corrupted files, or disk configuration problems.
- External Hard Drive Cable Failure: When a hard drive cable is not used for a long time or is of poor quality, it often fails. Using a faulty cable to connect the hard drive can result in issues with disk operations.
- External Desktop Hard Drive Power Failure: If you use an external desktop hard drive to boot your system, it can fail for specific reasons, causing it to not work correctly or even stop functioning altogether.
- Computer USB or Thunderbolt Port Failure: When a USB or Thunderbolt port fails, it can cause issues with disk operations, making it difficult to execute tasks that require a stable connection between the drive and system. This can be due to negligence, an outdated system, or other similar reasons. As a result, the port's failure can lead to problems with data transfer and storage, ultimately affecting the overall performance and functionality of the system.
- External Hard Drive Failure: When your external drive fails, safe ejection is impossible!
- Problems Related to macOS updates or the update process: Several users have reported experiencing a "disk inappropriately ejected" error randomly after updating to the latest macOS.
When you see the "Disk Not Ejected Properly" notification, it's essential to address the issue. However, losing all your data, whether personal or professional, can be a significant setback. Fortunately, Deep Data Recovery Wizard for Mac is a reliable and effective tool that can help you recover your lost data, serving as a savior in this situation.
How to Fix Disk Not Ejected Properly on Mac
Several fixes can help resolve disk ejection errors on a Mac, including checking connections, restarting the device using a mouse or trackpad, and running First Aid to assess the disk drive.
#Solution 1. Log back in and try to roll out the disc again
To resolve the disk ejection error on an older MacBook model with a CD tray, try ejecting the disk manually by pressing the Eject button on the keyboard or using the keyboard shortcut Command (⌘) + E. If the disk is stuck, you can try using a CD eject tool or a paper clip to gently push the disk out. If the issue persists, you may need to reset the System Management Controller (SMC) or the Power Management Unit (PMU) on your MacBook.
- To log out of your Mac, go to the Apple Menu, click on System Preferences, then click on Users & Groups, select your username, click on the "Log Out" button, and confirm the logout by clicking on the "Log Out" button again.
If the issue persists, you can try ejecting the disk, then restarting your computer, and if the problem still exists, try using a different disk or formatting the disk to resolve the issue.
- Go to Apple Menu and click on Restart.
When your MacBook reboots, press the mouse or trackpad button on your Mac until the disk ejects.
#Solution 2. Shut Down and Disconnect the Disk
If your Mac can't eject a disk, try shutting it down and disconnecting the disk. Wait a bit, then reconnect the disk and turn your Mac back on. Try to eject the disk safely again. If that doesn't work, restart your Mac while pressing the trackpad to force the eject.
#Solution 3. Run First Aid
The external hard drive issue is often due to the drive itself, not the Mac. To troubleshoot, run the First Aid app to diagnose any errors on the external drive, which can help prevent data loss if the drive is not ejected properly.
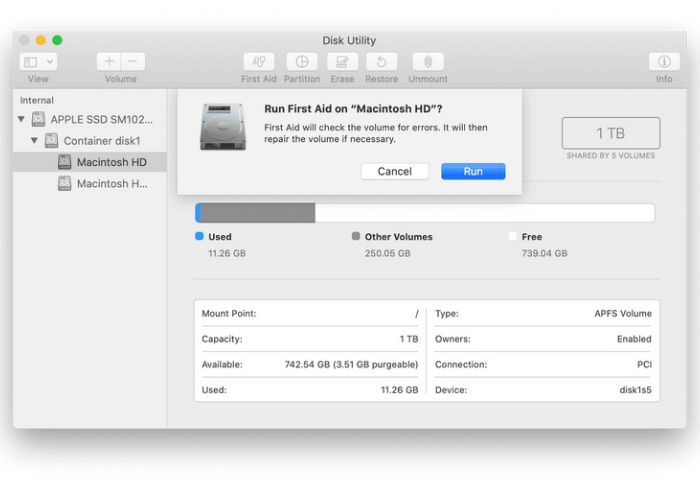
- Head over to Dock on your Mac
- Open Launchpad and navigate to Other
- Now, go to Disk Utility
- From the left pane, click on External Hard Drive
- Navigate to First Aid and press the Run button to proceed
First Aid on an external drive can take some time as it assesses the drive for any errors. If issues are found, they may be fixable, but if not, it's recommended to disconnect the drive to prevent further damage.
You can even change the port to which your External Drive is connected. Often there is an issue with the ports leading to the point.
#Solution 4. Test with other connection
If your Mac is experiencing a "Disk Not Ejected Properly" issue, it's often due to a faulty port or loose connection. To troubleshoot, try switching the external drive's connection to a different USB port, or replace the connecting cable if you suspect a port issue. This can help you determine if the problem lies with the port or the cable.
#Solution 5. Resetting NVRAM or PRAM on a Mac
If changing the connection to an External Hard Drive doesn't resolve the issue, you can try resetting NVRAM on your Mac. This is because NVRAM stores configuration data for your device, and a corrupt NVRAM or PRAM can cause problems. Resetting NVRAM may resolve the issue.
The above response is a rewritten version of the original text in one paragraph, with a more concise and formal tone.
- Turn off your Mac
- Immediately press the Option, Command, P, and R keys simultaneously until 20 seconds have elapsed. (Note: This is the procedure to reset the System Management Controller (SMC) on a Mac.
- Release the keys as soon as the Apple Logo appears
Resetting NVRAM or PRAM on a Mac will not erase any data, but it can resolve issues such as a frozen screen, unresponsive keyboard, or other system problems. The process is relatively simple and can be done by pressing a combination of keys on startup. This can help refresh the system and get it running smoothly again.
To reset NVRAM on a Mac, shut down your computer, locate the power button and the Command (⌘) + Option (⌥) + P + R keys, and press them all at once as you turn the computer back on. Hold them down for 20 seconds, then release them.
To avoid the "Disk Not Ejected Properly" issue on a Mac, it's crucial to properly eject external storage devices, such as USB drives or hard drives, before physically disconnecting them. This can be done by clicking on the "Eject" button next to the device's name in the Finder window or by right-clicking on the device and selecting "Eject." Additionally, it's recommended to safely remove the device by clicking on the "Safely Remove Hardware" option in the Apple menu.
How to Avoid Disks Not Ejected Properly on A Mac
The "Disk Not Ejected Properly" error can occur due to manual errors, such as not ensuring a safe removal of the disk. This can lead to problematic ejecting troubleshooting, making it essential to save your data.
1. Use the proper eject method
Never disconnect a drive directly, wait for the data transfer process to finish, and then properly eject the drive to avoid losing data.
2. Eject the disk after use
Ejecting a disk ensures that any data being read or written is finalized and saved, preventing data loss.
To eject the disk after the data transfer process ends, follow these steps:
- Go to Finder and search for the External Drive
- Right Click on the external drive and select the Eject
The drop-The down menu displays the eject option along with your Drive's name, notifying you of any potential problems during the ejection process.
Conclusion
If you're experiencing issues with your Mac's disk not ejecting properly, you're not alone. Faulty cables or ports, software bugs, and other similar problems can cause this issue, which can even lead to data loss. To avoid this stress, consider using the Deep Data Recovery for Mac, a reliable and safe tool that can help you recover your data effortlessly.
Related Articles
- C Drive VS D Drive: What Are the Main Differences?
- How to Format USB on Mac? Your Secure & Step-by-Step Guide Is Here
- 5 Best Registry Cleaner for Windows PC [Updated 2022]
- How to Recover Deleted Chrome Bookmarks on Mac
- How to Repair Windows 10 Using Command Prompt [3 Ways]
Do you know how to repair Windows 10 using Command Prompt? You can use two useful Windows repair commands - SFC and DISM. Ask for manual repair services if you cannot repair Windows 10 using Command Prompt. - SFC Windows Resource Protection Could not Perform the Requested Operation
Many users experience the 'Windows Resource Protection could not perform the requested operation' error when running the 'sfc /scannow' command. However, there are three methods that can help resolve this issue and prevent data loss with the help of Qiling Data backup.