3 Ways to Backup Mac Mail
Mac users often attempt to back up Apple Mail to an external hard drive for various reasons, such as protecting important messages from unexpected data loss, freeing up disk space, or transferring emails to an external drive. Fortunately, there are several ways to accomplish this task, each with its own advantages and disadvantages, which will be discussed in detail below.
Method 1. Backup Apple mail using Time Machine
To backup Apple Mail emails, simply right click the Time Machine icon in the Dock and select 'Back Up Now' from the pop-up menu.
Drawbacks:
- To set up Time Machine on your Mac, you should first install and enable it on your computer.
- You might get the risk of data loss if Time Machine backup restore failed.
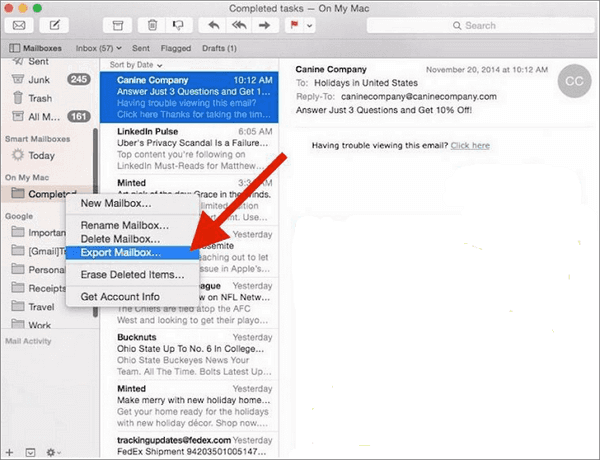
Method 2. Backup Apple mail using Export Mailbox feature
Mail's Export Mailbox option is a feature that allows users to remove messages entirely from Mail while still holding onto copies, making it attractive for those who want to archive email in Apple Mail. To backup Apple mail, you can easily use this feature to export your emails.
First, create a mailbox. To move emails to a new mailbox, simply open Mail, go to Mailbox > New Mailbox, and then drag and drop the desired messages into the newly-created mailbox.
Then, start to export a mailbox. To export a mailbox, right-click on it in the sidebar, select "Export Mailbox", and then choose a destination for the .mbox file. Click "Choose" to proceed.
Drawbacks:
Some Apple Mail users have reported that their emails were lost or corrupted while archiving their emails, resulting in unknown errors.
Method 3. Backup Apple mail using third-party Mac backup software
Due to the drawbacks of using Time Machine or Mail's Export Mailbox feature to back up Apple Mail emails and mailboxes, users may experience glitches. A safer alternative is Qiling Mac backup software, which can better manage the job.
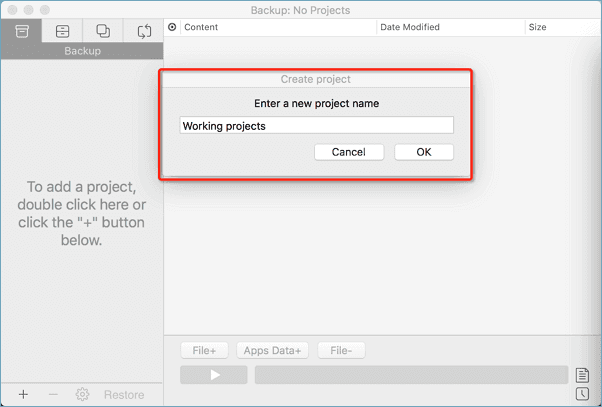
Step 1. To create a backup project in Qiling Mac backup software, start by launching the software and clicking on the first Backup tab. Then, click the + button located at the left corner of the left pane to initiate the creation of a backup project.
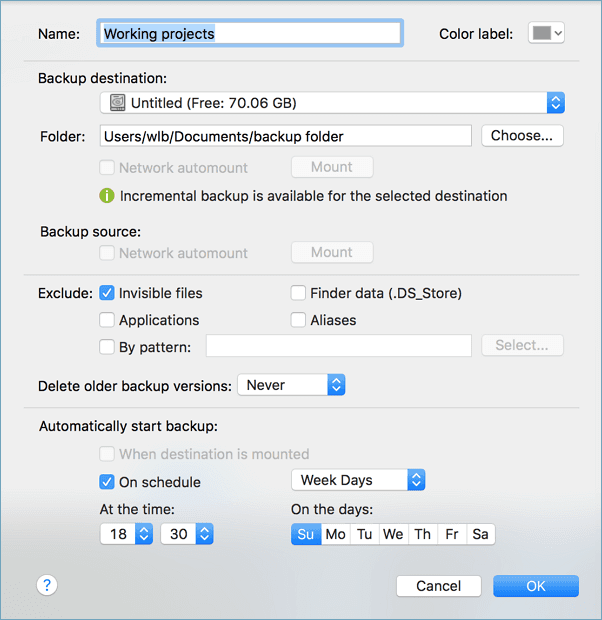
Step 2. To set up a backup for Mac Mail emails, you need to specify a destination, such as an external hard drive, and choose how often you want the backups to run automatically. Before setting up the backup, make sure the external hard drive is connected to your Mac. This will ensure that the backup process can access the drive and store the email backups there.
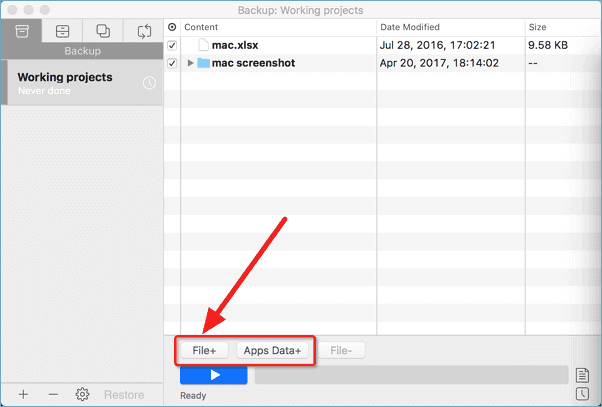
Step 3. To start backing up your Mac's emails, click on "File+" to select the specific files and folders you want to back up, and then click the blue "Start" button to initiate the backup process.
Related Articles
- 2 Methods to Change iTunes Backup Location on Mac
- How to Back Up Mac without Time Machine?
- How to Upgrade and Change Mac Bootcamp Drive?
- How to Clone USB Drive on Mac
- How to Move Programs from HDD to SSD in Windows 11/10
To move programs from your HDD to SSD in Windows 11/10 without re-installing, you can use an app migration tool. This tool allows you to easily transfer installed apps and programs from your HDD to SSD, or vice versa, with just a few clicks. - Can I Transfer Kindle Books to Another Device? Sure!
You can transfer Kindle books to another device with ease using three convenient methods. Click to learn how to transform your Kindle books.