Time Machine Restore Button Greyed Out, How to Fix?
This page covers two parts to help you resolve Time Machine greyed out issue. If you are having this issue on your Mac, follow to fix it now:
| Workable Solutions | Step-by-step Troubleshooting |
|---|---|
| Part 1. Time Machine Greyed Out | Solution 1. Open Finder > Click "Enter Time Machine"; Solution 2. Reboot Mac > Press Command + R until apple logo shows..Full steps |
| Part 2. Recover Lost Data | When Time Machine greyed out, run Qiling recovery software > Scan device > Restore lost data...Full steps |
Overview of Time Machine Greyed Out
"I've been using Time Machine to back up my MacBook Pro, first in Yosemite and now it's in EI Capitan. Yesterday, when I entered Time Machine, it showed me the backup, but the Restore button was greyed out. I have some Office documents accidentally deleted and need to be restored from Time Machine. How can I recover the lost files since the Time Machine restore greyed out?"
Time Machine, the built-in backup feature of your Mac, allows you to backup all the files, including apps, music, photos, email, documents, and system files automatically. When you have data loss, you can restore the data from your backup. However, things don't go smoothly all the time. You may find the time machine restore button greyed out occasionally just the same as the above user experience, which may be caused by the following issues.
- Time Machine backup HDD was formatted.
- Time Machine backup was incomplete.
- Time Machine backup was corrupted.
Fixes for Time Machine Restore Greyed Out
The time machine backup greyed out may result from not using the right way to "Enter Time Machine" or there is a hard disk error. Try the solutions below to fix the problem.
The right ways to Enter Time Machine:
Solution 1. First, open the Finder window, then click "Enter Time Machine".
Solution 2. Reboot your Mac > press Command + R until apple logo shows up. Release the buttons and enter macOS Utilities. Choose "Restore From Time machine Backup". It will not grey out in here.
If there is a backup hard disk error, like formatting, corrupted, there is no way but using professional Mac data recovery software to recover the lost files feasibly.
How to Recover Data on Mac When the Time Machine Restore Greyed Out
If you can't restore data from time machine backup, don't frustrate, here is the simplest workaround to recover lost files on Mac with Deep Data Recovery for Mac. It is an all-in-one Mac drive recovery software that helps recover files on Mac without Time Machine. It supports data recovery from Mac trash bin, hard drive, memory card, flash drive, digital camera, and camcorders. You use this reliable tool to recover lost or deleted files, photos, audio, music, emails from Mac due to deletion, formatting, lost partition, virus attack, system crash, and more.
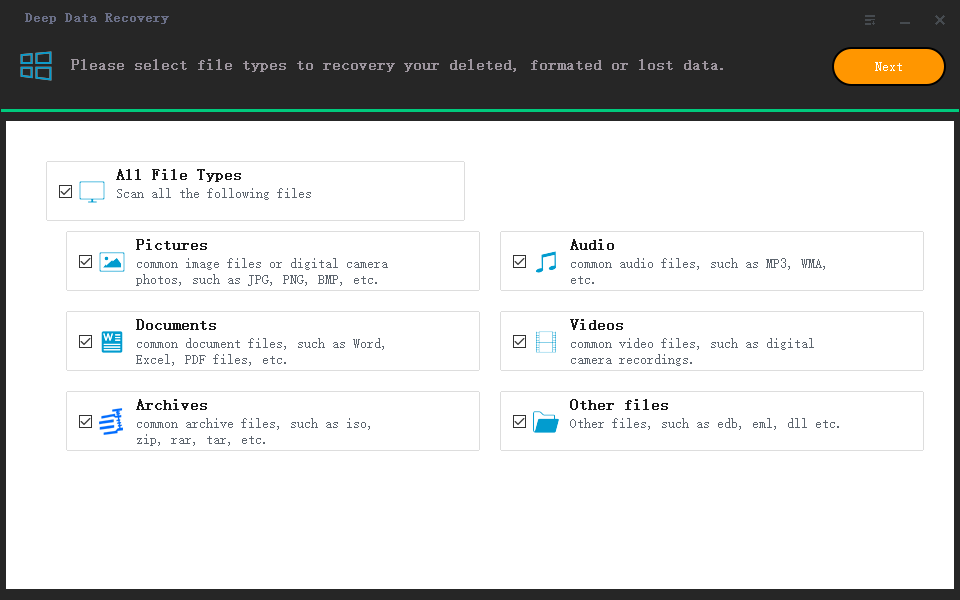
Step 1. Launch Deep Data Recovery. Choose file types and click "Next" to start.

Step 2. Select the disk location (it can be an internal HDD/SSD or a removable storage device) where you lost data and files. Click the "Scan" button.

Step 3. Deep Data Recovery for Mac will immediately scan your selected disk volume and display the scanning results on the left pane.

Step 4. In the scan results, select the file(s) and click the "Recover" button to have them back.
Related Articles
- 2022 Fix: ExFAT USB Not Showing Up on Mac Without Losing Data
- 100% Working Qiling Data Recovery Key and License Code for Mac
- Upgrade to Mac OS X El Capitan 10.11.6, No Data Loss [2022 Tutorial]
- Repair Corrupt Excel File on Windows 10/11 [Top 4️⃣Methods]
In this passage, you'll learn multiple ways to fix a corrupt Excel file on Windows PCs. The best and easiest solution is to apply Qiling Fixo Document Repair to repair the damaged Excel files.