How to Change Webex Meeting Location
Webex, Cisco's unified communication platform, allows everything and everyone to use it, streamlining collaboration and producing outcomes faster than ever by combining calls, messaging, and meetings in one application.
Webex allows you to move your mission-critical communications to the cloud, offering necessary features, security, and quality, making it easy to connect individuals and groups from any location at any time on any device.
Up to 1,000 people can participate in high-definition video meetings using WebEx, with each user having a unique phone number to organize private meetings. The platform also offers features like virtual backdrops and noise reduction to maintain a professional image.
On the other hand, Webex App automatically updates your address when you connect to a new network. So, it is logical for users to want to change their meeting location. This article will help them do so in easy steps. Here's how!

Change Webex Meeting Location
To change the Webex Meeting location, follow these steps: for Windows users, go to the top right corner of the Webex Meeting window and click on your profile picture, then select "Settings" and choose the desired site from the drop-down menu; for Mac users, click on the Webex Meeting icon in the top left corner, then select "Preferences" and choose the desired site from the drop-down menu. If you have multiple Webex sites connected to your email address, you can initiate and schedule meetings via any Webex site you prefer.
For Windows Users
Step 1: You can access your settings by clicking on your profile picture.
Step 2: Choose Among the Meetings.
Step 3: Select Edit under the Default Webex site URL, choose the Webex site you want to use for meetings and scheduling, and click Update.
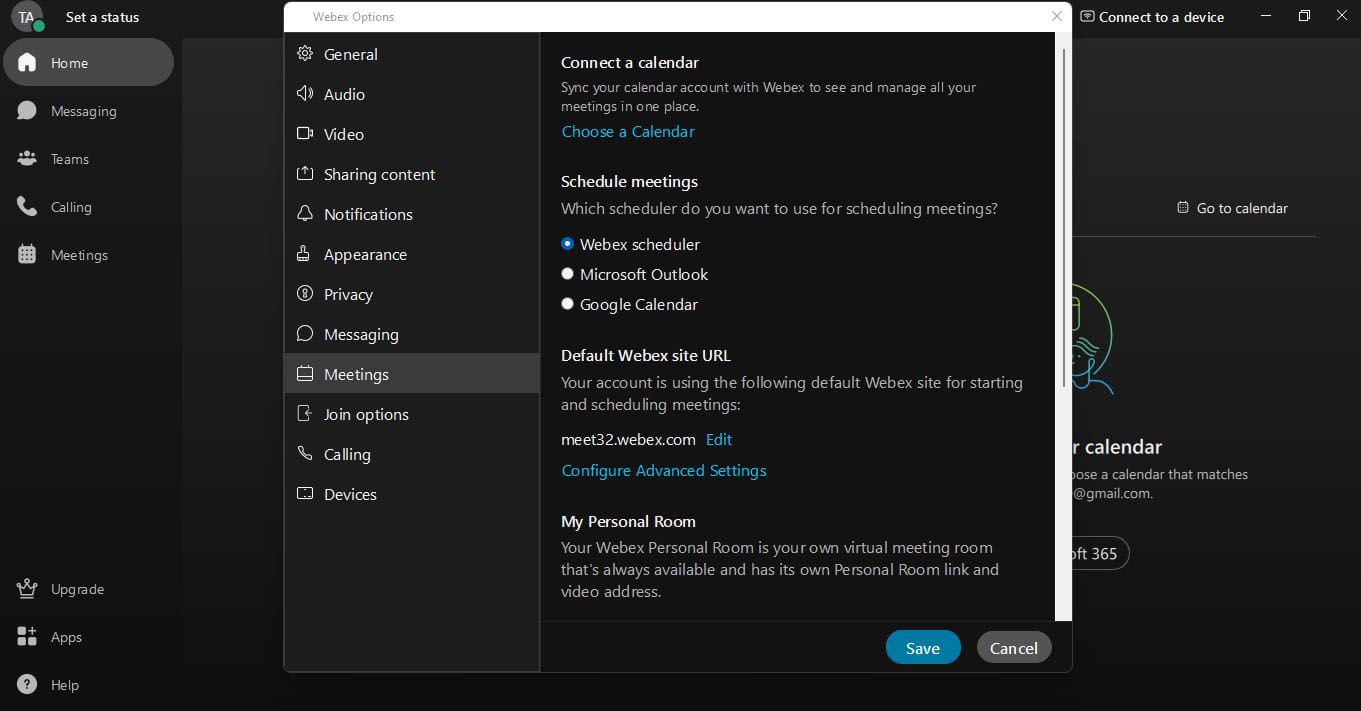
Step 4: Select the Save option.
For Mac Users
Step 1: To access your personal settings page, click on your profile image. This will take you to a page where you can manage your account information, notifications, and other settings.
Step 2: Choose from the Various Sessions.
Step 3: To schedule a meeting and initiate it, go to the Default Webex site URL, select Edit, choose the desired Webex site, and click Update.
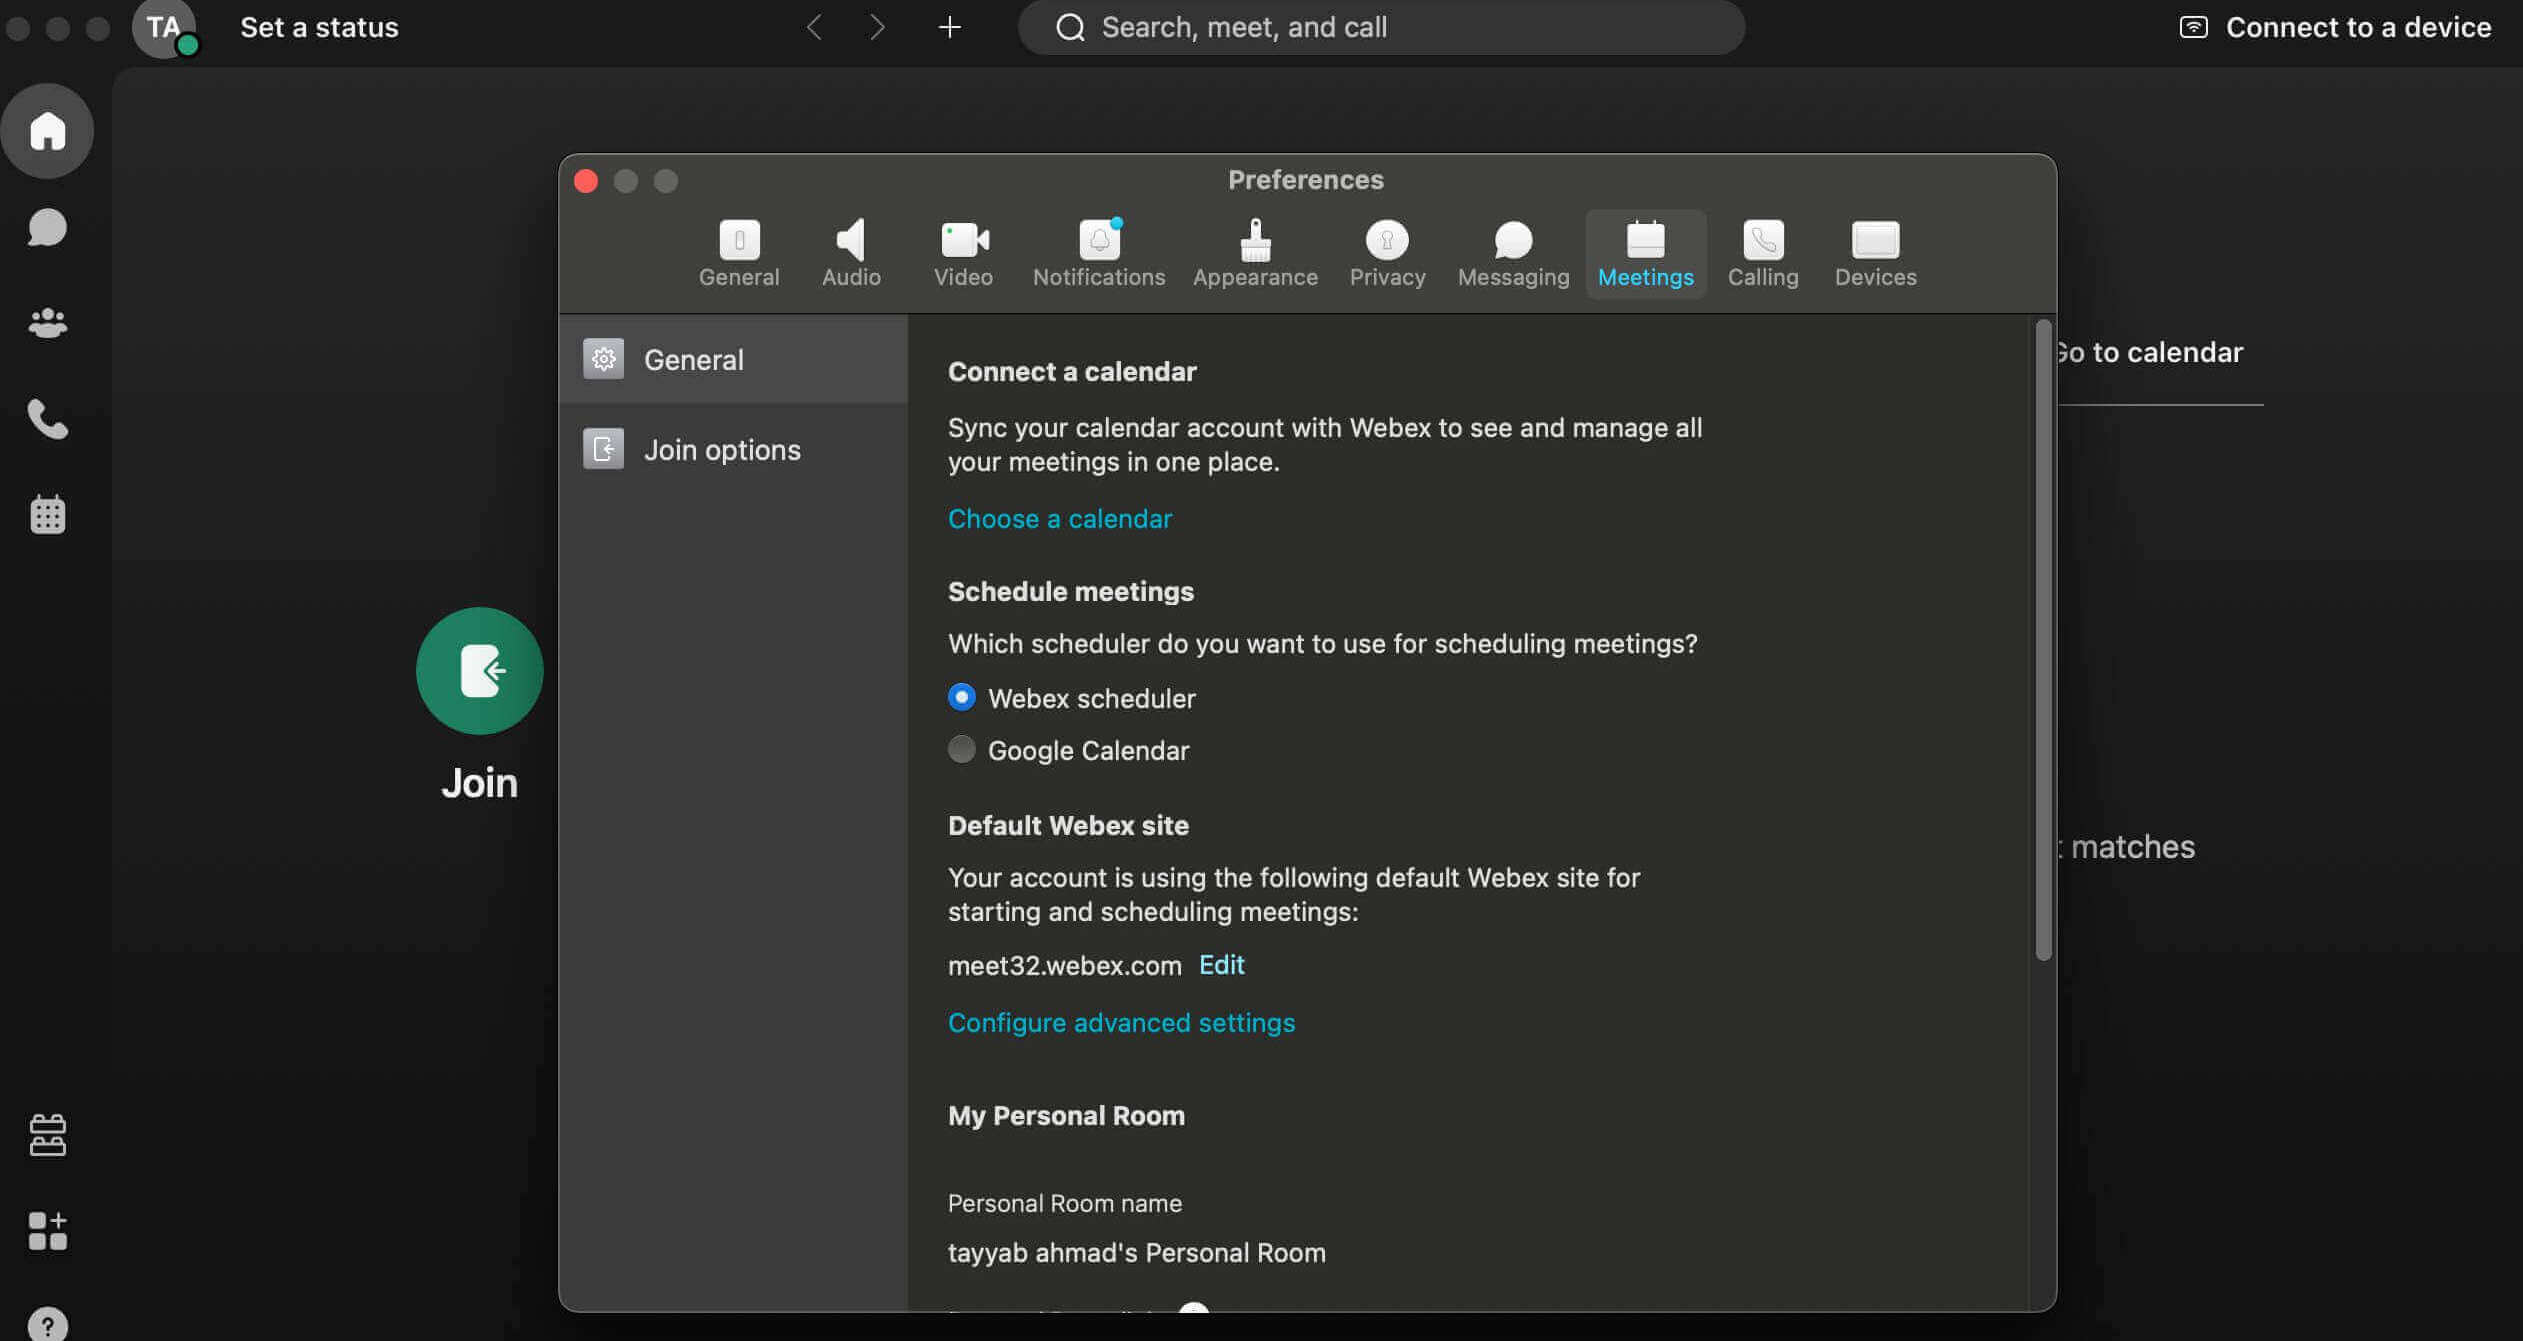
Step 4: When you're done, click Save.
Edit Webex Meeting Location in Calendar
To modify the specifics of your planned meeting using the Webex app, you can simply edit the meeting location in the Calendar. Your updated schedule will be reflected, and meeting invites will be sent out shortly to inform the attendees of the changes. This allows you to easily make adjustments as needed.
For Desktop Users
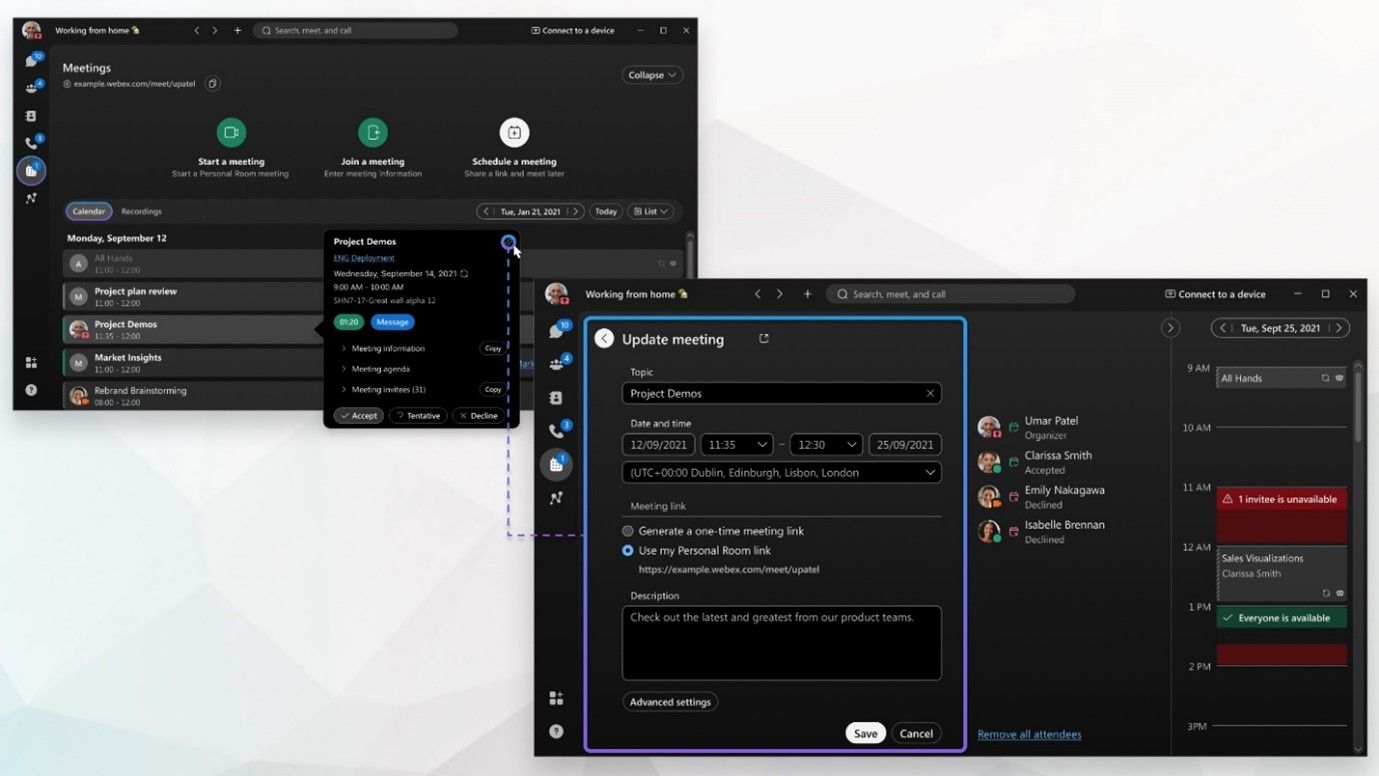
Step 1: Head over to the Meetings section.
Step 2: To see the meeting information, open your calendar and double-click on the meeting you want to view.
Step 3: You can also right-click the meeting and choose Edit from the menu that appears.
Step 4: I've updated the meeting information. The meeting will now take place on [new date] at [new time].
Step 5: You can choose to send the updated meeting invitation to all attendees, only the additional attendees, or skip sending an updated invitation altogether if you've added or deleted guests from the meeting.
Step 6 The App will send a revised meeting invitation to all participants, regardless of any changes made to the meeting details.
Important Note: To join a Webex meeting, others can invite you via email, and you will receive a meeting link and password. However, you will not be able to edit the meeting location if you are invited by others, as the meeting location is typically set by the host.
For Mobile Users
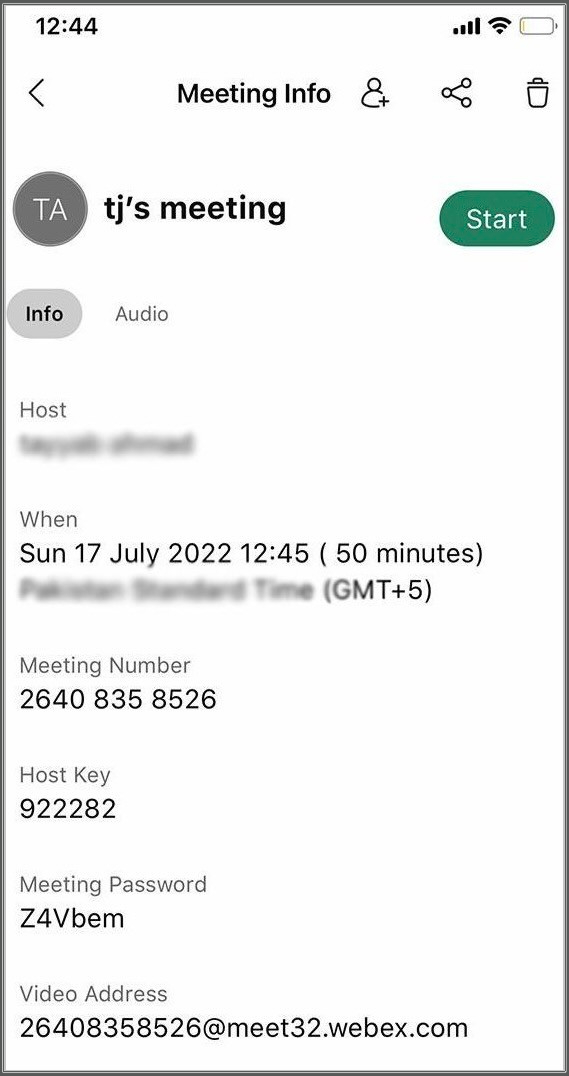
Step 1: Open the Meetings section in the Webex app.
Step 2: To view the details of a meeting on your calendar and make changes to it, tap the meeting to open its information page. From there, select the "Edit" option from the menu that appears, allowing you to modify the meeting's details as needed.
Step 3: Once you have made any necessary changes to the meeting details, tap the Update button to save the changes. This will ensure that the updated information is reflected for all guests who have been invited.
Bonus Tip: Transfer Webex App Between PCs
If you're moving your Webex application to a new computer, you may need to transfer your data from the old computer. Qiling Disk Master software can help you quickly move your data to the new location.
A PC transfer program that can automatically move files from one machine to another without data loss can be activated with just one click, making it easy to transfer photos, music, and movies without manually importing each file individually.
Users should not worry about losing their data, as Qiling PCTrans makes it easy to transfer data without altering or losing any of it, requiring no extensive technical expertise, and allowing users to safely recover data from inoperable PCs with just a few clicks.
Main Features of Qiling Disk Master:
- Move all of your files and configuration settings to the new computer.
- Using a straightforward Wizard interface and procedure, you can significantly reduce the time and money spent on PC reinstallation.
- Windows 11/10/8/7.
- Data Rescue is a software that helps recover information from a computer that has stopped working.
To transfer your Webex app to a new computer using this intelligent software, simply follow these steps.
Step 1. Run Qiling Disk Master on both PCs
On the source PC, select File sync on the main screen of Qiling Disk Master and proceed.

Step 2. Connect two computers
1. Select your target PC to connect via its IP address or device name and click "Connect" to establish a remote connection.
2. To access the target PC, enter the login password and click "OK" to confirm.
If you didn't see the target PC in the listed devices, you can manually add it by clicking "Add PC" and entering its IP address or device name.

Step 3. Select apps, programs, and software and transfer to the target computer
1. You can select and choose what you want to transfer from the current computer to the target PC, giving you control over the data being moved.
2. Select the desired applications and programs, then click "Proceed" to initiate the transfer process.

Conclusion
To change the location of a Webex meeting, follow these simple steps: first, log in to your Webex account and navigate to the meeting you want to edit; next, click on the "Edit" button; then, select the "Meeting Settings" option; after that, click on the "Location" field and enter the new location; finally, click "Save" to confirm the changes. You can also edit the meeting location while in the meeting itself, but only via the Webex application.
If you're looking to transfer old applications from one PC to another, use Qiling Disk Master to transfer applications without losing data. You can download it here to try it out.
Related Articles
- How to Move World of Warcraft to Another Drive/Computer
- Windows Easy Transfer for Windows XP, Windows 7, Windows 8, Windows 10, and Windows 11
- Transferring Installed Programs from One Computer to Another Windows 11/10 - Here Is the Best Way
- How to Transfer Database from One Server to Another (5 Ways)
- How to Back Up Alienware Laptop on Windows 7/8/10?
Find the best way to back up Alienware laptop in Windows 10, 8, 7 in case of data loss due to hardware failure, system crashes, etc. - How to Back Up Data from Hard Disk without OS?
If you want to back up data from hard drive without booting Windows, read this guide to get three effective methods.