How to Free Up C Drive Space Before/For Windows 11 Update
Running low on free drive space can be frustrating, as it prevents installing important updates or upgrading the Windows OS, ultimately affecting computer performance. While resetting the computer is an option, it may delete essential data. A better approach is to free up C Drive Space, which can be done before or after receiving a low free drive space notification, or even before installing the Windows 11 Update.
How Do I Free Up C Drive Space Before or For Windows 11 Update?
Cleaning out your PC before updating to Windows 11 is a good idea, as a low drive space can prevent you from installing the full version of Windows 11, which means you'll miss out on its latest features. If you don't have enough storage space, you'll receive a notification from Windows.
Check What Is Taking Up Space On Hard Drive?
- To check what's eating up your drive space, follow these steps: Start by checking your computer's storage usage by going to the "This PC" or "Computer" section, depending on your operating system. From there, you can see which files and folders are taking up the most space.
- Open the settings tab through the windows icon.
- Click on system options from the available one.
- To access the storage settings, go to the menu on the left side and tap on the storage option.

- Under the storage section, you can see what is taking up the most space in your hard drive.
- To view all the categories taking up the space, click on the "show more categories" option.
- You can go through each file type, check the files, and delete unnecessary temporary files to free up storage space.
- Now click on "view storage space on other drives" under the "More storage settings" tab.
- To check how a secondary drive's space is being utilized, click on the "Data" option. This will display a breakdown of all the storage usage by different files.
- To free up space on your hard drive, check each category in the disk usage analysis, such as the operating system, user data, and temporary files. Identify the largest consumers of space and consider deleting or compressing unnecessary files to reclaim space. Additionally, consider uninstalling unused applications and cleaning up temporary files to further free up space.
5 Ways to Free Up Disk Space Before or For Windows 11 Update
Clean-Up System Junk Files, Large Files, Transfer C Drive Programs with Qiling Disk Master
To clear desk space, remove junk files and unused files that take up ample space. Alternatively, transfer essential or unused files to free up storage space. Qiling, a software, can help with this process, offering features like app migration, system cleanup, large file cleanup, and app management. It can also transfer files for free using Qiling Disk Master, which provides three modes of transfer: network connection, image files, and local transfer. The software supports various Windows and applications, such as Adobe, Apple, and Zoom, and offers a free version and a paid version with a 30-day money-back guarantee. Downloading Qiling can be a helpful first step in clearing desk space.
Step 1. Open Qiling Disk Master on your computer. Click "System Cleanup" and click the "Scan" button to go on.
Step 2. When the scan is complete, a list of junk files will be displayed. Carefully select the unwanted files, being cautious not to delete essential files that could impact your computer's normal functioning or software operation.
Step 3. Click the "Clean up" button and confirm the cleanup operation to free up disk space. This can be done regularly to keep your disk space tidy.
Delete Windows Old Folder
- Follow the below steps to delete windows old folder
- Search for the disk cleanup tab through the windows icon.
- Click on the disk cleanup option from the available one.
- A small box will pop up, and then you can click on "clean up system files" to proceed.
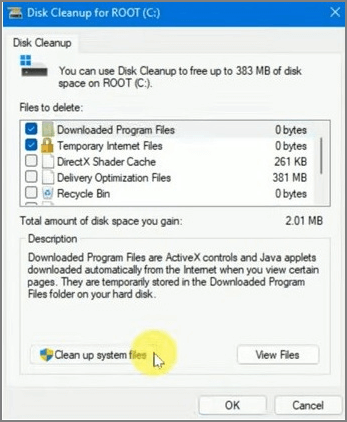
- Wait for a while until the internal processing is done on your system. After that, another box will pop up, which calculates the result.
- Now, wait for a while until the calculation process is completed. Then another new window pops up on the screen with the result.
- Scroll down through the present menu to find the previous Windows installation, then click on the square box next to it.
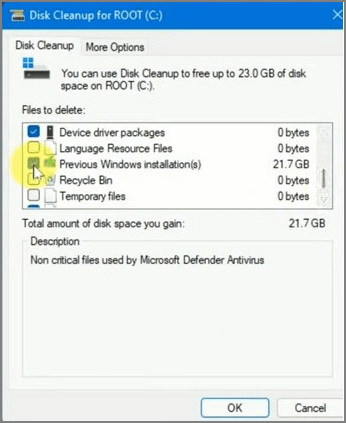
- Tap on the OK option present at the bottom of the page.
- Click on the option delete in the pop-up box.
- To delete an old folder, open the File Explorer, right-click on the old folder, and select the 'Delete' option. A window will open, asking for permission to delete the folder. Click on the 'OK' option to confirm the deletion. Wait for a while, and the old folder will be deleted.
- You can check your C-The "Old" folder option has been removed from the "This PC" section in Windows 10's File Explorer, and it can no longer be accessed from there. The "Old" folder, which was previously used to store previous versions of files, is now only accessible through the "Previous Versions" tab within the Properties window of a file or folder.
Use Windows Storage Sense
- Follow the below steps to use windows storage sense.
- Open the settings tab through the windows icon.
- Click on system options from the available one.
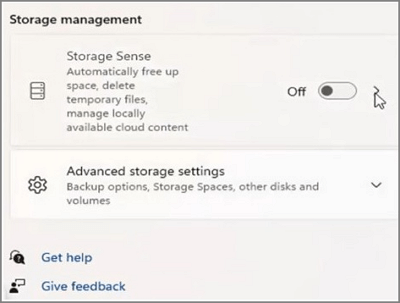
- To access the storage settings, tap on the "Storage" option from the menu that appears on the left side of the screen.
- Click on the Storage sense option under the storage management menu.
- To enable Automatic Content User Cleanup, open a new window, scroll down to find the option, and toggle it on.
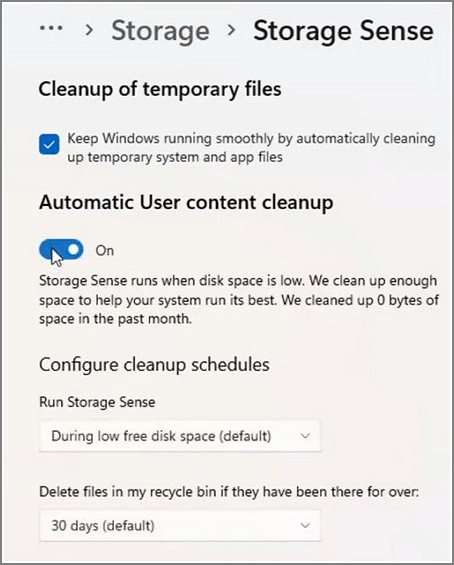
- Configure the cleanup schedules as per your priority, then click on the Run Storage Sense Now option.
- Wait for a while, and then it will be finished. You get a tick mark on the side of it once it is completed.
Use Clean Up System Files Using Disk Management
To clean up system files using disk management, follow the same steps as cleaning up the old folder, but instead select system files. Analyze and tick unnecessary files, then delete them by clicking "Clean up system files". Wait for the process to complete, and all unnecessary system files will be deleted.
Remove Temporary Files or Folder
- Deleting temporary files regularly can save you large storage space.
- To delete temporary files, go to the storage option in the settings tab.
- Now click on the temporary files option.
- You will see a menu of different categories of temporary files. Select all the types of temporary files you want to delete from this menu.
- Now click on the remove files option once you have selected the files you want to delete.
- Wait for a while, and all the temporary files will be deleted.
Tips to Avoid Low Disk Space Error in C Drive Windows 11/10
- Below are some useful tips for Windows users to avoid low disk space errors in Windows 11/10.
- Install big programs to a non-To free up space on your system drive, consider moving frequently used files and programs to a separate drive or partition. This can help declutter your system drive and save a large amount of space. Additionally, be mindful of the file size before installing any files or programs to avoid consuming too much space.
- Regularly clean up unused and unimportant files on the C drive, deleting them before they accumulate. Also, remove any unnecessary apps or software to free up space and maintain a clutter-free drive.
- Transferring or migrating the C drive to a local drive can save a significant amount of space. This process can be done using Qiling software, which is easy and simple to use, making it a convenient solution for users.
- The winsxs folder can be reduced in size without deleting its files, which is crucial for maintaining PC stability. This can be achieved by using Task Scheduler to compress the files within the winsxs folder, effectively reducing its size without compromising the system's integrity.
- Make only online one-Drive files as offline files generally take up more storage space on your PC than online files.
Conclusion
To free up C drive space before or for a Windows 11 update, start by analyzing the different files taking up storage space. Once you understand what's using up space, you can clear out unnecessary files at your convenience. You can free up C drive space using the five methods mentioned, and once you've maximized your storage, it's essential to manage it effectively. Regularly delete junk files and clean them up to maintain better storage space management in the future. By following these steps, you can ensure a smooth Windows 11 update process.
Related Articles
- HomeGroup Not Showing Up Windows 10/11? Share Files Without HomeGroup
- How to Transfer Files from PC to Xbox One on A New PC?
- How to Move/Switch from Internet Explorer to Microsoft Edge - Qiling
- Move GoTo Opener to Another Computer
- Get System State Backup of Windows 2012 R2 Domain Controller
You will learn how to create a system state backup and system backup of Windows Server 2012 R2 domain controller. The detailed steps are in each method. - Top 10 Ways to Fix Windows 7 Task Manager Not Responding
How to fix Task Manager not responding or opening in Windows 7? This guide will tell you 10 methods to fix the problem.