How To - How to Install and Run Windows 11 on USB
Microsoft Windows 11 has generated excitement among tech enthusiasts, offering a total display overhaul and user-friendly interfaces that provide a smooth experience. To install and run Windows 11, users can simply install and run it from a bootable USB drive, making the transition to this new operating system a breeze.
Creating a bootable USB drive is a manageable task with the right tool and time allocation. To install Windows 11, you must first confirm your computer can run it and ensure Secure Boot is enabled and your PC has TPM version 2.0.
To install and run Windows 11 from a USB drive, first create a bootable USB drive using the Rufus tool or Media Creation Tool, following the steps outlined in the article. Once you have a bootable USB drive, insert it into your computer and restart it. The computer should automatically boot from the USB drive.
How to Install and Run Windows 11 from a USB
You can install and run Windows 11 from a USB by creating a USB media with the aid of an existing Windows 11 ISO file, using non-Microsoft tools like Rufus and OS2Go. To do this, you'll need a USB drive with at least 8GB of allocated space, and then follow the steps to install Windows 11 from the USB. We'll outline two methods in detail.
Method 1. Download and Install Windows 11 with OS2Go
Step 1. The Windows11 builder is integrated with the Qiling OS2Go software, allowing users to download and launch the program after installation.
Step 2. WinToGo Creator has been renamed to Windows Install Drive Creator. This tool provides system information on its home screen, which updates in real-time. It supports creating installation drives for Windows 11, as well as Windows 10 and 8.1.
Step 3. To create a Windows 11 installation media, connect your USB flash drive to the computer. The Win11 builder will automatically detect your USB device, allowing you to simply click the "Create" button.
Step 4. If you're using a used USB drive, the software will erase its data. Once the download process starts, you can wait for it to finish or take care of other things while it runs.
Step 5. After successfully downloading the Windows 11 iso image file to a USB drive, you can proceed to install Windows 11 on your computer by following the installation wizard from the bootable USB drive. Simply follow the step-by-step process to complete the installation.
Method 2. Download and Install Windows 11 with Rufus
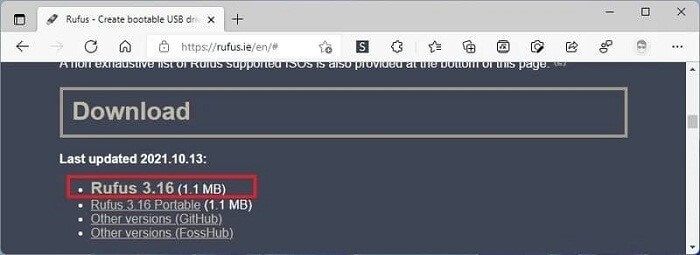
Step 1. To download Rufus, go to the Rufus download page and click the provided link to get the latest version of the software.
Step 2. Launch the tool by making a double-click on the Rufus-x.xx.exe file.
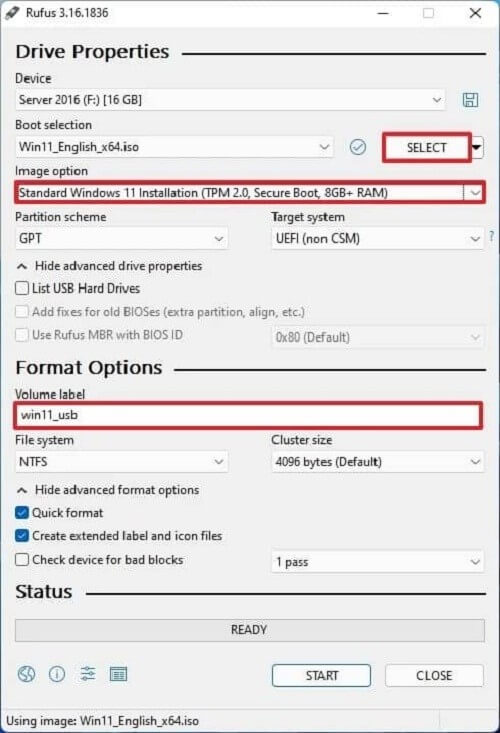
Step 3. In the Device option, select a USB flash drive, and under the Boot Selection section, click the Select button on the right side.
Step 4. Choose the Windows 11 ISO file in the folder and click Open. From the Image Options tab, select Standard Windows 11 Installation (TPM 2.0, Secure Boot, 8GB+ RAM) from the drop-down menu.
Step 5. To configure the partition scheme, select GPT from the Partition Scheme dropdown menu and UEFI (non-CSM) from the Target system dropdown menu. This will ensure that the operating system is installed in a format that is compatible with UEFI firmware.
Step 6. For the "Show advanced drive properties" section, let the settings remain at default, unless you have specific knowledge to make changes.
Step 7. In the Volume label section, create a name for the bootable media, such as win11_usb.
Step 8. Under the File system and Cluster size, make no changes to the default settings.
Step 9. To access the advanced formatting options, go to the "Show, advanced format options" dropdown menu and select the boxes next to "Quick format" and "Create extended label and icon files".
Step 10. Now click Start and OK from the pop-up window to confirm. Finally, click Close.
Once the process is completed, Rufus will create a USB drive to install Windows 11 on a compatible PC.
How to Run Windows 11 from a Portable USB
A portable USB drive allows you to install and run Windows 11 on any compatible device, and is easily carried and used everywhere, functioning as an additional hard drive for your laptop.
You can easily create a portable and bootable USB drive for Windows 11 using a popular Windows To Go creator like Qiling OS2Go, which is compatible with the Windows 11 OS and allows you to run Windows 11 from a USB drive.
Advantages of Portable Windows 11 USB
A portable Windows 11 USB offers numerous benefits, including the ability to install Windows 11 on multiple computers, create a backup of your current system, and have a spare operating system in case of a hardware failure. Additionally, it allows you to test Windows 11 on different machines without affecting their original operating systems, and provides a convenient way to restore your system to a previous state if needed.
- Additional storage space to store your whole virtual workstation.
- Online safety is crucial to protect against various threats, including bugs, internet viruses, and compromised online activities.
- Mobility and portability.
- Extra security and easy installation of Windows.
To create a portable USB with Qiling OS2Go, download and install it on your PC, then follow the guidelines to create a portable USB drive with the used space displayed on your system drive.
Step 1. To install Qiling OS2Go, plug in a USB drive larger than your system drive's used space, then select the target USB drive and click Next to continue.
Step 2. Qiling OS2Go will notify you that the following operation would delete all data on your drive. Make sure you have backed up all important data, then click Continue to proceed.
Step 3. The disk layout on the target drive will be identical to the resource drive, but can be adjusted to suit your needs. If using a Solid State Drive as the Windows bootable drive, select the corresponding option and click Proceed.
Step 4. Qiling OS2Go will start to create the portable USB drive, which may take a while depending on your OS and network condition. Once the progress reaches 100%, the USB drive will be bootable.
Step 5. To boot from a portable Windows USB, start your computer, press the required key (F2, DEL, F10...) to access BIOS, and choose to boot from the USB disk.
Note: Make sure the portable USB and your target computer have the same boot mode, either UEFI or Legacy, to ensure booting is possible.
Rufus and the Windows Media Creation Tool are two popular tools used to create bootable USB drives, but they have some key differences. The Windows Media Creation Tool is a free, official tool provided by Microsoft that allows users to create bootable USB drives for Windows installation, as well as create a recovery drive. On the other hand, Rufus is a free, open-source tool that offers more advanced features, including the ability to create bootable USB drives for various operating systems, including Windows, Linux, and macOS.
While the Windows Media Creation Tool is limited to creating Windows bootable USB drives, Rufus offers more versatility, allowing users to create bootable USB drives for a variety of operating systems. This comparison highlights the key differences between Rufus and the Windows Media Creation Tool.

Conclusion
Windows 11 can be installed and operated quickly using an external hard drive, such as a portable USB drive. A guide is available to create a Windows 11 bootable USB drive, and the Qiling OS2Go software can be downloaded for additional benefits.
Related Articles
- 3 Steps Done All: How to Install Windows 11 on Any PC
- How to Play Windows Games on Mac via A Portable Windows USB
- How to Copy Installed Windows 11 to USB as Portable
- Rufus vs. Qiling OS2Go: Should I Create a Bootable or Portable USB?
- Tested Solutions to No System Recovery Options in Windows 10/8/7
If you see no system recovery options available when you boot into Recovery Mode, you can find a solution to fix it. - Solved: Lenovo NOVO Button Not Working in Windows 10, 8, 7
NOVO button not working for system recovery in Windows 10, 8, 7? Find solutions here and get better way to perform Lenovo system recovery.