Ultimate Guides on How to Move iCloud to A New Computer [2022]
Overview
iCloud allows users to save essential items like pictures, contacts, calendars, movies, and mail, providing a cloud storage service. This enables users to access their stored files remotely from any location, making it a great alternative for backing up data and freeing up local storage space.
You can access your photos, movies, calendar, files, and other important data on your Windows PC using iCloud for Windows, after setting up iCloud on an iPhone, iPad, iPod touch, or Mac.
To free up space on your iCloud account, you might consider transferring some files to your PC, as iCloud only offers 5GB of free storage. This can be a good opportunity to create backups of your data in case of loss, and it's also a good idea to only store important files on your PC.
Easy Way to Move iCloud to Another Computer
You can easily transfer your iCloud account data to another PC without any data loss, thanks to the powerful tool Qiling Disk Master. To get started, simply install the program on both PCs.
Qiling Disk Master allows you to transfer personal data and PC settings to a new computer, including large files or apps, without worrying about size limitations.
Features
- Using a cloud storage service allows you to easily transfer files to a new computer by copying and pasting them, saving time and energy.
- Transfers all types of files, including programs, software, applications, and games, to a new PC.
- No data loss and no false operation would occur.
- Support for transferring files without the network.
- Compatible withWindows 11/10/8/7.
Functions
- It allows for the quick transfer of apps and settings to a new computer.
- The tool can easily recover data from a non-bootable or dead computer, making it a valuable asset for those who need to retrieve important information.
- Anyone can easily use and transfer data without needing prior technical knowledge.
To move iCloud to another computer using Qiling Disk Master, follow these steps: (insert steps here).
Step 1. Open Qiling Disk Master on both of your computers. Choose "File sync" to proceed.

Step 2. Connect two PCs via the network by entering the password or verification code of the target PC, choosing the right transfer direction, and clicking "Connect" to continue.
The verification code is displayed on the right side of the main screen for "File sync" on the target computer.

Step 3. To transfer files, select "Files" and choose the specific files you want to transfer. You can also edit the storage path for the transferred data by clicking the Edit icon.

Step 4. The process of transferring files from one PC to another involves clicking the "Proceed" button to initiate the transfer. The time taken for the transfer depends on the size of the file being transferred, and it is recommended to be patient during this process.
If you're looking to transfer files from iCloud to an external hard drive, you may find the information below helpful.
Transfer Files from iCloud to External Hard Drive [Ultimate Guide]
Transferring files from iCloud to an external hard drive is a great way to make a backup. You can easily achieve this by following the methods outlined in our article, which provides step-by-step instructions on how to do so. This will help you safely store your important files on a physical storage device, giving you peace of mind and ensuring that your data is protected in case of any technical issues or data loss.
Copy iCloud Files to Your New Computer
Here are the methods to transfer files from your old PC to your new computer after downloading files from iCloud:
Method 1. Use Windows Migration Assistant
You can still use the Migration Assistant software on your Mac if you're moving from Windows, but you'll also need to download the Windows Migration Assistant for your Windows PC. Also, confirm that both computers are plugged into a power source and are linked with the same Wi-Fi network.
To transfer files from a Windows computer to a Mac, follow these steps: use a USB drive or cloud storage (such as Google Drive or Dropbox) to move files from the Windows computer to the Mac, or use a file transfer service like Microsoft's OneDrive or Apple's iCloud to transfer files directly between the two computers, or use a third-party file transfer software like FileZilla or Transmit to transfer files.
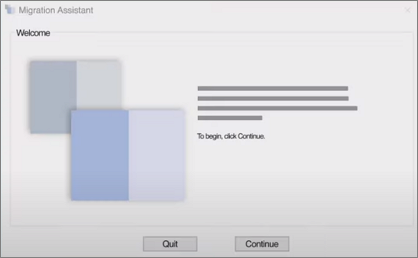
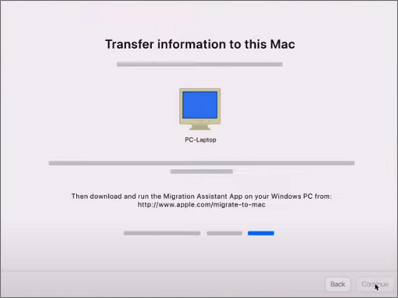
Step 1. On your Windows, open the Windows Migration Assistant application. Click ''Continue''.
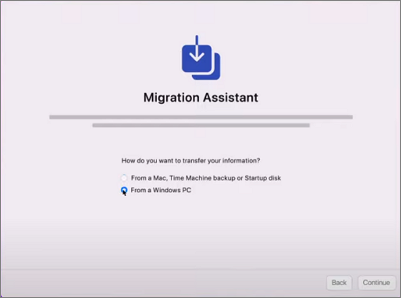
Step 2. To start the migration process, open the Migration Assistant software on your Mac, found in the Applications folder. Select the "From a Windows PC" transfer option to proceed.
Step 3. From the list of available computers, pick your Windows computer.
Step 4. Your Windows and Mac computers should now display a security code. Click "Continue" after ensuring the code is the same on both displays.
Step 5. To transfer files, data, and settings from your old Windows PC to your new Mac, follow these steps: First, select the items you want to transfer, such as files, folders, and settings. Click "Continue" after selecting each item.
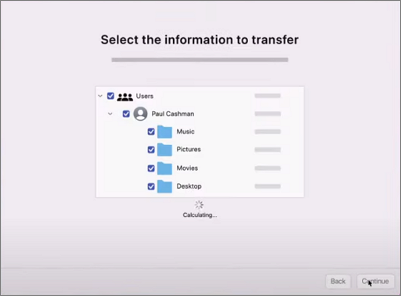
The Windows Migration Assistant will copy all your chosen files to your new Mac, starting the process of migrating your data to your new device.
Method 2.Through File Sharing
Here are the steps to transfer files between two Macs using file sharing:
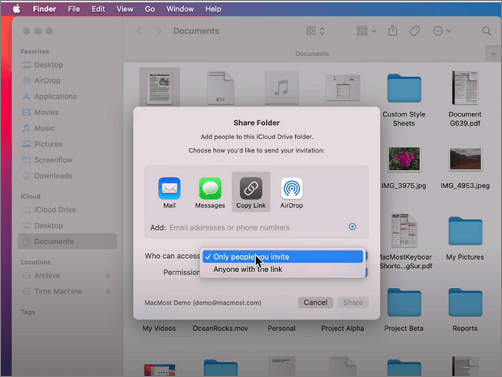
Step 1. To share a file, go to the Finder bar, click on "File", and select "Share". From the dropdown menu, click on "Share File".
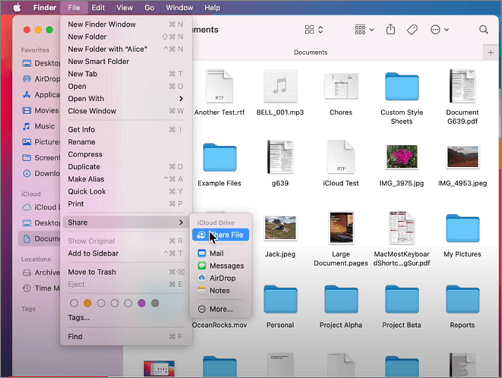
Step 2. In the next window, select how you want to share the file.

Step 3. To share a file, enter your username and password if prompted, set the desired permission, and then click the "Share" button.
You can now transfer files between your Macs using the drag and drop method, thanks to the connection between them.
Method 3. Take Advantage of Dropbox
Here are the steps to move files from one computer to another using Dropbox:
Step 1. Drag a file into your Dropbox account.
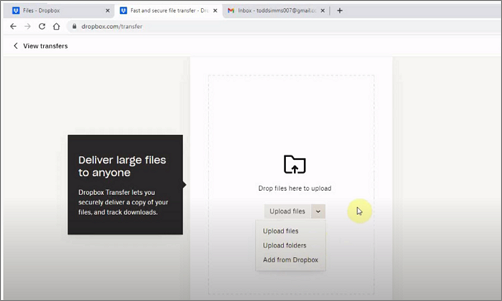
Step 2. Dropbox servers will receive the file, and the person you select to share it with will be able to download it from the servers and save it to their local computer.
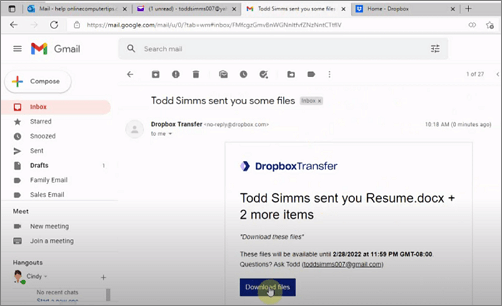
When exchanging files with others over long distances, using a cloud storage service like Dropbox can be a convenient and efficient way to transfer files. However, when transferring files between two nearby PCs, using Dropbox servers can be excessive and introduce unnecessary delays due to upload and download times.
Method 4. With the help of External Drive
In such cases, where a live Internet connection is not feasible or desired, alternative methods for accessing and managing content can be employed. These alternatives often rely on caching content locally, either on a device or on a separate storage medium, to bypass the need for a live internet connection. This approach can be particularly useful for situations where internet access is unreliable, speeds are slow, or usage limits are restrictive, allowing users to still access and utilize content without incurring additional internet-related costs or waiting for content to download.
If you're unable to transfer files over the internet, you can use an external hard drive to move them instead. To do this, first, connect the external hard drive to your computer. Then, copy the files you want to transfer from your computer to the external hard drive.
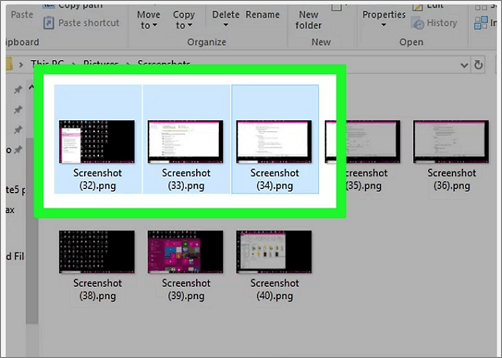
Step 1. Connect your external drive to your old computer. It will appear in the "This PC" section.
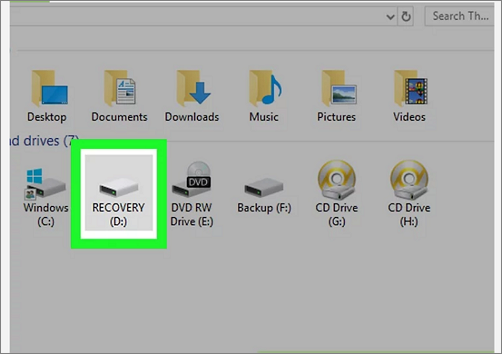
Step 2. Select the files and copy these files.
Step 3. Paste files to the Hard Drive.
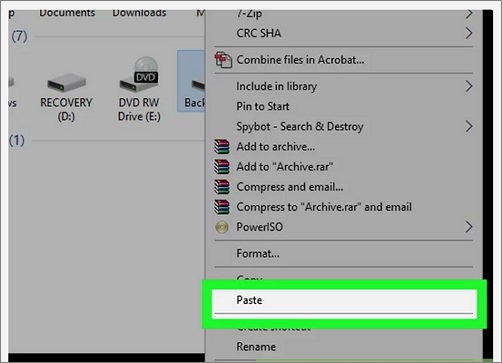
Step 4. Connect your external hard drive to a different computer, then copy and paste the files you want to transfer from the old computer to the new one.
After analyzing every method, we can help you compare and short-list the easiest one. Using Windows Migration Assistant and File Sharing can be lengthy and frustrating, requiring many steps. On the other hand, buying an external hard drive could be costly if you don't already have one.
Qiling Disk Master is a simple and easy-to-use tool that works perfectly without data loss, and it can also function offline if needed.
Sync iCloud Files to Your New Mac
To set up iCloud Drive on a Mac, first create an Apple ID if you don't already have one. Once you have an Apple ID, setting up iCloud Drive is a simple process that involves syncing your iCloud files to your new Mac. Follow the steps to complete the setup.
Step 1. Sign into Apple ID.
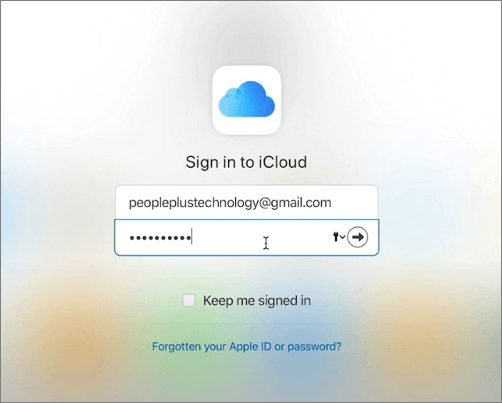
Step 2. Verify the code.

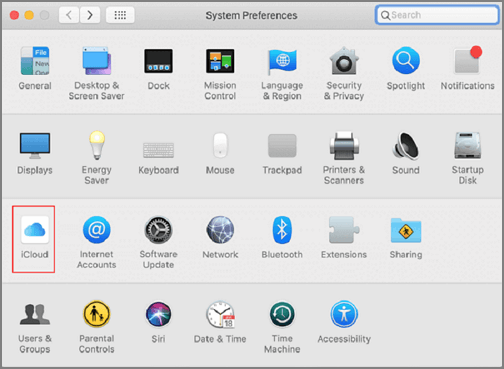
Step 3. To enable iCloud Drive on a Mac, simply sign in with your Apple ID and check the box next to iCloud Drive. This will allow you to access and store files in iCloud Drive.
Step 4. You are synced and your files will start showing.
Conclusion
To move your iCloud data to a new computer, you have four methods to choose from, each with its own instructions. However, the easiest and quickest method is using Qiling Disk Master, which allows you to transfer files without losing any data and doesn't require a network connection. This method is particularly convenient and worth trying.
FAQs on Move iCloud to ANew Computer
Here are the top concerned questions and answers in one paragraph:
1. Does iCloud transfer everything to a new Mac?
Any files, photos, and other images created or edited by an iPad, iPhone, or Windows system that are stored within iCloud become instantly available to a new Mac, once mated to the same iCloud account.
2. How do I import everything from iCloud?
To transfer data from your old iPhone to your new one, start by checking your iCloud backup on your old phone. Then, go to your iCloud settings, tap it, and select "iCloud Backup" to back up all your data. Next, set up your new iPhone and it will automatically prompt you to continue from your old phone. Choose "Download from iCloud" to restore your data, which may take some time. Once complete, you can finish the regular setup process on your new iPhone.
3. Can I download all my iCloud photos at once?
To select all iCloud photos, press and hold the Shift + Ctrl + Alt keys, then press the Down Arrow key. Alternatively, scroll down to the bottom of the page and click on the "Last Photo" option. Once all photos are selected, click on the "Download" button to start the process of downloading all iCloud photos to your computer.
4. How do I download an iCloud backup?
To recover an iCloud backup, start by opening your reset program and logging into iCloud through its interface. This will present you with a list of your available iCloud backups, from which you can select the one you want to recover. Once selected, download the backup file.
Related Articles
- How to Transfer Games to an External Hard Drive | Game Moving Tool
- The Quickest Way to Transfer Data from One Windows Server to Another
- How to Move Diablo III 3 to Another Drive/PC Without Re-downloading
- How to Move Installed Programs to Another Drive in Windows 11
- Best Bootable USB Drive Creator Tool for Windows [2022 Update]
If you're looking for a reliable tool to create a bootable USB drive for Windows, we've reviewed the top options and recommend checking out Qiling Backup, Qiling OS2Go, Rufus, UUByte ISO Editor, and Passcape ISO Burner - each offering a unique solution to suit your needs. - For Business of All Sizes: A Solid Way for Business Data Backup
Protect your business against all potential threats and safeguard your data with our innovative business data backup tool. Click now to learn more.