NVMe vs SSD: Is NVMe Faster Than SSD?
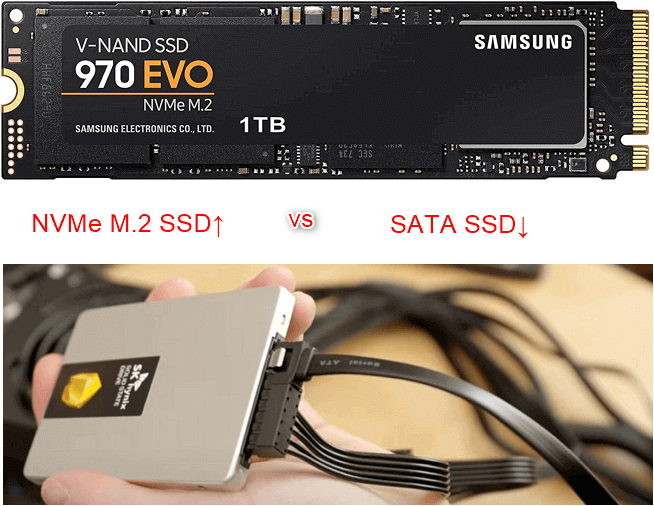
The Solid State Disk (SSD) has significantly improved since its initial release. Besides traditional SSDs, newer types like NVMe SSD and M.2 SSD are commonly mentioned. However, it's worth noting that M.2 is actually a connector type, not a type of SSD. Traditional SSDs should be referred to as SATA SSDs due to their use of a SATA connector and cable. In contrast, M.2 SSDs have a direct connector to the motherboard, eliminating the need for a cable. If your motherboard has an M.2 connector, you can simply connect your SSD directly to it.
When comparing NVMe vs SSD, users are actually looking to contrast NVMe M.2 SSDs with SATA SSDs. This article will compare the two from the perspectives of size, connector, speed, and price.
What's the Difference Between NVMe M.2 SSD and SATA SSD?
In this part, we'll briefly highlight the differences between the two SSDs, making it easy for novice users to make a quick decision after reading this content.
Size
NVMe M.2 SSD: A 22mm wide rectangular SSD, specifically NVMe M.2 SSDs, vary in length from 30mm to 110mm, with common sizes being 42mm, 60mm, and 80mm, typically used in laptops.
SATA SSD: There are two types of SATA SSDs: 2.5 inches and 3.5 inches. The larger SATA SSDs, typically 3.5 inches, are primarily used in desktops due to their size.
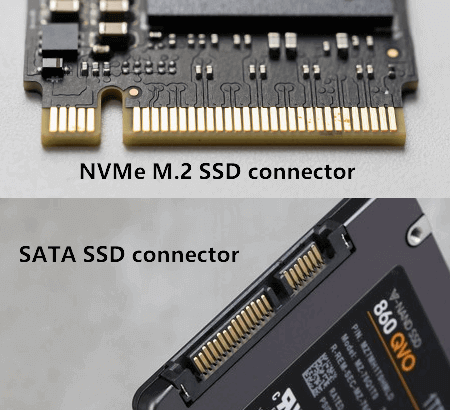
Connector
The NVMe M.2 SSD and SATA SSD differ in their connectors, with NVMe M.2 using a specific M.2 connector and SATA using a traditional SATA connector. This difference can be seen in the picture below, and users can check their motherboard to determine which type of connector it has.
Speed
The advantages of NVMe M.2 SSDs lie in the NVMe transmission standard and M.2 interface, which enable extremely fast transmission speeds. In contrast, SATA SSDs rely on the AHCI transmission standard, requiring 8000 CPU cycles and a 2.5μs delay per command, making NVMe M.2 SSDs significantly faster.
NVMe M.2 SSDs run about twice as fast as SATA SSDs, making them a good choice for gaming and large software applications that require high running speeds. If your computer's motherboard has an M.2 interface, opting for an NVMe M.2 SSD can be a good investment.
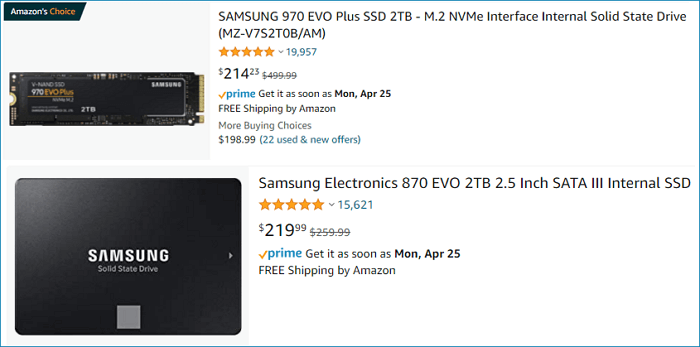
Price
Initially, NVMe M.2 SSDs were significantly pricier than SATA SSDs due to their superior performance and speed. However, with advancements in technology and increased competition, the price gap between the two has narrowed, and they are now relatively comparable in terms of cost.
When shopping for an SSD on Amazon, you'll find that the price difference between a 2 TB NVMe M.2 SSD and a SATA SSD is only a few dollars. If your computer's motherboard has an M.2 connector, choosing the NVMe M.2 SSD would be the better option.
How to Clone from SATA SSD to NVMe SSD?
The comparison suggests that NVMe M.2 SSDs are now a better choice than SATA SSDs. If you want to upgrade from a SATA to an NVMe SSD without losing data, cloning the disk is the best approach. Cloning creates an exact copy of the data and partition of the source disk to the target disk, allowing the target disk to boot successfully if the source disk contains a system partition.
To clone one SSD to another, you'll need to connect both the source and target SSDs to a single computer. If using a desktop, you'll need to open the main case with a screwdriver to install both SSDs, while laptop users will need a USB adapter to connect the two SSDs.
To clone a SATA SSD to an NVMe SSD, you'll need a cloning software, such as Qiling Backup, which is designed for both backup and cloning. This tool is highly acclaimed for its good clone quality, saving users time and energy. Its simple and smooth operation makes it easy to get started, and can be downloaded from the provided button.
Step 1. Connect the New Second Hard Drive to the PC
Preparations before cloning start:
1. To connect the target disk to your PC, you may need a screwdriver, a Power Splitter Adapter Cable, a SATA cable, or a USB to SATA adapter, among other possible tools.
2. Make sure the target HDD/SSD has an equal or bigger capacity than the used space of the old drive, so that the data can fit into it without any issues.
3. If the new disk's style is different from the old disk's, initialize the new HDD/SSD to either MBR or GPT to match the old disk's style.
3. Download a Disk Cloning Tool – Qiling Backup

Qiling Backup is a cloning software that integrates multiple functions, including, etc. In the disk clone field, this tool stands out due to its exceptional capabilities.
- Support system/disk clone, backup, restoring , and system transfer.
- Disk cloning software enables users to copy an entire disk, including the operating system, programs, and data, to a new hard drive. This can be useful for upgrading to a larger drive, creating a backup, or replacing a failed drive.
- Disk cloning has the highest success rate among all similar products on the market.
- This software supports a wide range of disk types, including IDE, EIDE, SATA, ESATA, ATA, SCSI, iSCSI, and USB 1.0/2.0/3.0.
- Supports cloning of basic/dynamic disks and MBR/GPT disks.
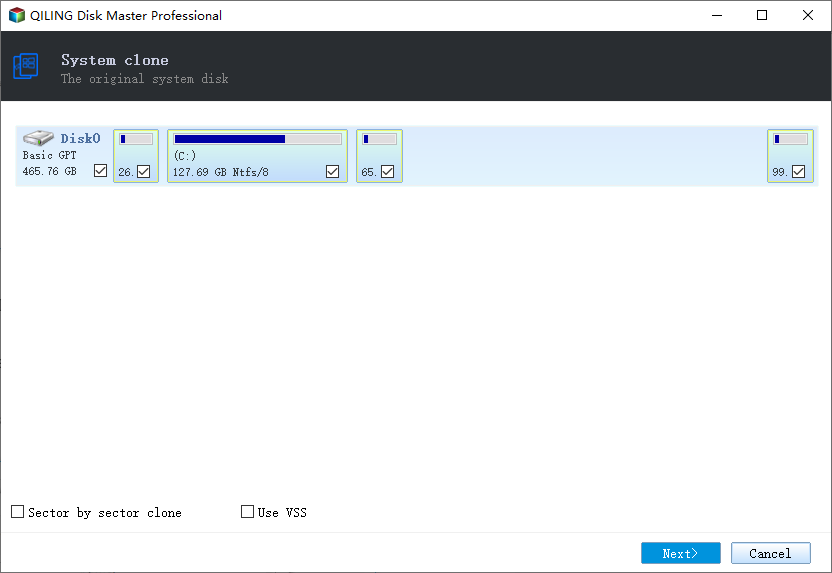
Step 2. Step by Step Guide
System Clone: To clone your system, go to System Clone, select the destination disk, and click Next to start. Optionally, in Advanced options, you can choose to create a portable Windows USB drive to clone the system to a USB drive.
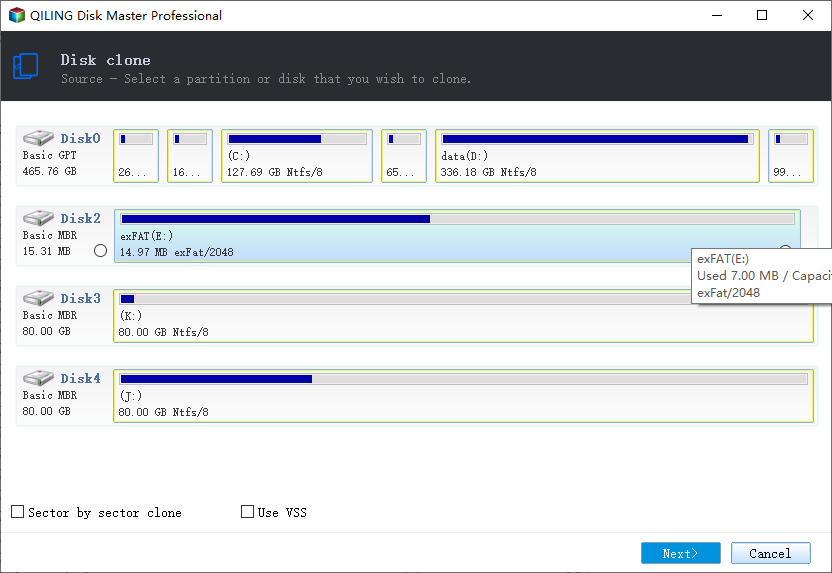
Disk/Partition Clone: To clone a resource disk or partition, select Clone, then choose the resource disk or partition, followed by the target disk. Click Next to initiate the cloning process.
Step 3. Boot from the Clone Hard Drive
Case 1. If you want to keep both the old disk and the new disk
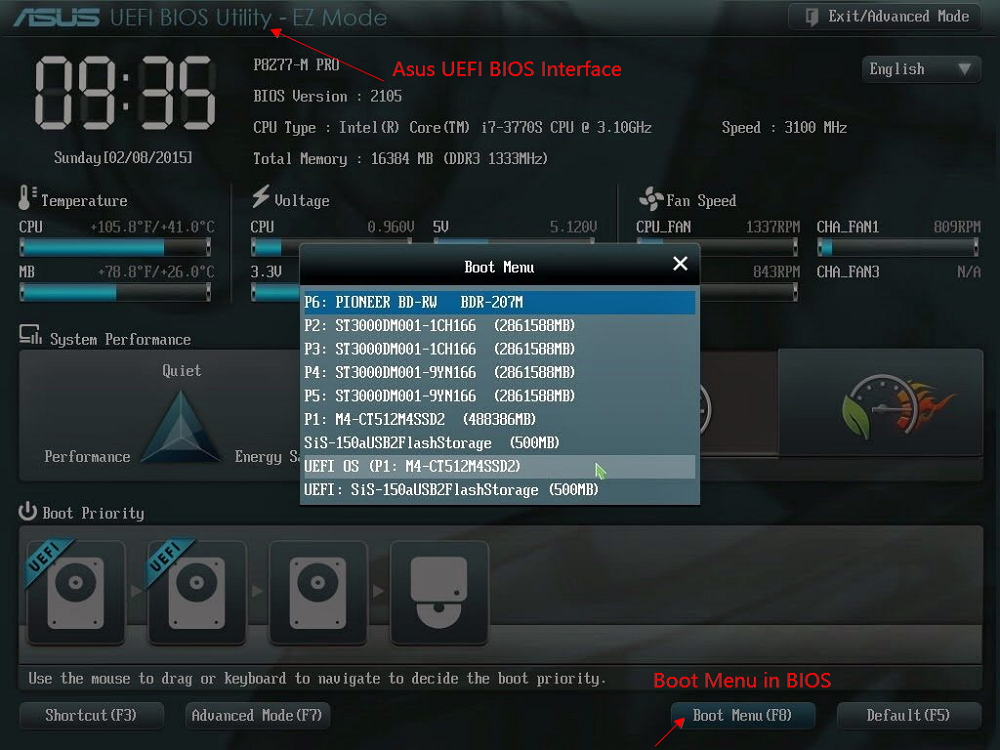
- To enter the BIOS settings, restart your PC and press the corresponding key (usually F2, F8, F10, or DEL) during the boot process. This will allow you to access and configure the basic input/output system settings.
- To set up a new hard drive or solid-state drive as the boot drive, navigate to the Boot option and choose the new HDD/SSD as the primary boot drive.
- Exit BIOS and restart the computer.
Case 2. If you want to only keep the new disk
- Unplug the old disk and ensure the new disk is properly connected.
- To connect a new disk and ensure it can be detected by the computer, first, physically connect the disk to the computer using a USB cable or through a SATA port if it's an internal drive. Next, restart the computer to ensure the system recognizes the new disk.
- Restart your computer.
Wrap Up
If you're unsure which SSD to get, consider what matters most to you. If you prioritize compatibility with your existing hardware, a SATA SSD is a good choice since it uses the same connector as older Hard Drive Disks (HDDs), making it easy to connect to both old and new motherboards. On the other hand, if you want the latest technology with faster speeds, smaller size, and relatively lower cost, a NVMe M.2 SSD is the way to go, especially if your motherboard has an M.2 connector.
To clone a SSD, follow the guide in this article carefully to avoid data loss.
Related Articles
- Exclusive Tips for How to Reset Lenovo/HP/Acer Laptop
- Stop OneDrive Backup in Windows 11
- Ultimate Guide: Windows 11 ARM Download with ISO
- The Settings You Should Change in Windows 11
- How Do I Replace My Hard Drive and Keep Windows License?
Do you want to learn how to replace a hard drive while keeping your Windows license? This page explains how to use a powerful disk cloning program to clone a hard drive to a new one without losing anything, even your Windows license. - How Do I Save Game Data while Updating the Game?
If you are a game player, you will know that games are always under updating. Then, how to make sure you won't lose data during this process? The best way is to make a backup for your games. You can find the answer fo how to save game data while updating the game here.