Transferring and Migrating Microsoft Visual Studio 2010 Tools to a New PC
Microsoft offers a wide range of applications to cater to various user needs. For web developers, Visual Studio 2010 is a valuable tool. Before transferring the application to another PC, it's essential to understand what Visual Studio 2010 is and why migration is necessary. This knowledge will help users make informed decisions and ensure a smooth transfer process.
Part 1: What is Microsoft Visual Studio 2010?
Microsoft Visual Studio is a development environment that allows users to create computer programs, websites, web apps, web services, and mobile apps. It supports various software development platforms, including Windows API, Windows Forms, and Windows Presentation Foundation, and can produce both native and managed code. The application's code editor features IntelliSense, a feature that provides code completion and suggestions.
The application supports 36 different programming languages and offers a code editor and debugger, making it a practical tool for various programming needs. It is available for free, with an optional paid upgrade, and can be installed from the Microsoft Store on both Windows and Mac operating systems.
Part 2: Why Is It Important to Transfer Microsoft Visual Studio 2021 from one PC to Another?
The application is well-suited for developers, allowing them to set up new sites and support various programming languages. However, there may be reasons to transition to Microsoft Visual Studio 2010, such as the need to transfer the application to another PC.
The reasons might be different and sometimes situational. They are:
- If you suspect your computer hard drive is corrupted and not responding properly, try booting in safe mode, checking for disk errors, and running a disk check. You can also try running a virus scan to rule out malware, and consider backing up your data to an external drive or cloud storage.
- You need to upgrade your system and migrate the application to improve performance.
- You're planning to buy a new PC and want to shift all your programs to the new PC, including Visual Studio.
- If you want to factory format your PC, you need to shift all your documents and folders, including effective programs with which you work daily.
The above-You might encounter a situation where you need to transfer Microsoft Visual Studio 2010 tools to another PC. This process can be beneficial, offering advantages such as:
- A new PC can provide better performance, allowing Visual Studio to run smoothly without any issues.
- The program has been upgraded to produce better results, allowing users to develop websites, applications, and other technical projects more effectively.
- Upgrading the system version can make the program run faster.
- The new upgraded PC allows users to work with various programming languages using the tool, providing a versatile and efficient computing experience.
Transferring an application to another PC can be beneficial, but it requires professional guidance and a specialized tool to avoid any issues or mess.
You can transfer Microsoft Visual Studio 2010 to a new PC using one of three methods. To migrate the program, you can use the "Migrate" option, which allows you to transfer your settings, extensions, and other data to the new PC. Alternatively, you can use the "Install" option, which will reinstall the program on the new PC, but you'll need to reconfigure your settings and extensions.
List out the possible ways to transfer the application:
- Qiling Disk Master tool
- Via CD/DVD burn
- Via USB ( Visual Studio Projects)
Let's learn all three methods and pick the easiest one to perform the task. If you know the details and know-how to do it, it'll be easy for you to follow. Just keep your eye on it.
Method 1. Transfer Microsoft Visual Studio to New PC with Qiling Disk Master

Qiling Disk Master can be a great option to transfer Microsoft Visual Studio 2010 to a new PC, allowing for a smooth and efficient setup on the new device. The tool's capabilities extend beyond transfer, enabling the migration of personal data, account settings, and even data recovery from broken or dead computers using its advanced data rescue recovery technique.
With the help of Qiling Disk Master, you can migrate and retrieve any data from anywhere, making it a potent tool for data migration, including applications and programs, from one PC to another.
The tool helps in the transferring process by providing a structured and organized approach to the task, making it easier to manage and complete. It streamlines the process, reduces errors, and saves time, allowing the user to focus on other important tasks.
How to transfer Microsoft visual studio 2010: Step-by-step guide
Qiling Disk Master would help you transfer the application from one PC to another. Here are the steps:
Step 1. Run Qiling Disk Master on both PCs
To transfer data from one PC to another using Qiling Disk Master, follow these steps on the source PC: On the main screen, select "PC to PC" and proceed.
Step 2. Connect two computers
1. Connect to a PC via its IP address or device name by selecting the target PC and clicking "Connect".
2. To confirm the login password of your target PC, enter the password and click "OK".
If you didn't see the target PC in the listed devices, you can manually add it by clicking "Add PC" and entering its IP address or device name.

Step 3. Select apps, programs, and software and transfer to the target computer
1. You can choose and select what you want to transfer from the current computer to the target PC, giving you control over the data that's being moved.
2. After choosing the desired applications and programs, click "Proceed" to initiate the transfer process.

Your new PC is now ready with Microsoft Visual Studio 2010 installed, allowing you to start working on your application at any time.
The benefits tips to using the Qiling Disk Master tool are as follows:
The tool is a multi-Qiling Disk Master is a tool that allows for efficient data transfer and can perform any data transfer operation. With its help, users can easily transfer data from one device to another. The advantages of using Qiling Disk Master include its ability to perform any data transfer operation, making it a versatile tool for various data transfer needs.
- Data transfer from PC to PC
- You can migrate local applications
- You can transfer essential files via image files
- Can recover data from dead PC
- The software has a simple and user-friendly interface, making it easy to navigate and use. It is also compatible with all the latest and previous Windows versions, ensuring that users can run it smoothly on their computers, regardless of the operating system they are using.
It's a high-This end tool offers a wide range of versatile functions, making it an essential asset for working professionals. With its user-friendly interface, you can easily perform various tasks, including data transfer, within a few clicks, making your work experience more efficient and streamlined.
Method 2. Transfer the Visual Studio 2010 via CD/DVD burn
To transfer a file from one PC to another PC, you can use a USB drive to move the file. Simply insert the USB drive into the first PC, copy the file to the USB drive, then insert the USB drive into the second PC and copy the file.
To install SQL Server Express, download the stand-alone ISO package and install it. Once installed, follow the steps to complete the setup process.
Step 1: Insert a CD or DVD into the drive
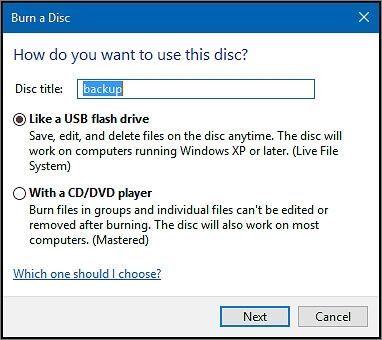
Step 2: Select the burn option and select the Visual Studio. All items
Step 3: Once you tap on the Ok button, it will burn all the necessary files, completing the process.
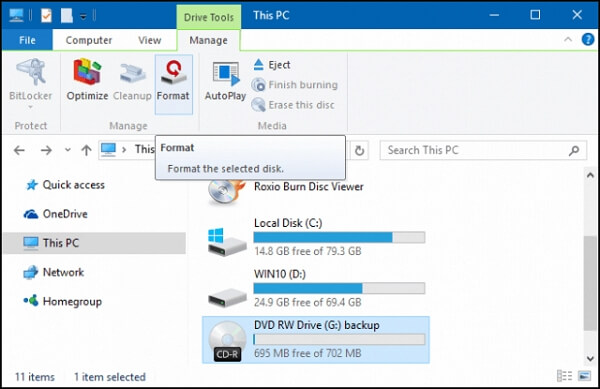
Once you've completed the process, you can use the CD/DVD for further installation on another PC.
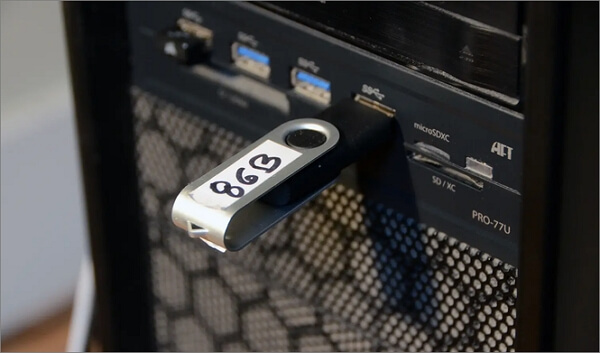
Method 3: Transfer the Visual Studio Projects via USB
You can transfer Visual Studio projects using a USB port, but ensure the USB has enough storage to hold project files and transfer them to another PC as needed.
Let's learn how you can transfer the visual studio project from one PC to another.
Step 1. Open your PC documents
Step 2. Click on Visual Studio projects
Step 3. Choose the Project folder you want to copy
Step 4. Click on the Copy option and copy the entire folder
Step 5. Next, paste the folder to a USB drive
Once you have all the project details files on your USB drive, you can transfer them to another PC whenever needed. Alternatively, you can store all these files on the USB drive and use them wherever you go, carrying the drive with you. This makes it easy to access and work on your projects from anywhere.
Part 3: Conclusion
Migrating Visual Studio 2010 can be a breeze if you choose the right tool and follow a straightforward process. We recommend using Qiling Disk Master, which allows you to transfer Visual Studio 2010 tools and move the entire application from one PC to another with ease. This makes it ideal for developers, and the workflow will only get better on a new and upgraded PC.
Related Articles
- [Easy and Fast] How to Transfer Everything to a New Laptop
- How to Locate or Find Large Files in Windows Server 2022/2019/2016
- Can I Transfer Installed Programs to SSD without Reinstallation in Windows 11
- How to Move Microsoft Teams to Another Drive
- How to Transfer Minecraft Worlds from PC to PC
Transferring Minecraft worlds from one PC to another can be easily done using the easiest method, which involves exporting the world as a .world file and importing it on the new device. Alternatively, you can also manually copy the Minecraft world files from the original PC to the new one, but this method requires more technical expertise. - How to Transfer User Account and Profile from Windows 7 to Windows 10/11
Transferring user accounts from Windows 7 to Windows 10/11 can be a seamless process with the right tool. Qiling Disk Master can help with this task, making it easy to transfer user profiles, settings, and data across multiple computers, eliminating the need for manual data migration and making the process much simpler.