Repair and Recover Your Corrupted SD Card on Mac
With the increased memory of tablet computers and mobile phones, digital cameras have become the most common portable devices using SD cards as storage devices. Data loss from SD cards can occur due to accidental deletion or formatting, but it's often more challenging to recover data from a corrupted SD card, as the computer may not recognize it. However, there are still ways to attempt data recovery, and in this article, we'll guide you through the process of retrieving your camera photos or videos from a damaged SD card.
What will Damage the SD Card?
SD card corruption is often caused by irregular operations. If your SD card can't be used normally, check if it's due to one of the following common situations: have you performed any wrong operations? If so, your SD card may have been damaged. In this case, it's best not to do anything and try to recover your data immediately using our recommended method.
- Unplug the SD card during data transfer
- Your computer has installed malware
- Accumulated bad sectors
- Manufacturing defects
- Physical damage
How to Recover Corrupted SD Card on Mac?
To recover data from an external device like an SD card, use data recovery software that can scan the device and restore deleted data as long as the computer can detect the SD card.
For Mac users, we recommend using Deep Data Recovery, a specialized software that has a great reputation among users. It boasts the fastest scanning speed, even with large data volumes, and allows users to review and preview data before recovering, making the process clearer and simpler.
You can download Deep Data Recovery software from the button below and follow the detailed guide to learn how to use it on your Mac.
Step 1. Launch Deep Data Recovery for Mac, and insert your camera SD card into your Mac computer.

Step 2. To recover camera data, click on the left panel and select "Camera Data Recovery". The software will automatically scan your SD card and detect the camera model. If it can't detect it, you can manually select the camera brand from the drop-down menu and then click "Scan" to start the recovery process.

Step 3. Deep Data Recovery will scan and list all the lost photos and videos on your SD card.

Step 4. To recover a deleted photo or video, choose and preview the desired file, then click the "Recover" button. Next, select a recovery location to save the recovered file, making sure not to save it to its original destination to avoid overwriting and causing further data loss.
Recover the Lost/Deleted Photos and Videos from Camera SD Card
The most common application scenario of SD cards is to install them on cameras to take photos and videos. However, improper operations can lead to SD card corruption or data loss, which can be devastating for Mac users. Fortunately, there is a reliable method for Mac users to recover lost photos and videos on the SD card, which will be introduced in this article.
Bonus Tip: How to Repair Damaged SD Card using Mac Utility?
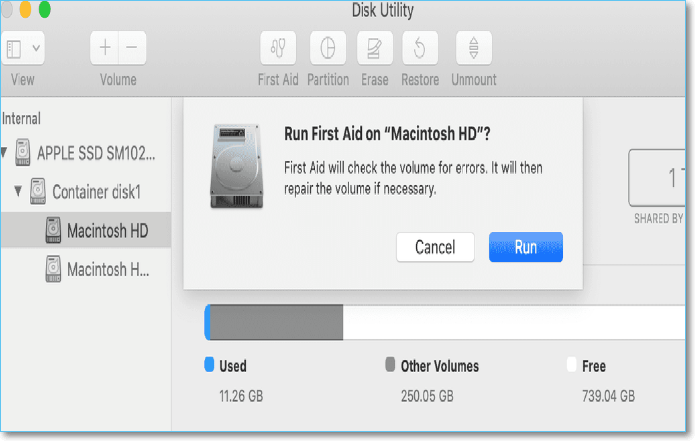
On Mac computers, there is an in-built utility that enables users to repair damaged external storage called First Aid. After you have recovered the photos and videos in your SD card, you can try this utility to repair the SD card so that you can use it again. Here are the detailed steps.
Step 1. To access the Disk Utility on your Mac, open the application and then go to View > Show All Devices. This will allow you to view all devices connected to your Mac, including external drives and other storage devices.
Step 2. In the sidebar, select your SD card, then click the First Aid button.
Step 3. Click Run and follow the onscreen instructions to start repairing.
Step 4. When the First Aid process is complete, click Done.
Conclusion
As SD cards store many of our cherished memories and happy moments, it's our responsibility to provide users with a reliable way to recover and protect their data. The method introduced in this article aims to help users overcome their SD card-related problems and successfully retrieve their valuable information.
Related Articles
- [Easy Tip] Recover Data on Mac For Free
- 3 Methods: Recover Unsaved or Lost Excel File on Mac
- How to Recover Deleted iWork Files on Mac
- Mac TextEdit Recovery: Recover Deleted/Unsaved TextEdit Files
- Fix Stuck at Windows Is Loading Files Loop
During the Windows setup process, users of Windows 7 or Windows Vista may get stuck at the “Windows is loading files” screen or experience a loop, preventing them from completing the setup. However, if Windows cannot boot, users can still recover their data using Deep Data Recovery, providing an effective solution to this issue. - SanDisk Repair Tool to Fix SanDisk Memory SD Card/Pen Drive/USB/SSD
If you're looking for SanDisk SD card repair tool, SanDisk USB repair tool, or SanDisk format tool, I suggest you try the right SanDisk repair tool to fix the memory card, USB drive, Pen drive, HDD, or SSD problems according to the symptoms.