Downgrade macOS/Mac OS X without Losing Data 2022 (Big Sur/Catalina Applicable)
If you're trying to revert or downgrade your new macOS or Mac OS X to the previous version on your Mac computer, you can follow the provided guidance below to bring your previous macOS or Mac OS X back without losing any data.
| Workable Solutions | Step-by-step Troubleshooting |
|---|---|
| Method 1. Use Time Machine | Start Mac and hold Command + R keys > Enter Recovery Mode > Insert Time Machine drive...Full steps |
| Method 2. Use USB Bootable Drive | Back up data first > Plug in USB and launch Disk Utility > Erase USB > Rename it as "My Volume"...Full steps |
| Bonus Tip. Recover Data | After reverting macOS or Mac OS X, run Qiling Mac file recovery software > Scan and recover lost data ...Full steps |
Methods on this page can be applied to all Mac systems, including Big Sur, Catalina, Mojave, High Sierra, Sierra, and older Mac OS El Capitan.
Tip: Backup Mac data before downgrading macOS or Mac OS X
Before downgrading your Mac's operating system to an older version, it's highly recommended that you back up all important data to prevent loss in case something goes wrong during the process.
You can either choose third-Use a Mac backup software to back up your entire Mac to an external hard drive in one go, or choose Time Machine to automatically back up all your important data with ease.
It's highly recommended to back up all important data into an external hard drive for data security.
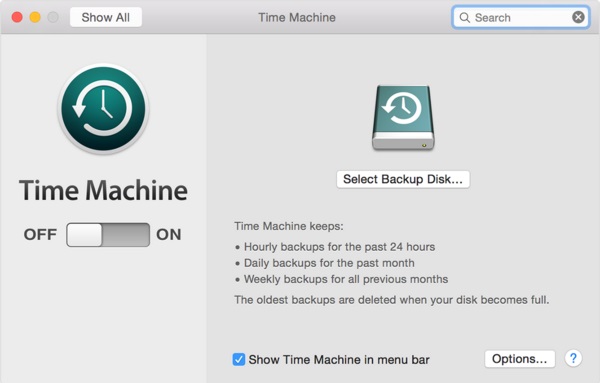
If you prefer to use Time Machine, here are the details:
- To customize your Mac's desktop, go to Finder > Preferences, then select the box next to "Hard disks" under the "Show these items on the desktop" section.
- To create a backup folder, open the backup disk and create a new file folder. Name it something like "My Backup" to keep track of your backups.
- To back up your Mac, open the disk and click on the "Users" file folder. Select all the files and data you want to back up, then drag them to the "My Backup" file folder.
To downgrade macOS without losing data, you can follow one of two methods. First, backup all your data, then proceed with reverting macOS. This ensures that your files and information are safe, allowing you to start the downgrade process with confidence. Once your data is secure, you can choose either of the two methods provided as a guide to help you complete the downgrade successfully.
Method 1. Downgrade macOS or Mac OS X with Time Machine
- Notice:
- This method applies to downgrading various versions of macOS, including Big Sur to Catalina, Catalina to Mojave, Mojave to High Sierra, High Sierra to Sierra, as well as Mac OS X: Yosemite to El Capitan, etc.
- This method is for users who have used Time Machine to back up their Mac data, including the old Mac OS, and now want to restore their system to the previous version.
If you've already created backups of your Mac data and macOS, follow these steps for a guide. However, if you haven't created such a backup, you can skip to Method 2 to downgrade your Mac OS.
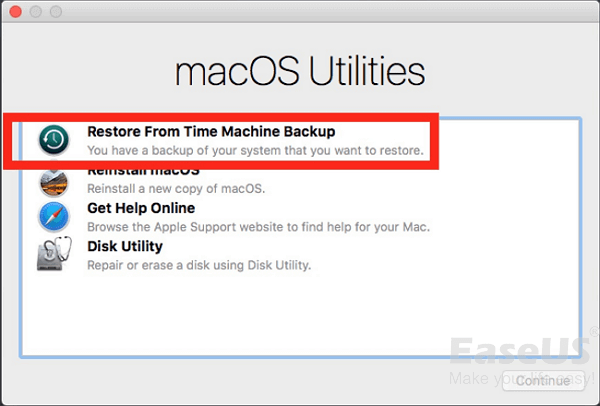
- 1. To enter the Recovery Mode on your Mac, start or restart your Mac and hold the Command + R keys to boot into the Recovery Mode, or hold the Option/Alt key and choose the Recovery option.
- 2. To restore your Mac from a Time Machine backup, insert the hard drive used for Time Machine and select "Restore from Time Machine Backup" under the OS X Utilities menu. Then, choose the inserted hard drive from the list of available backups.
- 3. Choose the most recent data and time when the Mac was still running the current macOS.
- 4. To restore a Time Machine backup, select the main disk drive where the backup was stored, which is usually named "Macintosh HD", and click the "Restore" button.
Wait for the computer to restore and gain Yosemite again, which may take a few hours or all day long depending on the amount of data that needs to be restored.
Method 2. Create USB Boot Drive and Revert Back to Old macOS or Mac OS X
If you have no Time Machine backups, this method is suitable for you. However, it's recommended to first use Time Machine to back up your important data and the system itself if you have no backups of your current macOS or Mac OS. This ensures your data is safe before attempting to recover your system.
To downgrade Mac OS, follow these steps: First, ensure you've followed the correct guide for downgrading your Mac system, as the process for downloading new macOS and old Mac OS X differs. Then, proceed with the downgrade process. (Note: The specific steps for downgrading will depend on whether you're downgrading from a newer macOS or an older Mac OS X.)
Downgrade macOS (e.g: Downgrade macOS Mojave to High Sierra)
- 1. To prepare the USB drive, plug in an external USB drive with a minimum capacity of 16GB, then launch Disk Utility and select the USB drive. Finally, click the "Erase" button to format the drive.
- 2. Rename the USB drive as "MyVolume" and choose APFS or Mac OS Extended as the format, click Erase. Quit Disk Utility when the process is done.
3. To create a bootable USB installer for macOS High Sierra, launch Terminal from the Finder and type the command: -sudo /Applications/Install\ macOS\ High\ Sierra.app/Contents/Resources/createinstallmedia --volume /Volumes/MyVolume --applicationpath /Applications/Install\ macOS\ High\ Sierra.app, and hit Return.
- Enter your Admin Password as required, wait until the process is done.
- 5. Restart the Mac, hold the Option key.
- 6. When the option to select a boot disk appears, choose the installer disk (the external USB drive) you created.
- 7. High Sierra will start the installing process. When your Mac is finished updating, it will automatically restart. Once it boots up, you'll see the Startup Assistant, which will guide you through the process of setting up your Mac. This includes selecting your language, choosing your country or region, and setting up your Wi-Fi connection.
If your Mac was shipped with Mojave, you can directly downgrade Catalina to Mojave using the following tips.
- 1. Restart Mac, hold Command + Option + Shift + R keys to boot into Recovery Mode. You can also press Command + R to enter the Recovery Mode.
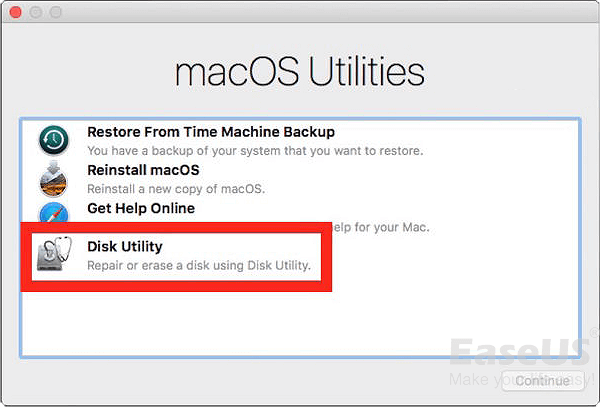
- 2. Click on "Disk Utility", select the disk with Mojave installed, and click "Erase".
- 3. Rename the disk, select Mac OS Extended or APFS as the file format, click "Erase". Quick Disk Utility by then.
- Re-enter the Recovery Mode, and select "Reinstall macOS" then press "Continue".
The old High Sierra will be installed on your Mac automatically by doing so.
Downgrade Mac OS X (e.g: Downgrade Mac OS X Yosemite to El Capitan)
- 1. Download the OS X Yosemite installer from Mac App Store.
- To downgrade to El Capitan, first download the Diskmaker X app to create a bootable USB drive. This app will allow you to create a bootable USB drive for El Capitan's downgrade.
- 3. Insert a USB drive into Mac, launch Diskmaker X, and choose OS X Yosemite 10.10. The Diskmaker X will take care of the rest of the tasks for you.
- 4. Keep the USB drive inserted into the PC, restart Mac. Hole Option/Alt and chose USB drive in the menu while rebooting Mac.
- 5. Go to Utilities and select Disk Utility at the Install OS X menu.
- Select "Macintosh HD" and choose "Erase". Make sure that "Mac OS Extended (Journaled)" is selected under the "Format" field.
- To begin the installation of OS X Yosemite, go back to the Install OS X menu and select Continue. This will initiate the installation process.
- After updating your Mac to Mavericks, you need to install the latest version of the Combo Updater, then install the latest version of the Combo Updater again, and finally install the Combo Updater again. After all these, all you need is to be patient in installing Yosemite on your Mac.
Bonus Tip: Restore Lost Data after Downgrading macOS/Mac OS X(without backups)
Users who have forgotten to back up important data before downgrading Mac OS can use this method to recover lost data. If you've lost data after Mac OS reinstallation or downgrading, you can use powerful Mac data recovery software to restore your lost data.
Qiling Mac data recovery software supports restoring lost data on Mac, compatible with Mac OS 10.8 and later.
If you've lost important data after downgrading your Mac OS, Deep Data Recovery for Mac can help. The process is straightforward, requiring just three steps to recover your lost data.
Step 1. Launch Deep Data Recovery. Choose file types and click "Next" to start the recovery process.

Step 2. Select the disk location where you lost data and click the "Scan" button.

Step 3. Deep Data Recovery for Mac will immediately scan your selected disk volume and display the scanning results on the left pane, allowing you to quickly locate the files you need to recover.

Step 4. The scan results show the recovered files. Select the desired file(s) and click the "Recover" button to restore them.
Related Articles
- Fix Slow External Hard Drive on Mac
- Get Deep Data Recovery for Mac Crack with License Code
- Snow Leopard Recovery Mode | How to Recover Data from Mac OS X
- Follow Our Tips to Resolve A Collection of Mac No Startup Disk Issues
- How Does An Excel File Get Corrupted? We Discussed Reasons and Fixes Here
Excel file corruption can occur due to various reasons, causing the inability to open a workbook. Common causes include file system errors, Excel add-in or plugin issues, and incorrect file format. - How Much Does It Cost to Recover Data from a Hard Drive (2022)
How much does it cost to recover data from a hard drive, USB flash drive, or SD card? Do not be scared of data recovery prices. We explain how much data recovery software and manual data recovery service charge for their services. Choose the best data recovery strategy to get back lost data from your hard drive, USB, or SD card with simple steps.