How to Recover Missing/Lost Files After macOS Ventura Update
Missing Files After macOS Ventura Upgrade
"After I upgraded to macOS Ventura, my PDF files in books disappeared. Where are these files in the backup (Time Machine)?" - Quoted from Apple Discussion
macOS Ventura has been released, but like any new software update, it comes with its own set of problems. Many users have reported missing files after upgrading to the new operating system, and the exact cause of the issue remains unclear. However, there are a few possible explanations for this phenomenon.
- Files were somehow corrupted during the upgrade process.
- The files were stored in a location that was incompatible with the new operating system.
- Files were simply deleted during the upgrade process.
4 Practical Ways to Recover Missing Files After macOS Update
Missing files can be a significant inconvenience, but fortunately, users can take a few methods to recover missing files after the macOS Ventura update. Regardless of the cause, these methods can help retrieve lost files and minimize the disruption caused by the missing files.
Method 1. Recover Missing Files After macOS Ventura Update with Software
If you've updated to macOS Ventura and are missing some files, don't worry! Deep Data Recovery Mac is a powerful tool that can help you recover deleted files, even if you're not tech-savvy. With its user-friendly interface, you can easily recover your lost files and get back to work without any hassle.
Recover Missing Files after Mac Update
- Support Mac data recovery, MacBook data recovery, and more
- Recover data from various file systems with ease, including HFS+, FAT, NTFS, exFAT, and EXT2/3/4, with a user-friendly interface that makes the process simple and hassle-free.
- Use a data recovery software like Deep Data Recovery Wizard to scan the device and recover lost files. It supports various file types, including documents, photos, videos, and more.
To recover missing files after the macOS Ventura update, this software can restore data from your computer in just a few minutes. Follow the steps below to get your files back.
Step 1. Select the location
Select the disk where you lost data after updating to macOS Ventura/Monterey/Big Sure/Catalina, then click "Search for lost files".
Step 2. Find lost data after the scan
Deep Data Recovery for Mac scans the selected disk volume, displaying the scanning results in the left pane, allowing users to find specific data using file type and file path.
Step 3. Recover data after macOS update
Select the target files that were unknowingly lost during or after the update, and click the "Recover" button to recover them all.
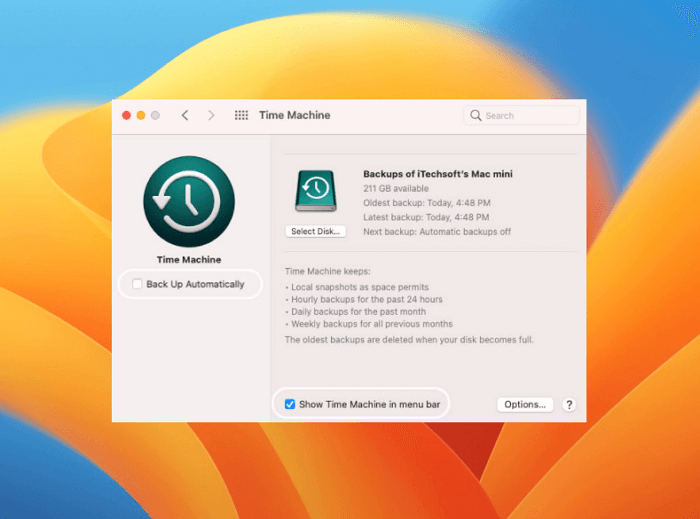
Method 2. Recover Missing Files After macOS Ventura Update from Time Machine
If you've lost files after the macOS Ventura update, Time Machine can help you recover them. If you have Time Machine set up and running, you can follow these steps to restore from Time Machine and retrieve your missing files.
Step 1. Open Time Machine from the Dock or Launchpad.
Step 2. Select "Enter Time Machine" from the menu bar.
Step 3. To restore a folder or file from the timeline, locate the specific item in the timeline that you want to restore. This could be a folder or file that you previously deleted or moved, and you're looking to recover it.
Step 4. Select Restore from the menu bar.
Step 5. Follow the prompts to complete the restoration process.
With Time Machine, you can quickly and easily recover missing files after a major update like macOS Ventura, so you don't have to worry about losing important data.
Method 3. Recover Missing Files After macOS Ventura Update from iCloud
If your files have gone missing after updating your Mac, don't worry - they might be recoverable from iCloud Drive if it's enabled. Your missing files might be stored in iCloud, so you can try checking there to recover them.
- Open iCloud Drive and see if your files are listed.
- Download the wanted files to your Mac hard drive
Method 4. Recover Missing Files After macOS Ventura Update with Apple Support
If you're having trouble finding your files after updating to macOS Ventura, you can try contacting Apple support for assistance with recovering your lost data. They may be able to help you locate your files.
The website offers various support options, including submitting a ticket, accessing a knowledge base, and live chat or phone support, to help users recover lost files after the macOS Ventura update.

Conclusion
If you're missing files after updating to macOS Ventura, don't panic! There are effective methods to retrieve your lost files. Qiling Mac data recovery software is a reliable solution that can help restore your missing files after the macOS update.
Missing Files After macOS Upgrade FAQs
If you're still having problems with the macOS Ventura update, here's some additional information that might help. The update process can be complex, and there are several potential issues that can arise.
1. How to restore lost photos after the macOS Ventura update?
To recover lost photos after the macOS Ventura update:
- The Go menu is located at the top of the screen, and clicking on it will open a drop-down menu with various options, including "Go to Folder" which can be used to navigate to a specific folder on the computer.
- To access the Trash folder, go to Go to Folder and type in "Trash". This will take you directly to the Trash folder.
- If you see missing photos here, select them and click Put Back to restore your photos.
2. Which is better, Monterey or Big Sur?
Monterey vs Big Sur:
- The initial launch of macOS Big Sur was marred by various issues, including instability problems.
- The Monterey OS was released in June 2021 and is currently the version used on most Mac devices.
3. Does updating macOS delete everything?
Updating to Monterey will not delete your files, as long as you follow the proper procedures for installing the update. It's essential to back up your files and data before updating your Mac, and to ensure that you have a reliable internet connection during the installation process. By taking these precautions, you can minimize the risk of any issues and ensure a smooth transition to the new operating system.
Related Articles
- How Recover Deleted or Unsaved InDesign Files on Mac
- Apps Unresponsive? Force Quit on Mac when Frozen
- How to Recover Deleted Emails on Mac?
- Mac Digital Camera Photo Video Recovery (Free for 2GB Recovery)
- [SOLVED] How to Recover Audio Files on Windows/Mac/Android/iPhone
There are times that you lose audio files like voice recordings, music and songs. Read this post and recover audio files on Windows/Mac/Android/iPhone with simple clicks. Download and run Qiling audio recovery software to get back your recordings, music and songs on any device. - 2 Proven Ways to Recover Civilization VI Game Save
If you've lost Civilization VI game data, there are two ways to recover it. You can try recovering lost game data with Civilization VI's autosave feature, or use Qiling game data recovery software to restore your game saves. To get back your lost game data, simply follow the steps outlined in the text to see if either of these methods work for you.