Mac Digital Camera Photo Video Recovery (Free for 2GB Recovery)
When using a camera, it's common for photos and videos to be stored on a memory card, with popular options including SD cards from brands like SanDisk, Lexar, Transcend, Samsung, and Sony. However, memory cards can be prone to data loss due to issues such as corruption, mistaken deletion, formatting, or blank errors when previewing or exporting photos. If you experience picture loss on your Mac, you can follow a recovery process to retrieve your lost photos and videos.
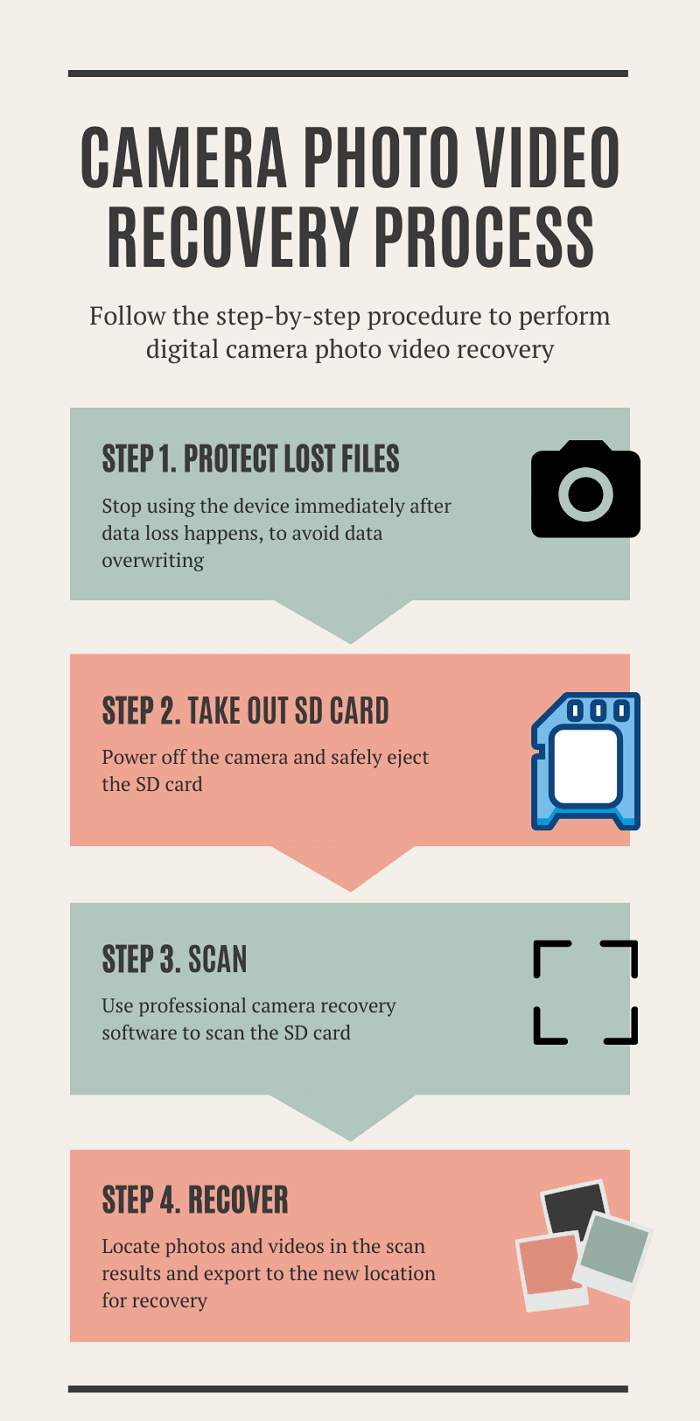
To recover photos and videos from a camera's SD card on a Mac, it's essential to handle the lost files with care, avoid using the camera, and connect the SD card to the Mac correctly. A reliable Mac photo recovery tool is then needed to scan and retrieve the lost files.
First, Connect the Camera SD Card to Mac
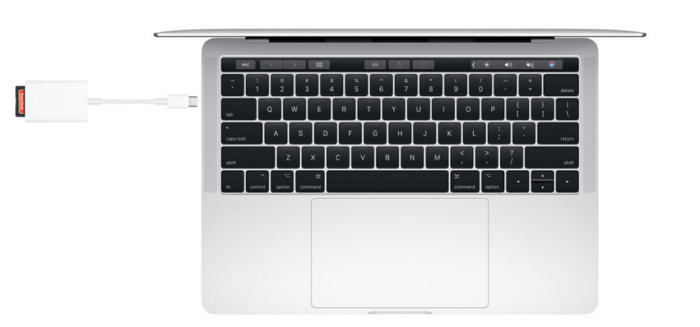
Immediately power off the camera and then carefully eject the SD card. Depending on your Mac model, you may need to use an adapter to insert the SD card, or you can insert it directly into the SD slot.
These Mac models have an SDXC card slot:
- MacBook Pro introduced in 2021
- MacBook Pro introduced in 2011 through 2015
- Mac mini introduced in 2011 through 2014
- 13-inch MacBook Air models introduced in 2013 through 2017
- 27-inch iMac models introduced in 2010 or later
- 21.5-inch iMac models introduced in 2010 or later
If your device doesn't have an SD slot, you can transfer the camera's SD card to your Mac using a USB-C to SD card reader.
Second, Download Photo Recovery Software
To determine the dependability of camera photo recovery software, consider researching online, reading product reviews and comparisons, and seeking advice from experienced colleagues and friends. However, ultimately, it's up to you to make a judgment based on four key factors.
- Reputation: You can get a reliable idea of a software's reputation by checking its Trustpilot rating, which indicates its efficiency and support, and also consult Wikipedia for factual information about the founder, brand, and product's objective.
- Free Trial: It should offer a free trial version that lets you preview scanned photos and videos before buying the license.
- Compatibility: The software should be able to read and process various camera RAW image formats, as well as widely used formats like JPEG, TIFF, DNG, GIF, BMP, and PSD.
- Repair corrupted photos & videos: Many users have successfully recovered their missing photos and videos using data recovery programs, but the recovered files often won't open due to partial overwriting or corruption, which most recovery software can't repair.
Having responsible, trained, and patient customer service would be a significant advantage. In terms of choosing a reliable and capable data recovery application, Deep Data Recovery for Mac is a suitable option that can meet your needs.
The software has been a top choice in the market for over a decade, highly praised by customers and reviewers. It's fully compatible with macOS Monterey, Big Sur, and earlier versions, and its advanced scan algorithm technology allows for the recovery of lost images and videos, as well as the repair of corrupted files, all before the recovery process begins.
Here's the detailed guide about:
Next, Scan and Recover Lost Photos and Videos on Mac
Both free and trial versions of Deep Data Recovery for Mac are available. You can start with the free version, which allows you to recover up to 2GB of files for free, making it a great option to test the software before committing to a purchase. The recovery process is a simple 3-step procedure that can be completed on a Macbook Pro, iMac, or Macbook Air.
Step 1. To recover data from your memory card on a Mac, correctly connect the memory card to your Mac, then launch Deep Data Recovery for Mac. Select the file types you want to recover and click "Next" to begin the recovery process.

Step 2. Select the card and click "Scan" to let the software search for lost files on it.

Step 3. After a quick scan and deep scan, all files will be listed in the left panel of the scan results.

Step 4. Select the files you want to recover and click the "Recover" button, avoiding saving the recoverable files to the SD card itself to prevent data overwriting.
Related Articles
- Can't Find My WD Passport on Mac! How to Fix?
- Can't See Files on External Hard Drive Mac? Find Missing Files Here
- TRIM SSD Data Recovery
- Mac Not Recognizing External Hard Drive #6 Solutions#Data Recovery#
- How to Fix A Corrupted SQL Server Transaction Log File
A corrupted transaction log file (.ldf) can occur due to various errors such as unexpected system shutdown, hard drive problems, or a virus attack. To resolve this issue, you can try the methods provided. - Here is How to Fix DllRegisterServer Was Not Found
If you're encountering the DllRegisterServer Was Not Found error when trying to register a DLL on Windows, this guide can help. The error is often caused by corrupt files, missing DLLs, or issues with security software, but with the right solutions, you can resolve the issue and get back to work.