Can't Find My WD Passport on Mac! How to Fix?
If your WD My Passport is not showing up on your Mac, there are several possible reasons and solutions to consider. The issue may be caused by a faulty USB port, a corrupted drive, or a software conflict. You can try restarting your Mac, updating your operating system, and reinstalling the WD My Passport software. If none of these solutions work, you may need to contact WD support for further assistance.
The WD My Passport external hard drive is primarily used for backing up and storing data. If it's not recognized by macOS, it's not necessarily a major issue, but rather a problem that can be resolved. The issue may be caused by an error with the external HDD or a crash on the macOS system. Fortunately, there are six potential fixes that can be tried on a Mac to resolve the problem.
Fix 1. Change another cable
Analyze the issue with the printer's internal wiring, and if the problem persists, try replacing the cable to determine if it's the cause of the issue.
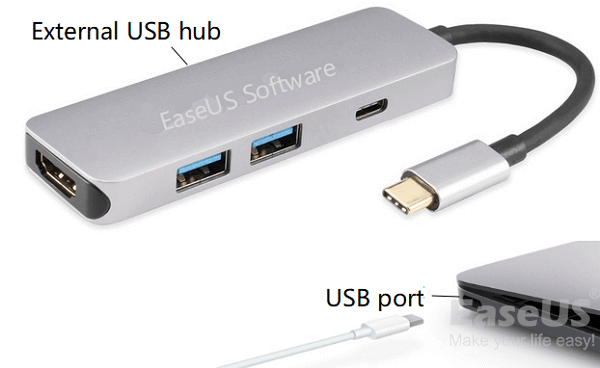
Fix 2. Try another USB port
A faulty USB port can prevent the WD My Passport from being detected on your Mac. Try switching to a different USB port or connecting another USB drive to the same port to see if the issue persists.
Fix 3. Update to the latest WD drive unlock application
On Mac computers, you need to unlock the WD drive first to access it normally. If you're experiencing issues after a macOS Big Sur update or with an Apple Silicon M1 MacBook Air, you may see an error message. To resolve this, download and install the latest WD Discovery Utilities from the official website.
Fix 4. Check Mac Finder Preferences
If your WD My Passport is showing up in neither the Finder nor the desktop, it's possible that the configuration of the Finder Preferences prevents your Mac detects the external hard drive. In other words, you didn't allow the connected external hard drives to show up in the Finder or on the desktop. Here, follow the steps below to check the Finder Preferences.
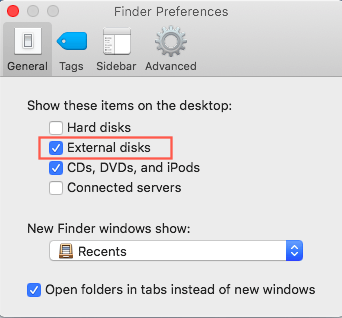
Step 1. Visit the Finder > Preferences > General Tab.
Step 2. Mark the External Disk option in the Finder Preferences.
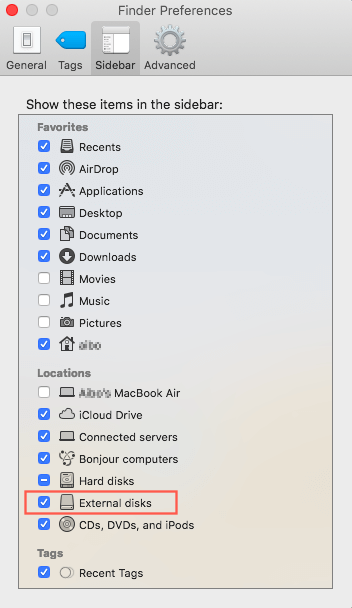
Step 3. To display your WD Passport external hard drive in Finder, mark External Disks again under Locations in the Sidebar. This will show your WD Passport external hard drive in Finder.
Fix 5. Repair WD My Passport with First Aid
If your external hard drive or USB flash drive isn't showing up on your Mac, it might be due to minor hardware errors that can be easily fixed. The built-in feature "First Aid" on macOS can help repair these issues without causing any data loss. You can use this tool to troubleshoot the problem, and it's a good idea to try it before making a backup.
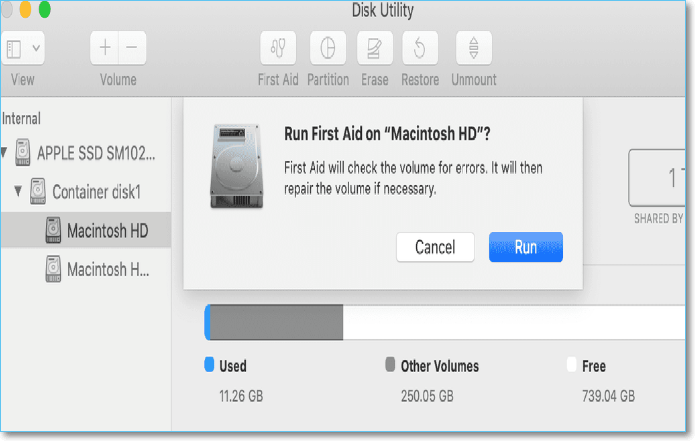
Step 1. Go to System Preference > Disk Utility.
Step 2.Choose the WD external hard drive, and click "First Aid" on the top of the right panel.
Step 3. To confirm the operation, click "Run" and the system will start checking and repairing your WD My Passport external hard drive.
If hardware errors are causing the issue, running a First Aid might resolve the problem. If that doesn't work, try the last method.
Fix 6. Format the WD External Hard Drive
Before taking this step, make sure you have no other options. Formatting your drive will erase all data, so be sure you're ready to lose everything on it. If you're still sure, go ahead and follow the instructions, but be aware that this is the last resort.
Formatting a hard drive is the most straightforward way to factory reset it, erasing all data and settings, which can be a solution when culprit files are the issue. This approach also allows for data recovery if a backup isn't available, and data can be restored from a backup if one was made beforehand.
Deep Data Recovery for Mac is a reliable data recovery tool that has helped millions of users recover their lost, deleted, or formatted data. If you don't have a full backup of your device, you can follow the steps below to save your data.
Step 1. To begin the data recovery process on your Mac, connect your external hard drive to your computer. Once connected, launch Deep Data Recovery for Mac. From there, select the file types you want to recover and click "Next" to initiate the process.

Step 2. Select the external disk and click "Scan" to let the software search lost files on it.

Step 3. After a quick scan and deep scan, all files will be displayed in the left panel in the scan results.

Step 4. Select files you want to recover and click the "Recover" button. Don't save the recoverable files to the external hard drive in case of data overwriting.
Now, you can start to format your WD Passport external hard drive.
Step 1. Go to Disk Utility > View > Show All Devices.
Step 2.To erase your WD Passport hard drive, select it in the sidebar and click the Erase button.
Step 3. Click the Scheme pop-up menu, then choose GUID Partition Map.
Step 4.To change the file system format, click the "Format" pop-up menu and select a file system format from the options provided.
Step 5. Enter a device name and click Erase.
Solved: USB Flash Drive Not Showing Up on Mac
If your Mac isn't recognizing a USB drive, try these 10 solutions to get it working again: restart your Mac, check the USB port, ensure the drive is formatted for Mac, update your Mac's operating system, use a different USB cable, check for disk errors, run a disk utility scan, reset the System Management Controller, reset the NVRAM, and if all else fails, try a different USB drive.
Conclusion
This article provides a comprehensive guide to resolving the issue of a WD external hard drive not showing up, covering various situations. If you're experiencing this problem, it's essential to first recover your files from the WD Passport hard drive using Deep Data Recovery for Mac before attempting to fix the issue.
Related Articles
- Deleted Files Mac But Still No Space: Reasons and Solutions
- Format Your Mac For Sale without Difficulty
- Mac Partition Recovery | Recover Deleted/Lost Partition on macOS/Mac OS X
- How to Find External Hard Drive on Mac In Case It's Working but Not Showing Up
- A Complete Guide to Recover Deleted Files
Are you looking for a way to recover deleted files on Windows 10? This full guide provides you with every way to recover deleted files on Windows 10, Windows 11, Mac, iPhone, Andriod, SD card, USB flash drive, Google Drive, and more. Read on and you will get lost data back in any data loss situations. - How to Recover Deleted Instagram Posts/Photos/Videos
If you've lost photos, videos, or stories on Instagram, you may have tried using the app to restore them, but it only supports posts deleted within 30 days. For permanently deleted or lost posts, Qiling data recovery software might be able to help.