Mac Not Recognizing External Hard Drive #6 Solutions#Data Recovery#
An external hard drive (HDD) is a must-have storage device for personal computers, offering ample space to store large files like movies, photos, and videos. Its portability also makes it ideal for transferring data between computers, and if compatible, it can be used on multiple devices and platforms.
If your Mac is not recognizing an external hard drive, try restarting your Mac and the external drive, then reinsert the drive into the Mac. If that doesn't work, try using a different USB port on your Mac. If the issue persists, try formatting the external drive on a different computer or using a USB drive repair tool. If none of these solutions work, you may need to replace the external hard drive.
Why External Hard Drive Not Recognized? Reasons Are...
Connecting a hard drive to a Mac can sometimes be frustrating, especially when it's not showing up as expected. While some issues may be relatively minor, others can be more challenging to resolve, requiring some effort to fix. However, in most cases, a little troubleshooting can help identify and resolve the problem, making it unnecessary to worry or resort to more complex solutions.
The reasons why an external hard drive can't be recognized on a Mac are varied and can be attributed to several factors, including the type of connector used, a corrupted file system, partition problems on the external hard drive such as bad sectors, outdated drivers, or even a virus infection. These potential culprits can cause the Mac to fail to detect or recognize the external hard drive.
Follow our 6 tips here for Mac not recognizing external hard drive for a rectification. You may find that most of the attainable fixes are based on Disk Utility (Solution #3-#5), the default application installed on Mac machine, so you can hopefully fix a not recognized external hard drive on Mac without paying a penny.
Essential Data Recovery Tool That Comes in Handy - Deep Data Recovery for Mac
- Recover lost or deleted files, documents, photos, audio, music, and emails with ease using effective recovery methods.
- You can recover files from an external hard drive, emptied recycle bin, memory card, flash drive, digital camera, and camcorders using specialized software like Disk Drill, Deep Data Recovery Wizard, or Recuva. These tools can scan the device and recover deleted or lost files, including photos, videos, documents, and more.
- Data recovery support is available for various unexpected scenarios, including sudden deletion, formatting, hard drive corruption, virus attacks, and system crashes. This assistance helps retrieve lost data and files, even when they've been irretrievably deleted or corrupted.
#1. Check the Connection
The top concern when an external hard drive isn't showing up is often related to the connection. This is a relatively easy issue to identify, and the most likely culprit is a problem with the USB port or the connection cable. Checking the connection is a good place to start when troubleshooting why the external hard drive is not being detected.
- Ensure the USB/eSATA cable is securely connected to the USB port, with a snug fit, to prevent data transfer issues.
- Try connecting the external drive to a different USB port on your computer to see if the issue persists. This can help determine if the problem is with the port or the drive itself.
- If your Mac only has one USB port, you can try connecting other devices that can be connected to the USB port to see if your Mac can recognize them normally.
- If the external drive isn't showing up on the first Mac, try connecting it to another Mac to see if it appears there. If it shows up on the other Mac, it's likely a problem with the first Mac, but if it doesn't show up on the other Mac either, it could be a problem with the drive. You can try restarting the first Mac, using a different USB port or cable, or resetting the System Management Controller (SMC) or Power Management Unit (PMU) if it still doesn't work. If you're still having trouble, it might be best to consult with a professional for further assistance.
If all the answers to the given examples are negative, you likely have a connection issue, which can be resolved by replacing a cable or USB port. If that's not the case, proceed with the next solutions.
#2. Tweak Settings in Preferences in Apple Finder
To see the external hard drive shortcut on your Mac screen, you need to enable the option to show external disks in Finder settings.
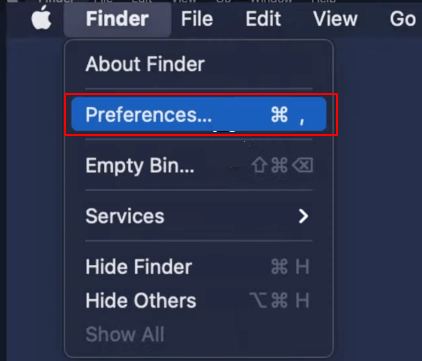
Step 1: On your Mac, click the Finder icon in the dock, and then choose Finder > Preferences.
Step 2: To show external disks on the desktop, go to the General tab, tick the option "External disks" to enable it. If it's already enabled, skip this step and follow the other methods.
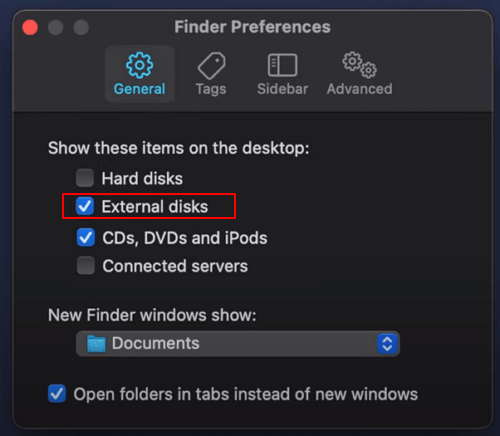
Closing the Finder preferences window allows you to see the external hard drive on your Mac desktop.
#3. Disk Utility - Mount External Hard Drive
Your Mac can usually automatically mount external hard drives connected via a USB port, allowing you to read and write data on them. However, if your external hard drive doesn't mount, you can manually mount it on your Mac using the built-in Disk Utility application, which manages hard disks.
If you're experiencing issues with your external hard drive not showing up in Disk Utility, you might receive error messages suggesting it's due to dismounting problems, such as the Mac being unable to mount the disk.
To recover data from an unmounted external hard drive on a Mac, first, connect the external drive to the Mac using a USB cable. Then, open Disk Utility on the Mac, select the external drive from the list on the left, and click on the "First Aid" button to repair any disk errors.
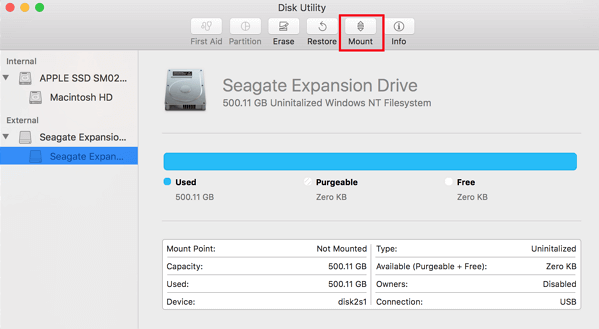
If your external hard drive is not recognized on your Mac, try checking it in Disk Utility. If it shows as unmounted, you'll need to mount it to make it recognizable on your Mac.
Step 1: To open Disk Utility, click the Finder icon in the dock, navigate to Applications in the sidebar, double-click the Utilities folder, and then double-click Disk Utility to launch it.
Step 2: Check the external hard disk in the left sidebar, highlight your hard drive and click Mount.
You're right, mounting the disk doesn't solve the problem. If the disk is damaged or corrupted, mounting it might not even work. In that case, you might need to try some repair options, such as running a disk check or repair utility, or even trying to recover data from the disk.
#4. Disk Utility - Check and Repair External Hard Drive Corruption
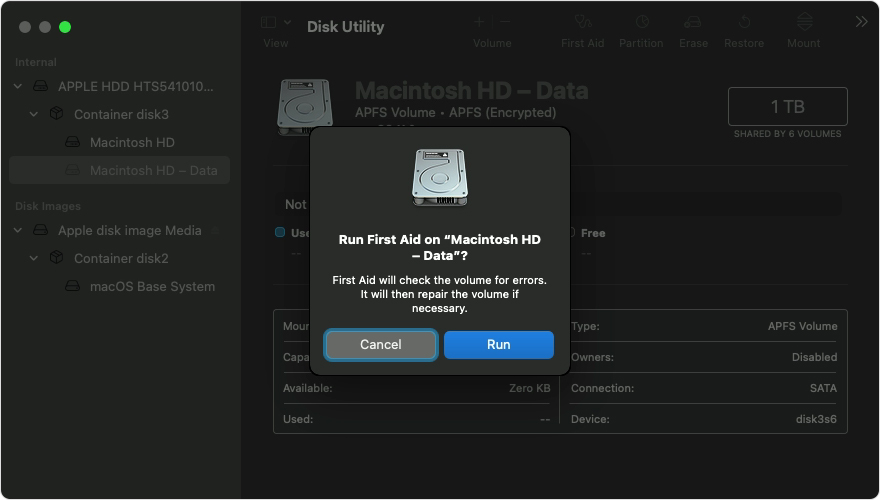
The First Aid feature in Disk Utility is used to identify and fix disk errors such as file system corruption, bad sectors, and other issues.
Step 1: In Disk Utility, select the external hard drive from the left sidebar, then click the "First Aid" button to run a diagnostic and repair any issues on the drive.
Step 2: First Aid will check the volumes for errors and will then repair the volume if necessary. Once confirmed, click Run.
#5. Disk Utility - Erase and Format External Hard Drive to APFS/ExFAT
Formatting a disk is a simple solution to resolve most hard drive issues, typically caused by logical errors, and can resolve issues with volumes on an external hard drive that has a corrupted file system or is not compatible with the current macOS, making it unrecognizable to Mac.
- Warning
- Despite it's a solution that is very basic, easy to operate, and obtainable on Mac, we don't recommend you try it in the first place because formatting a disk will erase data in it. To get back the data, you'll only depend on a third-party Mac data recovery tool.
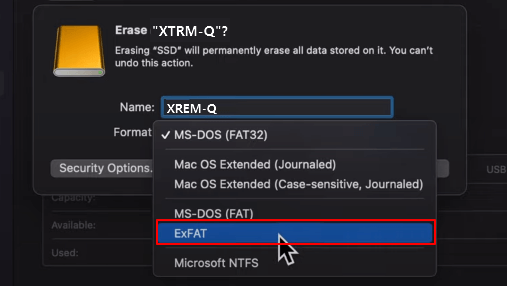
Step 1: In Disk Utility, click the Erase button to format the selected external hard drive.
Step 2:To properly set up an external hard drive for use with a Mac, the critical step is to select a suitable file system from the Volume Format drop-down list, choosing either APFS or ExFAT which are both recognizable by Mac, and then clicking the Erase button.
#6. Recover Data from Not Recognizing External Hard Drive on Mac
The five tips mentioned earlier have been proven effective in resolving external hard drive issues on Mac, utilizing the computer's default disk management utility. This means that you can likely fix a not recognized external hard drive on Mac without professional help, making it a cost-effective solution. However, if data loss occurs due to the external hard drive not showing up or being recognized on Mac, you can consider using Qiling Mac hard drive recovery software to recover your data.
Step 1. Connect your external hard drive to your Mac, then launch Deep Data Recovery for Mac. Choose the file types you want to recover and click "Next" to start the process.

Step 2. Select the external disk and click "Scan" to search for lost files on it.

Step 3. After scanning, all files will be displayed in the left panel of the scan results.

Step 4. Select files you want to recover and click the "Recover" button. Don't save the recoverable files to the external hard drive in case of data overwriting.
Related Articles
- Multiple Choices - Fix macOS Can't Repair the Disk
- 3 Methods: Recover Unsaved or Lost Excel File on Mac
- How to Recover Unsaved, Lost and Deleted Word Document Mac
- How Do I Fix Permission Denied on Mac
- How to Recover Deleted Videos from Webcam in Computer
If you've accidentally deleted webcam videos, are experiencing issues with your webcam not working, or need to reinstall it, don't worry - there are solutions available. To recover deleted webcam videos, you can try using data recovery software or checking your computer's event logs for any recorded footage. - How to Recover Files Deleted by Antivirus using CMD and Software
Recovering files deleted by antivirus can be a frustrating experience, but there are ways to retrieve them. One approach is to use a file recovery software that can scan the computer's hard drive and restore deleted files.