How to Recover Data from Unmountable Hard Drive on Mac
To recover files from an unmountable volume on your Mac OS X, download and install Deep Data Recovery for Mac, then follow these steps: open Qiling Mac data recovery tool, select the hard drive volume with lost data, and access all the data.
Part 1. Recover Data from Unmountable Drive on macOS/Mac OS X
There are times when a Mac's hard drive won't mount, preventing the system from booting or starting. This can be a frustrating issue, as seen in a real case shared on Apple's Community forum.
You're experiencing an issue where your drive won't mount on a Mac, but third-party software can still access the files. This suggests that the drive's file system is still intact, and the issue lies with the Mac's ability to recognize and mount the drive. To recover your data without third-party software, you can try using the built-in Disk Utility on your Mac. You can also try using Terminal commands to repair the disk. However, the best course of action would be to back up your data using the third-party software that can already read your files, as it's likely the safest and most reliable method to retrieve your information.
When you encounter an unmountable hard drive on your Mac, you can recover data from the unmountable drive using professional Mac data recovery software, such as Deep Data Recovery, which can recover over 200+ file types from your Mac hard drive or compatible external storage devices in various tough situations.
- Recover deleted files after emptying Trash Bin
- Recover lost data from a formatted USB flash drive
- Restore data from a Mac that won't boot
- Recover lost photos, documents, videos, audios, emails, etc.
- Import or export file scanning results
With the tool installed on your Mac, you can securely recover data from an unmounted hard drive.
Best Mac data recovery software - Deep Data Recovery for Mac
Steps to Recover Data from Unmountable Hard Drive on Mac
Deep Data Recovery for Mac is a simple solution to recover unmountable hard drives on Mac, as well as troubleshoot data loss cases like recovering Mac hard drive data. It's a clean and secure tool that provides full solutions for Mac hard drive recovery, making it a reliable option for users to solve all Mac data problems.
Step 1. Launch Qiling file recovery software on your Windows computer. Select file types and click "Next" to start the recovery process.

Step 2. Select the disk location where you lost data and files, then click the "Scan" button.

Step 3. Deep Data Recovery for Mac scans the selected disk volume and displays the results in the left pane.

Step 4. To recover the selected file(s), simply select them in the scan results and click the "Recover" button. This will restore the file(s) to their original state.
Part 2. How to Repair Unmountable Hard Drive on Mac
To repair an unmountable Mac hard drive, you can use the First Aid feature in Disk Utility or format the hard drive directly, ensuring data recovery and prevention of further data loss.
Method 1. Repair an Unmountable Hard Drive on Mac with Disk Utility
Disk Utility can fix some disk problems, making it worth trying when your Mac hard drive becomes unmountable.
Step 1. Go to the Apple Menu, click "Restart", and press and hold "Command + R" immediately until the Apple logo appears.
Step 2. Click "Disk Utility" > "Continue".
Step 3. To repair a drive, go to the "View" menu, select "Show All Devices", and then choose the drive you want to repair from the sidebar.
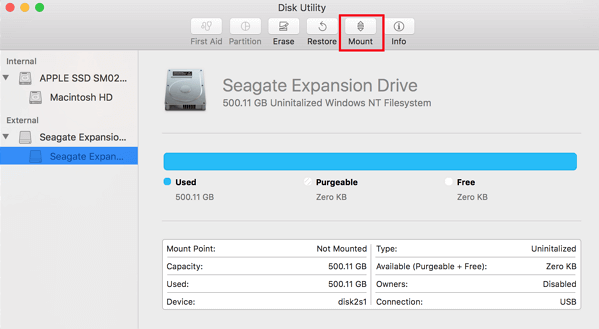
The Mac hard drive is greyed out and marked as "untitled" (meaning unmounted on a Mac computer).
Step 4. In the Disk Utility window, select the untitled Mac hard drive and click the "Mount" button from the Disk Utility bar.
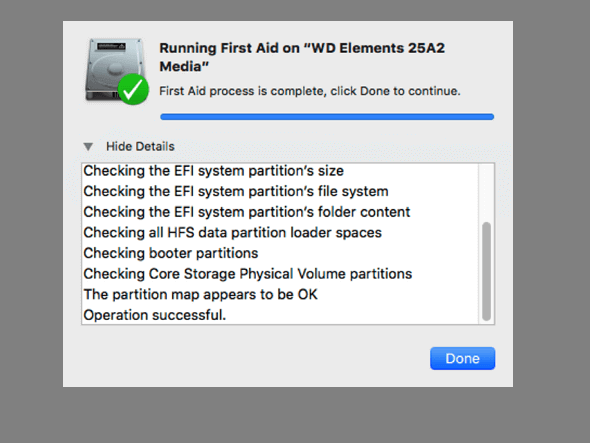
Step 5. If Disk Utility alerts you that your hard drive is failing, back up your data and replace the disk with a new one. Click the "First Aid" button to run a diagnostic test on your hard drive. If the test fails, it's likely that your hard drive is failing and you should replace it with a new one. Immediately back up your data and replace the disk to prevent data loss.
If Disk Utility says the disk has been repaired, you can use your hard drive normally again. If not, format your unmountable hard drive to fix it.
Method 2. Repair an Unmountable Hard Drive on Mac by Formatting
You can format it to fix the issue if you still fail to access the unmounted hard drive.
Steps to Format Mac Hard Drive
Step 1. Go to "Finder" > "Applications" > "Utilities" > "Disk Utility".
Step 2. Select the drive in the left sidebar and click "Erase".
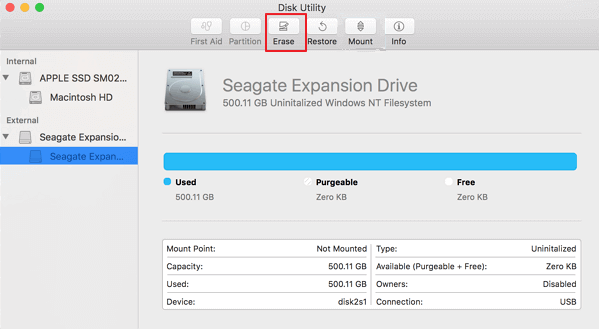
Step 3. Set the OS format to the desired type, rename the drive if needed, and click "Erase" to confirm the formatting.
To resolve the issue, restart the Mac computer. This will allow you to access and save new data on the drive again.
Part 3. Symptoms and Causes of an Unmountable Hard Drive
The "unmountable hard drive" issue on Mac typically occurs when booting up the computer. This happens when the Mac operating system is unable to access the local file system or drive, resulting in the error. The booting process involves mounting the file system and reading data from Mac drives, and if this process fails, the "unmountable hard drive" problem arises.
Symptoms
- The hard drive will be greyed out in Disk Utility.
- All data on an unmountable drive becomes inaccessible.
- Data read/write functions, and access becomes quite slow.
- The files are visible, but are unable to perform any actions like moving or copying.
Possible Causes
- Virus/malware infection
- Files system corruption
- OS malfunction
- Disk Utility failure
Part 4. Repair Unmountable Disk Mac FAQs
There are some hot topics about unmountable drive data recovery. You can read on to get additional help.
What does mounting a drive mean?
Mounting a hard disk involves making it accessible to the computer through a software process, allowing the operating system to read and write data to the disk. This process typically enables the computer to automatically recognize and utilize the disk when it's connected, eliminating the need for manual intervention.
How do I force an external hard drive to mount?
If your external hard drive won't mount, you can try the following: Check the power cord and USB connection to ensure they're properly connected. Restart your computer and try to mount the drive again.
- Check External Hard Drive
- Mount the External Hard Drive
- Format External Hard Drive...
What happens when you mount a hard drive?
When a drive is mounted, the mount program identifies the type of filesystem on the partition and then uses kernel calls to implement standard filesystem operations, such as reading, writing, listing, and setting permissions.
How can I recover data from the unmounted disk?
Steps to recover data from unmounted disk:
Step 1. Select the disk location where you lost data and files. Click the Scan button.
Step 2. Deep Data Recovery for Mac will immediately scan your selected disk volume and display the scanning results on the left pane.
Step 3. Select the desired file(s) from the scan results and click the "Recover Now" button to restore them.
Conclusion
To fix unmountable Mac volume errors, try running Disk Utility, checking for file system corruption, and restarting your Mac. If these solutions fail, use Qiling data recovery software to recover data from your unmountable Mac hard disk in minutes.
Related Articles
- Comprehensive Guide on How to Use a Flash Drive on Mac
- Apps Unresponsive? Force Quit on Mac when Frozen
- How to Recover Unsaved, Lost and Deleted Word Document Mac
- How to Delete Files on Mac that Won't Delete: Methods Vary from Specific Errors
- How to Recover Deleted Files in Windows 10 (7 FREE Ways)
How to recover deleted files in Windows 10? This tutorial covers several effective ways to help you undelete files or restore permanently deleted files on Windows 10. You can use Qiling data recovery software to recover permanently deleted files in Windows 10 or apply other ways to restore deleted files. - Create Bootable Media of Data Recovery Wizard for Mac
The software allows you to create a bootable USB drive, so you could set the computer to boot from the disc and start the data recovery.