Comprehensive Guide on How to Use a Flash Drive on Mac
Quick Navigation:
| Workable Solutions | Step-by-step Troubleshooting |
|---|---|
| 1. Find Flash Drives on Mac | Insert the USB flash drive, its icon will appear...Full steps |
| 2. Mount Flash Drives on Mac | Insert the USB flash drive, launch the Finder...Full steps |
| 3. Erase Flash Drives on Mac | Insert the USB flash drive, click on Applications...Full steps |
| 4. Format Flash Drives on Mac | Insert the USB flash drive, open disk utility...Full steps |
| 5. Recover Flash Drives Data | Download Qiling Data Recovery for Mac...Full steps |
USB flash drives are a convenient option for transferring small to medium-sized files, as they are compact, come in various shapes, colors, and cases, and are compatible with both PCs and Macs featuring a USB port.
A USB flash drive is a portable storage device, also known as a memory stick, thumb drive, or pen drive, that allows for easy transfer of data between devices. It is a compact and widely used tech gadget that enables efficient and simple data transfer between laptops, desktops, and other devices.
Global computer hardware consumers are divided into two main categories: PC users and Mac users. This guide will focus on using a USB flash drive with a Mac computer.
How to Find Flash Drives on Mac
USB flash drives and SD memory cards are two types of portable storage devices that are widely used. When plugged into a Mac's USB port, USB flash drives are usually auto-detected and start working. In addition, some older MacBook models came with memory card slots for reading SD cards and transferring data between the card and computer.
USB Flash drives can be plugged into a MacBook's USB port, or a memory card can be accessed using a USB Type-C adapter.
If the flash drive is not auto-detected, the Finder app on the MacBook can be used to configure and display externally attached storage devices.
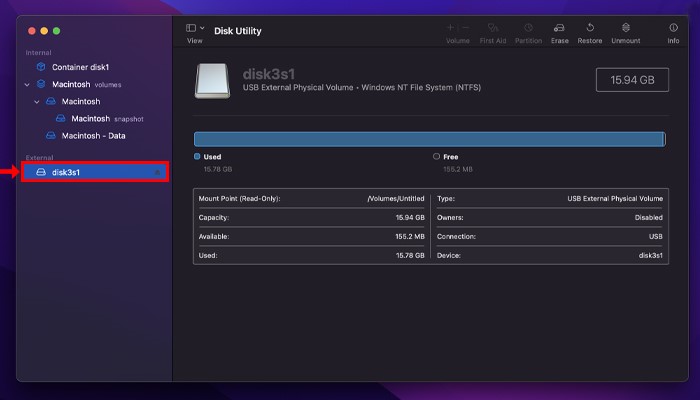
Step 1. Insert the USB flash drive into the USB port of your Mac.
Step 2. The flash drive will be automatically detected and its icon will be displayed on the desktop.
![]()
Step 3. If the USB flash drive doesn't appear automatically, open the Finder app, then select the USB flash drive that you plugged in.
How to Mount Flash Drives on Mac
A USB flash drive may not get detected automatically by macOS and fail to mount if it's not compatible with the operating system or has an error, such as being corrupted.
Signs that you have a corrupt USB flash drive include:
- The macOS does not recognize the device.
- It does not appear in the Finder app.
- The drive is not accessible because it's not properly mounted or formatted. You'll need to reformat it using the Disk Utility app or re-mount it by restarting your computer.
- The drive appears grayed-out in Disk Utility.
- When you encounter macOS error messages while trying to use a flash drive, it's likely due to compatibility issues or file system problems. This can occur when the flash drive is formatted in a file system that's not compatible with macOS, such as FAT32, or if the drive is damaged or corrupted.
Common reasons for USB flash drive corruption include:
- Unplugging flash drive without disconnecting/unmounting it.
- Unexpected or sudden power loss to flash drive.
- Device driver issues or wrong drivers installed.
- The device's memory module wears out due to prolonged use, leading to a decrease in its overall performance.
- Software or OS crashes.
If a flash drive is not mounting on a system, the most common solution is to restart the system and reconnect the device. If a restart doesn't work, using Disk Utility can help resolve the issue.
Step 1. The USB flash drive was inserted into the USB port of the Mac.
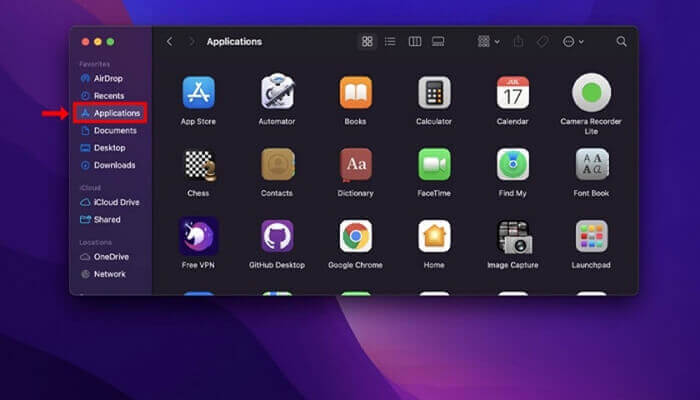
Step 2. Launch the Finder app.
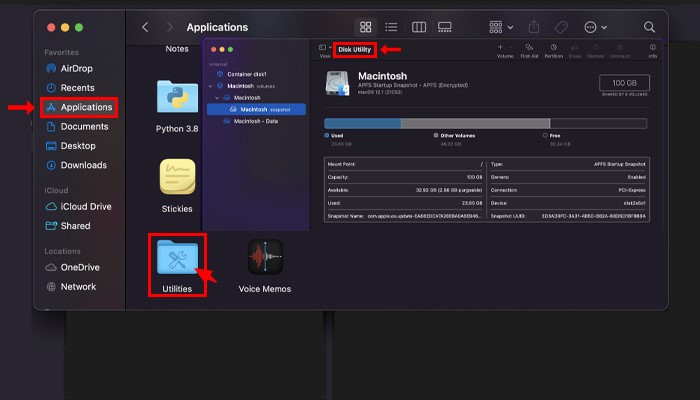
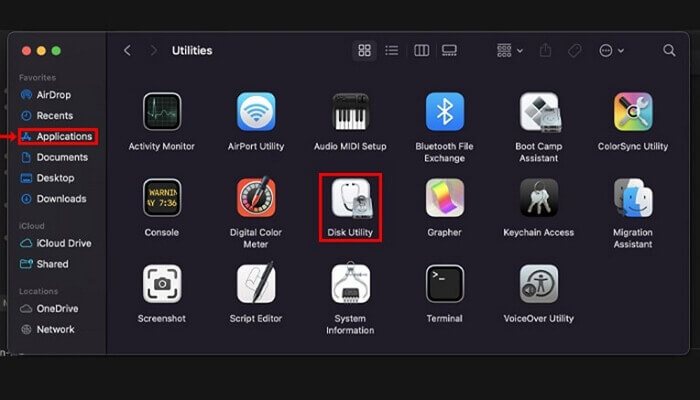
Step 3. Select the Applications option from the sidebar.
Step 4. The Utilities folder will be displayed on the right side of the Finder. Double clicking on it will open it.
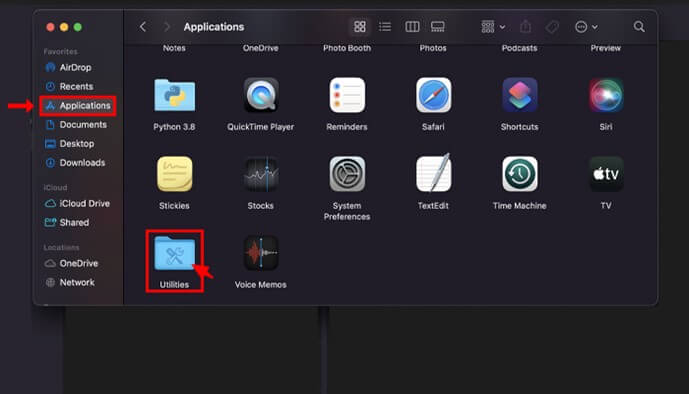
Step 5. Launch the Disk Utility app by double clicking on it. This app will be used to mount the flash drive.
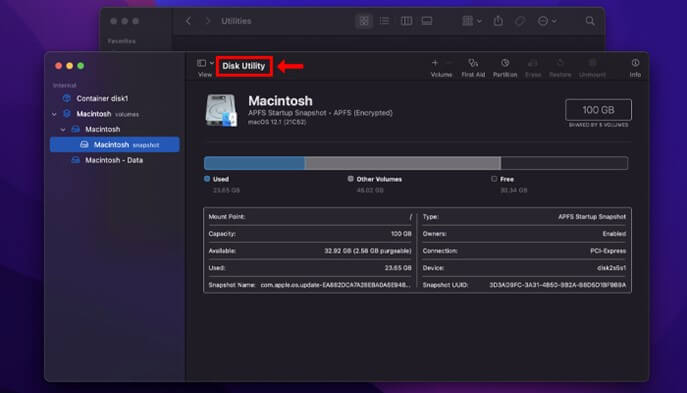
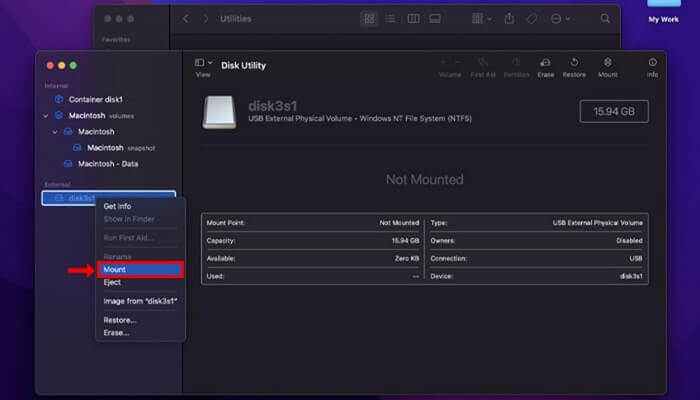
Step 6. Connect your flash drive to your Mac and open Disk Utility. Your flash drive should be displayed in the left sidebar. Click on the name of your USB flash drive to access it.
Step 7. If the USB flash drive does not appear in the Disk Utility app, click File and then Refresh Information.
How to Erase Flash Drives on Mac
If you're using a USB flash drive regularly, you'll eventually run out of space to store new data. To free up space, you can delete unwanted files, but if you have a large number of files to erase, you can use Disk Utility to quickly wipe the drive clean. This is especially useful if you have a backup of all your files and need to erase everything at once.
Step 1. Insert the USB flash drive into the USB port of your Mac.
Step 2. In the Finder app, click on Applications, double click Utilities, and then click on Disk Utility app.
Step 3. Select your flash drive from the list on the left side of Disk Utility.
Step 4. Click on the Erase option displayed on top
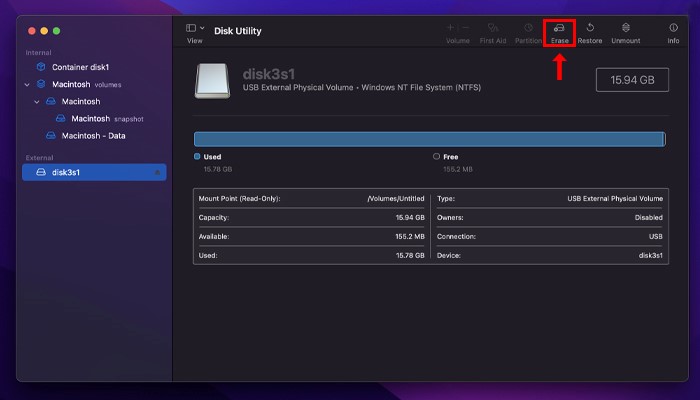
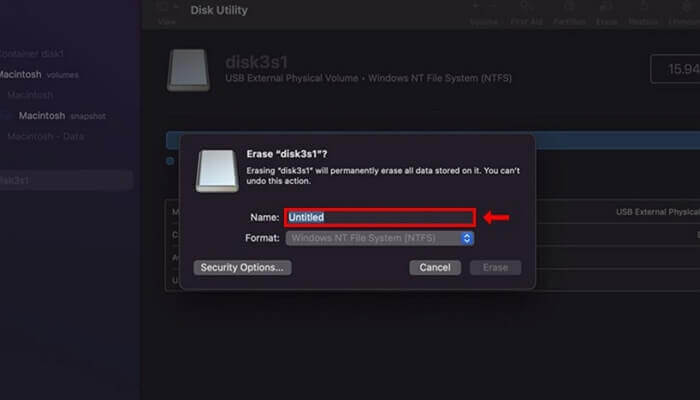
Step 5. A new dialog box appears asking for confirmation, and clicking the Erase button will proceed with the deletion.
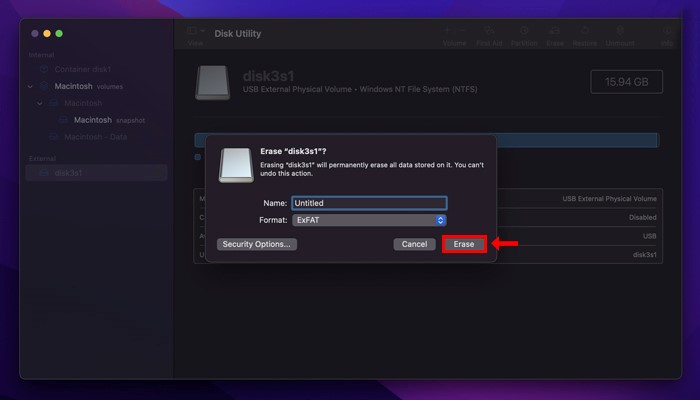
You have the option to rename your flash drive and choose a different file system for your operating system before erasing it.
How to Format Flash Drives on Mac
Formatting a USB flash drive involves completely removing all data from it to prepare it for fresh use, allowing you to choose from various file systems to make it compatible with a Mac, both macOS and Windows, or other operating systems. This process completely erases all data on the drive, making it necessary to back up any important files before proceeding. To format a flash drive, follow the steps outlined, which will guide you through the process of selecting the desired file system and formatting the drive. By doing so, you can ensure the drive is ready for use with your preferred operating system.
Step 1. Insert the USB flash drive into the USB port of your Mac.
Step 2. Open Disk Utility from Applications.
Step 3. Select your USB flash drive from the left sidebar under External.
Step 4. Choose the Erase option from the tabs displayed on top.
Step 5. Specify a new 'Name' for your flash drive.
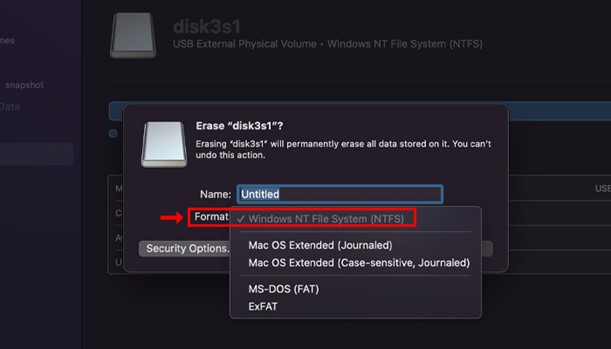
Step 6. To select a file system, go to the 'Format' menu and choose the file system that suits your needs.
Step 7. From the 'Scheme' menu, select a partition scheme.
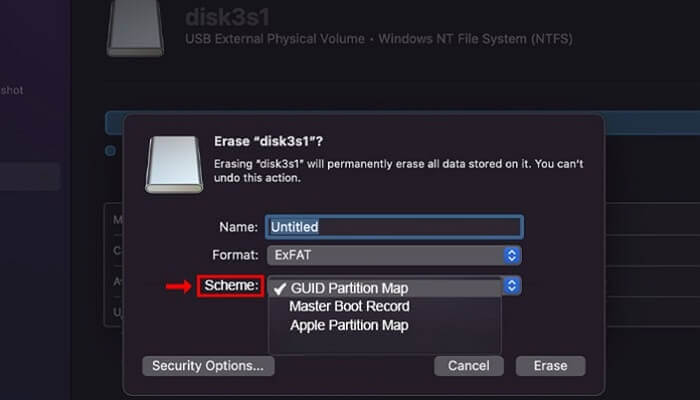
Step 8. Click on the 'Erase' button to format the flash drive.
What Can First Aid Do for Flash Drives
The First Aid function on a Mac allows you to check the status of your disk, volumes, and external devices, and provides built-in tools to detect and repair errors on your Mac disks. It scans the specified drives and informs you if the detected issues can be fixed or not, offering a solution to potential disk problems.
Step 1. Insert the USB flash drive into the USB port of your Mac.
Step 2. To access the Disk Utility app, open it and choose View > Show All Devices from the menu.
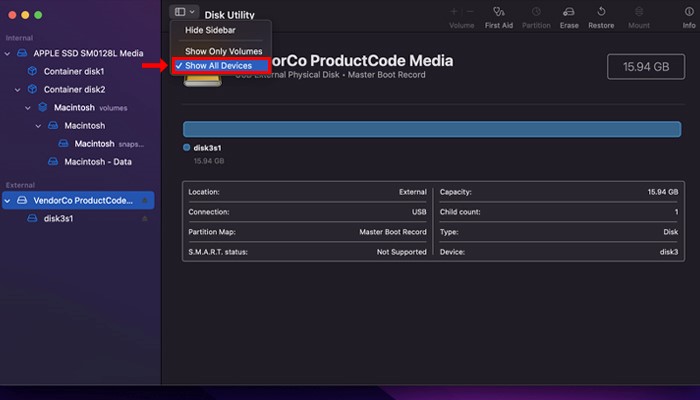
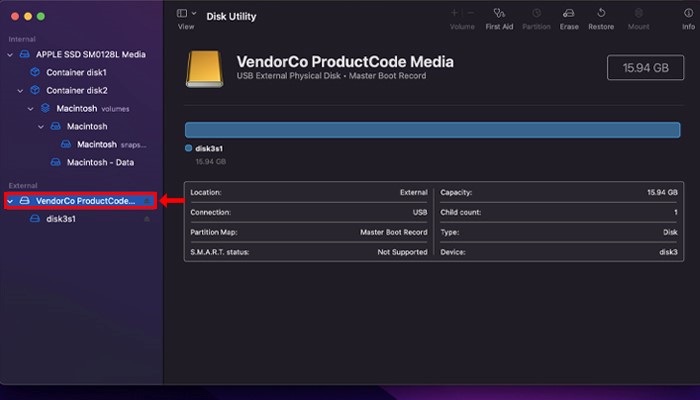
Step 3. The USB flash drive will be displayed on the left sidebar, allowing you to select it.
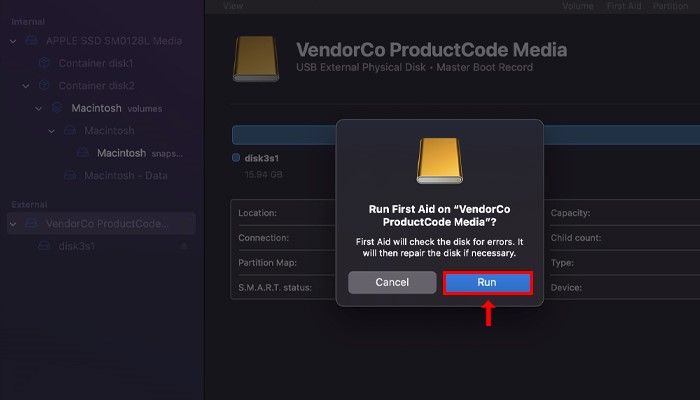
Step 4. To treat a burn, choose the First Aid option from the tabs displayed on top.
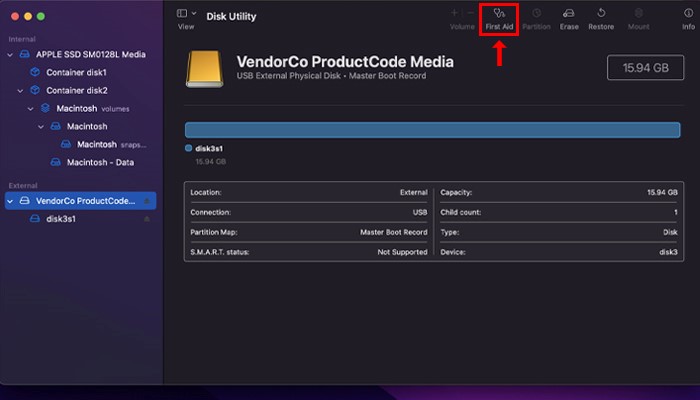
Step 5. Click the 'Run' button in the First Aid dialog box.
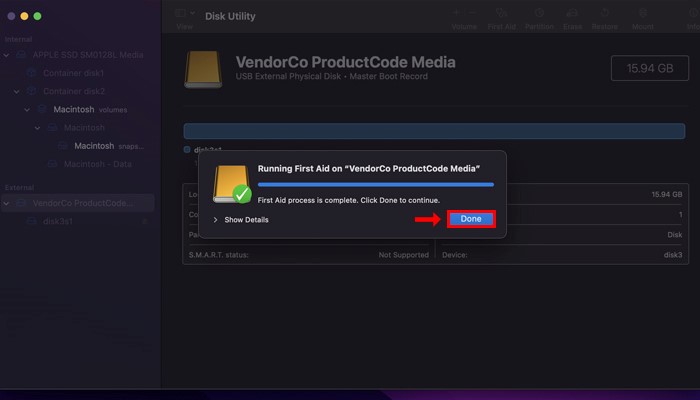
Step 6. Click the 'Done' button when First Aid has finished scanning.
Extra Tip: How to Recover Flash Drive Data
Permanently deleted files on a Mac can often be recovered using specialized USB data recovery software, which can analyze drives for recoverable data and inform the user accordingly, and can recover a variety of file formats.
One of the leading recovery software for Mac is Qiling Data Recovery for Mac, a third-party data recovery software that is considered one of the finest tools available today.
The innovative features set includes:
- Recovery of over 1000 file formats.
- The supported file systems include FAT12/16/32, ex-FAT, NTFS, NTFS-5, ext2/3, HFS+, and ReFS.
- Filters option to customize the file scan.
- File preview for easy file selection.
- The free trial version allows you to recover up to 2GB of data.
- Monthly, Yearly, and Lifetime subscriptions.
Conclusion
USB flash drives offer a convenient way to transfer small to medium-sized files between PCs and Macs with a USB port.
Qiling Data Recovery for Mac is a top-notch tool for recovering data from a Mac disk or external flash drive used with a Mac, offering ultra-fast and reliable data recovery. Its user-friendly interface and innovative features, combined with its powerful data recovery capabilities, make it one of the best data recovery apps available.
Related Articles
- Recover Files after Factory Reset Mac or Reinstalling macOS in 2022
- MacOS Comparison: Monterey vs Big Sur
- Repair Photos Library and Recover Lost Photos on Mac
- Disk Drill Mac: Is It Safe? Or Is It Worth Downloading?
- Unlock Hard Drive | Fix Drive Where Windows Installed Is Locked
When trying to install or restore Windows from recovery media or start your PC, you may encounter the error “The drive where Windows is installed is locked. - Unlock PDF Without Password | Remove Password from PDF Files [2022 Real Fix]
If you're looking to open a password-protected PDF file without entering the password, there are a few ways to do so. You can use Google Chrome to open the file, Adobe Acrobat to access the contents, or a free online PDF password remover tool to bypass the password.