Accidentally Clicked Don't Save Word Mac? Recover Unsaved Word
Problem - Accidentally Clicked Don't Save Word on Mac
I accidentally clicked "Don't Save" while closing an MS Word document on my Mac. So I lost 10+ pages of work! Please help me recover unsaved Word documents.
If you've accidentally pressed "Don't Save" on Word on Mac, don't worry! This tutorial has got you covered.
| Workable Solutions | Step-by-step Troubleshooting |
|---|---|
| Fix 1. Use Recovery Software | Run Qiling Mac recovery software > Scan device > Filter Unsaved Word file...Full steps |
| Fix 2. Use AutoRecovery | To quickly access a specific folder in Finder, go to the "Go" menu, select "Go to Folder," and then type the path to the desired folder in the text field that appears. This allows you to navigate to the folder without having to browse through the file system.~/Library/Containers/com.microsoft..." ...Full steps |
| Fix 3. Use Temp Folder | Go to "Applications" > "Utilities" > "Terminal" > Enter open $TMPDIR > Open TMP folder...Full steps |
Dos and Don'ts when you closed Word without saving the file:
- To reopen a closed Word document, reopen your Word application, check if the closed file appears in the "Recently closed" area, and click to restore it.
- Don't try to start a new round of editing in Word, as it can lead to data overwriting and reduce the chance of full recovery.
Related Post: Recover unsaved PowerPoint on Mac
Solution 1. Accidentally Clicked Don't Save Word on Mac, Try Recovery Software
If you've accidentally deleted an unsaved document, it won't appear in the Trash folder and is difficult to recover from elsewhere. A handy tool that can help is Deep Data Recovery for Mac, which can assist in retrieving the lost document.
This Mac data recovery software is designed to recover deleted and lost files, including unsaved files. It can retrieve lost Word documents, Office Excel/PowerPoint files, and other types of files, as well as retrieve unsaved files from the previous version folder.
Download Deep Data Recovery for Mac, which can help find the unsaved Word file you clicked "Don't Save" on by accident.
Step 1. Launch Deep Data Recovery, select the file types you want to recover and click "Next" to begin the recovery process.

Step 2. To recover unsaved files, hover your mouse over the device where the file was last saved, and click on the "Scan" button. This will initiate a scan to find any files that were saved to that device but not yet closed.

Step 3. After scanning, click on "Type" and expand "Unsaved Documents". Then, select the exact file type, such as Word, Excel, PowerPoint, Keynote, Pages, or Numbers, that you lost without saving. This should help you recover your unsaved document.

Step 4. Double-click on the unsaved file to preview it, select the correct version, and then click "Recover" to save the file to a different, secure location on your Mac.
For Windows users, refer to the page "How to Recover Unsaved/Deleted Word Document in Windows 10" for assistance.
Solution 2. Recover Unsaved Word Document from AutoRecovery
AutoRecovery is a built- AutoRecover is a feature in Microsoft Office applications that automatically saves changes to document files every 5 or 10 minutes, helping to prevent loss of data in case of a system crash or other unexpected event. It is enabled by default in Word, Excel, PowerPoint, and other Office applications, and can be configured to save files at different intervals. This feature is designed to provide an extra layer of protection for users' work, and can be especially useful for users who work on large or complex documents that require frequent saving.
When you accidentally close a Word file without saving, there's a chance to recover it from the AutoRecovery folder on your Mac, where Word stores autosaved copies.
Here are the steps to recover a lost Word document without saving from the AutoRecovery folder manually: You can try to recover your lost Word document by looking for the AutoRecovery file in the folder where your Word document was saved. The AutoRecovery file typically has a .
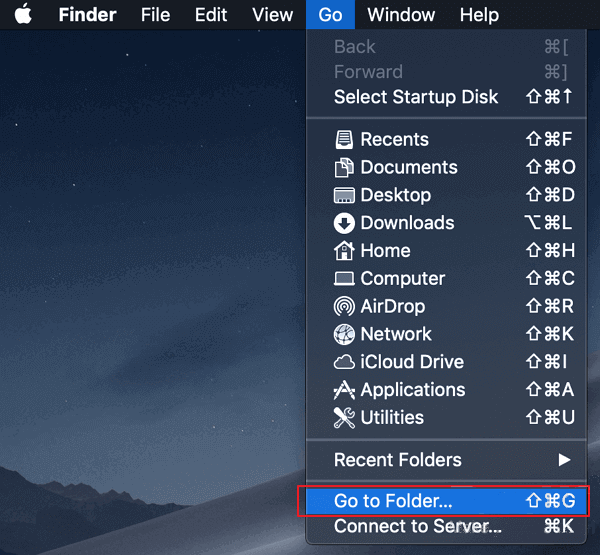
Step 1. Go to Finder, then click "Go", select "Go to Folder".
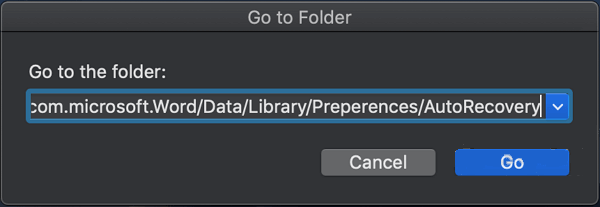
Step 2. Type ~/Library/Containers/com.microsoft.Word/Data/Library/Preferences/AutoRecovery and click "Go".
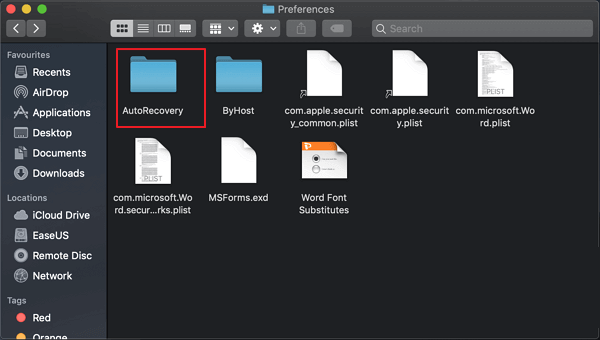
Step 3. Check the AutoRecovery Folder.
Step 4. To find the AutoRecovery file in other extensions, open the file with Microsoft Word. The file name will be in the format of AutoRecovery***.
Step 5. View the content of the unsaved Word document, then re-save it on Mac Desktop.
Solution 3. Recover Word Document Not Saved from Temporary Folder
The Temporary Folder on a Mac is a local directory that stores temporary files created during editing or modification processes. It can be used to retrieve unsaved files, such as a Word document, that were not saved due to a user clicking "Don't save".
The folder is named as TemporaryItems and you may find all temporary files of the unsaved Word in a TMP format. Follow recover Word document that was not saved from this folder now:
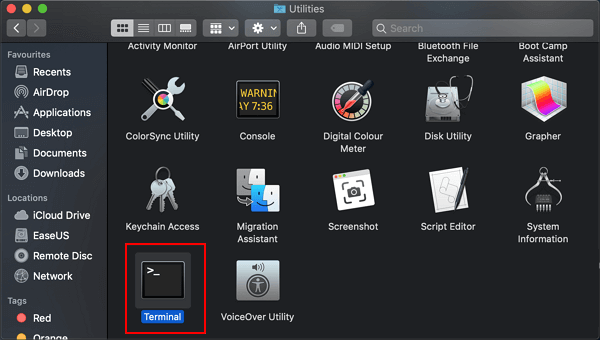
Step 1. Go to Applications> Utilities > Terminal.
Step 2. Enter open $TMPDIR in Terminal and press "Return".
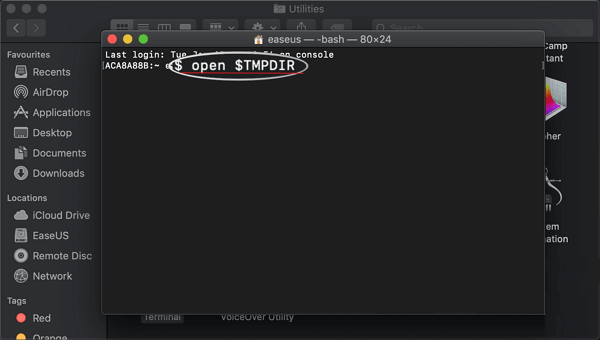
Step 3. Find and open the folder named as TemporaryItems.

Step 4. Locate and save the unsaved Word document to the desktop.
Step 5. Then change the file extension from ".tmp" to ".doc" or ".docx".
After the program crashes, open the unsaved Word document in your Word application and verify that the content is still there. If everything looks good, hit the Save button this time to ensure the document is saved properly.
Qiling Mac file recovery software can help recover lost files, even if the Temporary folder is empty.
Tips to Avoid Losing Word Files Before Saving
If you accidentally press "Don't save" on Word in Mac, don't worry, as there are methods to recover unsaved Word documents on your Mac. The steps mentioned earlier can be followed to retrieve your lost work.
When editing in Word, to minimize the chance of losing your hard work, save your document frequently, especially before making significant changes, and consider using the "Save As" feature to create a backup copy. Additionally, use the "Recover Unsaved Documents" feature if you accidentally close the document without saving, and take advantage of the built-in autosave feature to automatically save your work at set intervals.
- Click "Save" or press the "Ctrl+S" keys once you've made changes in Word.
- Disable problematic programs that freeze your Mac or Word.
- Set the AutoSave to a higher frequency, such as 5 or 3 minutes, to save your work more frequently. This will help prevent data loss in case of a system crash or other unexpected event.
Sum Up: Your Lost Word by Clicking "Don't Save" Is Recoverable
If you accidentally pressed "Don't save" in Word on Mac, there are ways to recover your work. One instant and effective solution is to use Deep Data Recovery for Mac, which features an unsaved file recovery tool.
If you lost an unsaved Word document on your Mac, don't worry, it's recoverable. You can try checking AutoRecovery and Temporary Folder, which are the last locations where your lost file might be found. Even if you clicked "Don't save" when closing the document, your hard work might still be recoverable. Follow the steps to retrieve your lost file and bring back your work.
Related Articles
- How to Recover Deleted/Disappeared Notes on Mac
- 9 Fixes - Fix Mac Not Reading SD Card Once for All
- Repair Photos Library and Recover Lost Photos on Mac
- PDF File Recovery: How to Recover Deleted/Unsaved PDF Files Mac
- Email Recovery for Gmail, Yahoo, Outlook, Hotmail
If you're struggling to find out how to recover permanently deleted emails, this article can help. It provides step-by-step guides on how to recover deleted emails in various email services, including Gmail, Outlook, Hotmail, and AOL. - [5 Solutions for macOS] Recover Deleted Files After Updating to Catalina
How to recover deleted files after updating to Catalina? This article teaches you five ways to recover lost files on macOS Catalina. You can recover deleted files with Time Machine, recovery software, iCloud, Apple Support, and by checking the Mac folder.