Clone a 4Kn or 512e Sector Size Disk Safely
Quick Navigation:
- What 4Kn and 512e Actually Mean
- Check the Sector Size Before You Clone
- Why the Clone Fails or Will Not Boot
- Clone with Qiling Disk Master
- Frequently Asked Questions
Two disks can carry the same advertised capacity and still disagree about geometry. A 512e drive reports 512-byte logical sectors and translates them in firmware, while a 4Kn drive reports 4096 bytes directly. A clone between the two is possible, but it needs aligned partitions and a destination with enough addressable blocks.
What 4Kn and 512e Actually Mean
Every current hard drive and SSD stores data in 4096-byte physical sectors, but it can report them to the operating system in two ways. A 512e drive reports 512-byte logical sectors and converts them inside the firmware, which is why the e stands for emulated. A 4Kn drive reports 4096-byte logical sectors and has no translation layer at all.
The difference is invisible in Explorer and in Disk Management, yet it changes the number of addressable blocks and the alignment a partition needs. A partition table written for 512-byte sectors places the first partition at a multiple of 512 bytes, which is not a multiple of 4096, so a 4Kn destination has to read and rewrite a whole physical sector for every small write.
Booting is the second issue. Firmware on some machines cannot start from a 4Kn system disk, so a clone that completes perfectly still ends at a blank screen.
Check the Sector Size Before You Clone
Record four values before you start: the logical sector size of the source, the logical sector size of the destination, and the exact capacity in bytes of both disks. A drive information utility reports them side by side, and the partition offsets of the source show whether the existing layout is already 4096-aligned.
The built-in fsutil command also reports bytes per sector for an NTFS volume. It is a Windows tool rather than part of this software, and it returns the logical value only, so a 512e drive still reports 512 even though its physical sectors are 4096 bytes.
Compare capacities in bytes rather than in gigabytes. A 4Kn drive of the same nominal size can hold slightly fewer addressable blocks, and a clone that ignores that detail fails near the end when the destination runs out of them.
Why the Clone Fails or Will Not Boot
Three failures are common. The clone stops with a not enough space message although the destination looks larger; the copy finishes but the machine will not boot; or the system boots and then performs badly on every write.
The first is a block-count mismatch. The second is usually a boot mode problem, because a disk cloned from a legacy BIOS installation keeps MBR boot code that neither the destination firmware nor the 4Kn geometry can use. The third is misalignment, and it shows up as slow small writes rather than as an error.
Check the boot mode of the source in the firmware settings before you clone. If the source boots in UEFI mode from a GPT disk, the clone has the best chance of starting on a 4Kn destination.
Clone with Qiling Disk Master
Qiling Disk Master reads the geometry of both disks and adjusts partition offsets while it clones, so a 512e source can be written to a 4Kn destination with aligned partitions instead of a byte-for-byte copy of a 512-byte layout.
Step 1. Choose Disk Clone
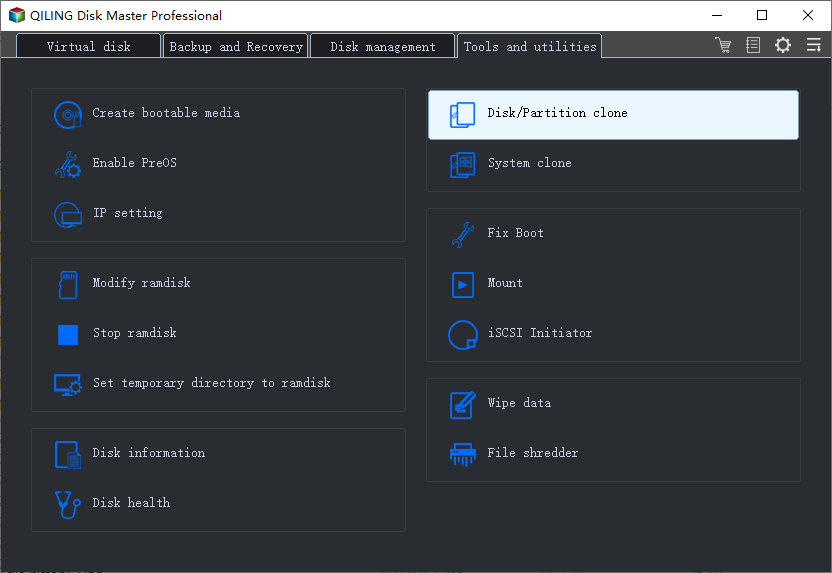
Start the program, open Clone on the left, and select Disk Clone. Partition Clone is the better choice when you only need one volume rather than the whole disk.
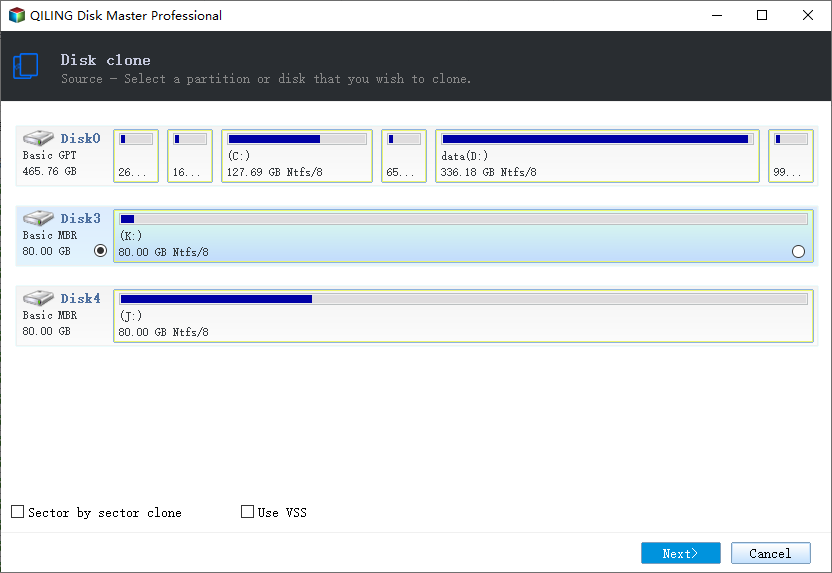
Step 2. Select the Source Disk
Pick the disk that holds the current installation and confirm its capacity and model in the summary line. Do not select the destination here; the wizard asks for it in the next step.
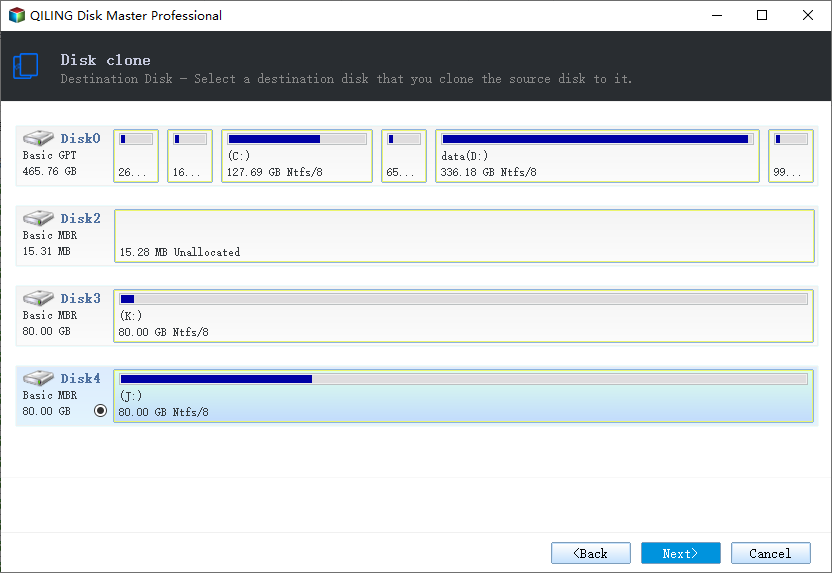
Step 3. Select the 4Kn or 512e Destination
Choose the new disk and read the capacity shown under each entry. Comparing bytes is the reliable test when two drives carry the same advertised size, and the smaller line is usually the 4Kn one.
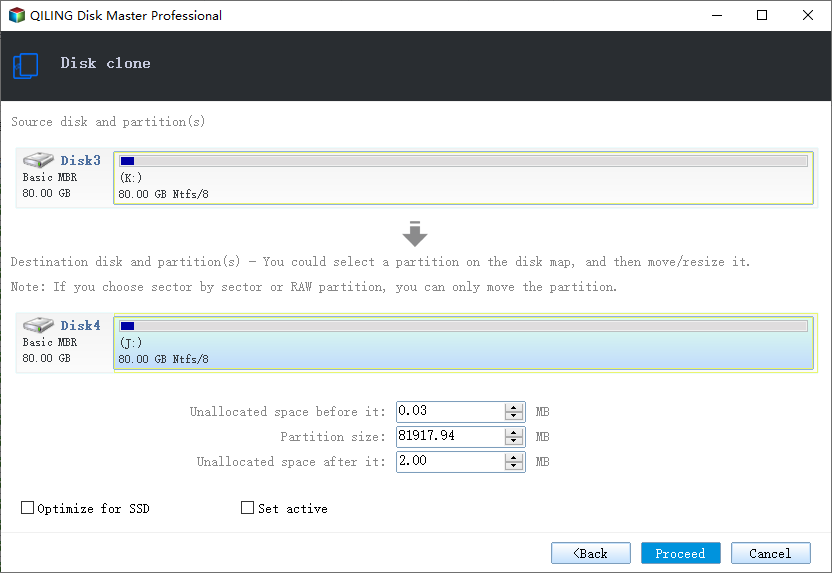
Step 4. Adjust the Layout, then Preview and Proceed
Enable the option that fits partitions to the new disk when the destination is smaller, and check that the system partition starts on a 4096-byte boundary. Review the pending operations list, then click Proceed.
Step 5. Confirm the Result
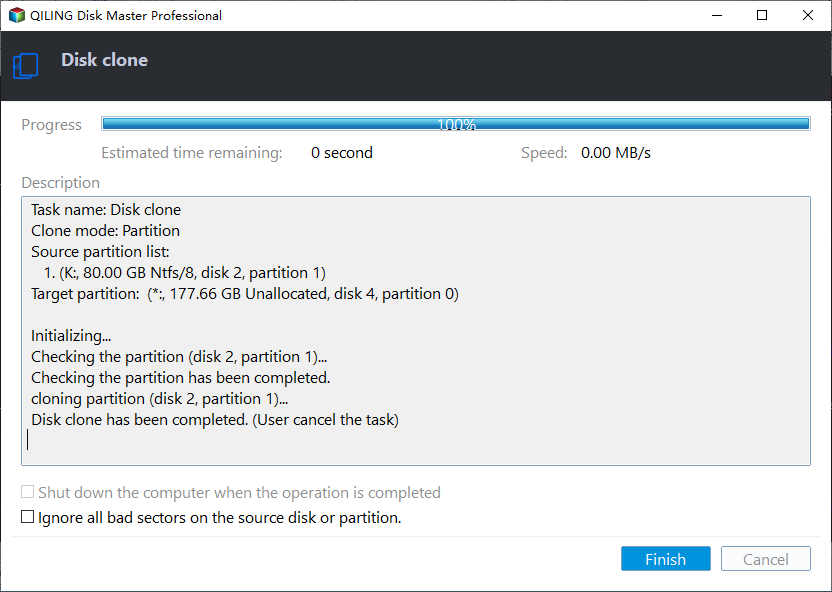
Wait for the progress bar to finish, then boot from the new disk once before you erase the old one. Keep the source untouched until the machine starts normally and the applications open without errors.
Frequently Asked Questions
Can I clone a 512e disk to a 4Kn disk?
Yes, provided the destination has at least as many addressable blocks and the firmware can boot from 4Kn. The clone tool handles alignment; the firmware is outside its control.
Does 4Kn make an SSD faster?
Only slightly for desktop work. It removes a translation step and can reduce write amplification, but the gain is measurable mainly in servers with large sequential reads.
Why does my 4 TB drive show less space after cloning?
Drives of the same advertised capacity differ in exact byte count, and a 4Kn disk rounds differently. Compare the byte figures rather than the gigabyte labels.
Is a misaligned clone recoverable?
Yes. Realign the partitions with a partition manager instead of cloning again. The data is intact; only the starting offsets are wrong.
For the alignment rules behind these offsets, see 4K alignment when cloning an SSD.
Related Articles
- 4K Alignment When Cloning an SSD
- Best Free Disk Cloning Software for 2026
- Clone Windows 11 to a Smaller SSD
- Clone an ASUS Laptop HDD to an SSD
- Recover Files After a Failed Disk Clone
Products
Articles & Tutorials
- Data Recovery
- Data Backup
- File Recovery
- File Backup
- System Backup and Restore
- Disk and Partition Clone
- Technical articles
- Mobile articles
- Disk Master Help
- Windows Data Recovery Tutorials
- Windows Secure Delete Tutorials
- Windows Partition Management Tutorials
- Windows File Backup and Restore Tutorials
- Windows System Backup and Restore Tutorials
- Windows Disk Backup and Restore Tutorials
- Windows Clone Tutorials