Migrate Windows to a New SSD and Keep Recovery
Quick Navigation:
- Count the Partitions Before You Clone
- Clone the Whole Disk, Not One Volume
- Verify the Repair Option Afterwards
- Migrate With Qiling Disk Master
- Frequently Asked Questions
An SSD upgrade usually copies the Windows volume and the EFI partition, then stops. The recovery partition is small and has no drive letter, so it is easy to miss, and the machine boots normally without it. The loss only becomes obvious months later when Windows needs its repair environment and finds it missing.
Count the Partitions Before You Clone
Open Disk Management and list every partition on the system disk: the EFI system partition, the Microsoft reserved partition, the Windows volume, and the recovery partition that normally sits at the end.
Compare the total with the capacity of the new SSD. A smaller destination can still hold everything if the partitions are scaled, but the recovery partition has to be included in that plan.
Note which partition the firmware boots from. The EFI partition and the boot configuration must both be copied for the system to start.
Clone the Whole Disk, Not One Volume
Disk Clone copies every partition on the disk, which is the simplest way to keep the recovery environment. Partition Clone copies only what you select, and the recovery partition is the one people forget.
If the destination is smaller, enable the option that fits partitions to the new disk so the layout is scaled instead of rejected.
Keep the old disk connected until the new one has booted at least once.
Verify the Repair Option Afterwards
After the first boot from the new SSD, open the recovery settings and check that the recovery environment reports as enabled on the expected partition.
If it reports as disabled, the partition was not copied or its identifier was not preserved, and the repair environment can be recreated from installation media.
Boot the new disk once with the old disk disconnected. A clone that only boots with both disks attached has a boot configuration problem.
Migrate With Qiling Disk Master
Qiling Disk Master clones the full disk layout, including the recovery partition, and adjusts partition sizes when the destination is smaller.
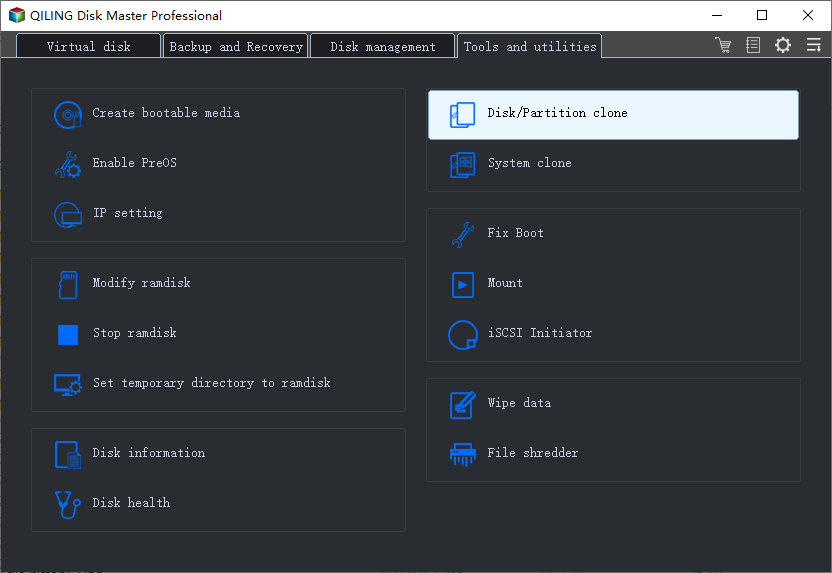
Step 1. Choose Disk Clone
Open Clone and select Disk Clone. Confirm that the source is the disk holding Windows and not a data disk.
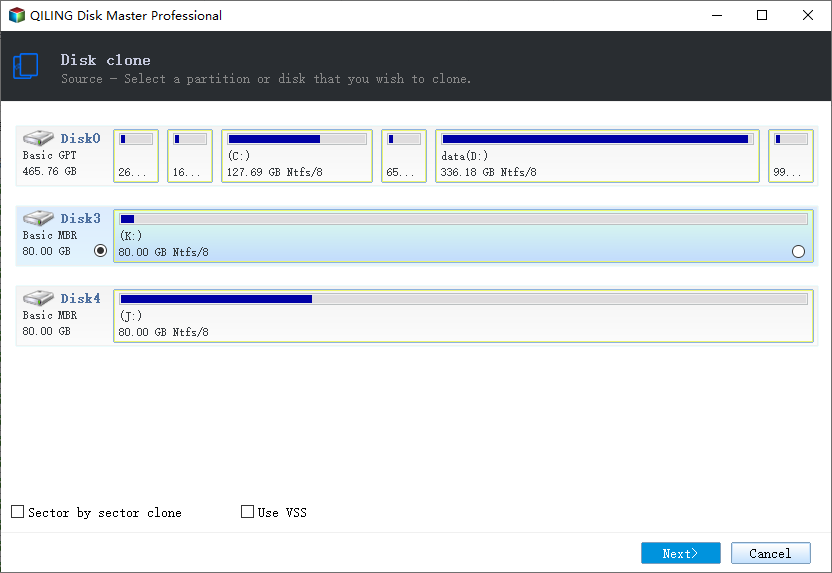
Step 2. Select the System Disk
Pick the disk that holds the EFI, Windows, and recovery partitions, and check that all of them appear in the summary.
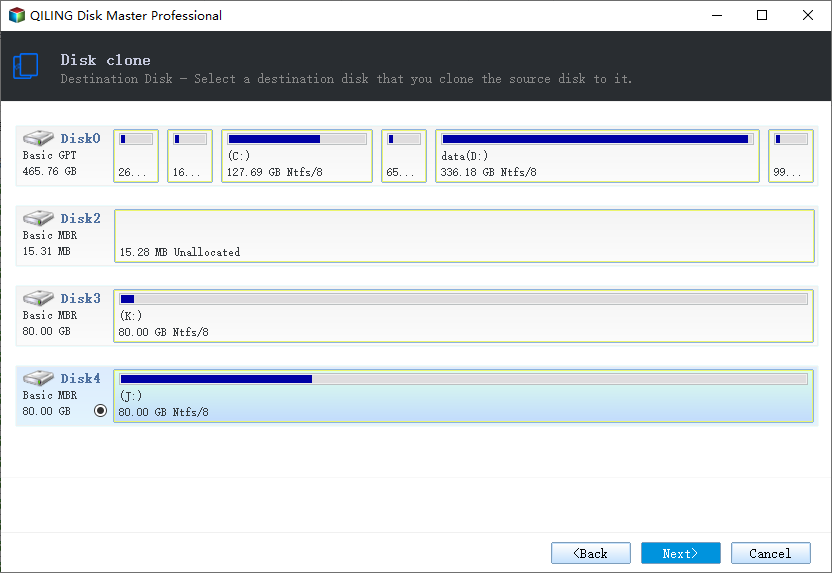
Step 3. Select the New SSD
Choose the replacement drive and enable the option that fits partitions when it is smaller than the source.
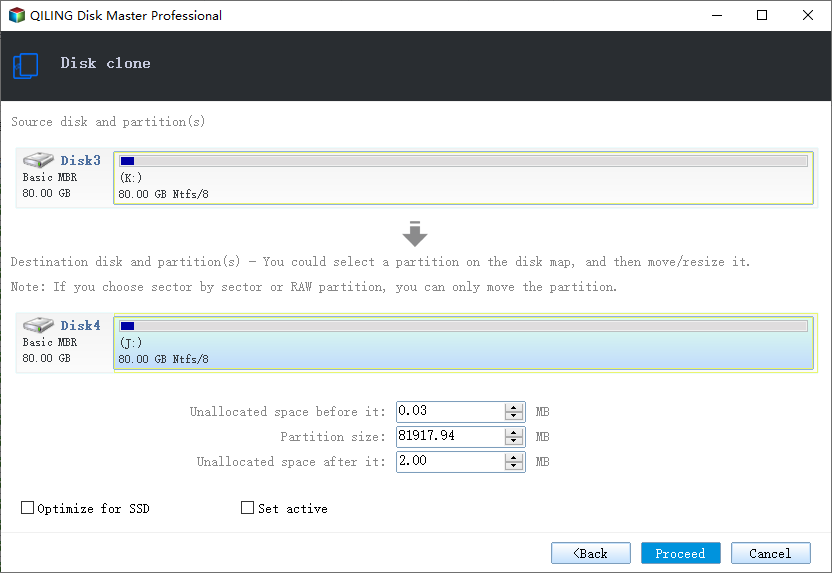
Step 4. Preview and Proceed
Check that every partition is mapped, including the recovery partition, then click Proceed.
Step 5. Boot and Confirm Recovery
Boot from the new disk with the old one disconnected, then confirm the recovery environment is still available.
Frequently Asked Questions
Do I need the recovery partition?
Windows works without it, but repair and reset options disappear. Most users want it kept.
Why is the recovery partition at the end of the disk?
It was placed there by setup or by a later update to keep it out of the way of volume growth. Moving it during a clone is normal.
Can I recreate it after the clone?
Yes, from installation media, but it is simpler and safer to copy it during the migration.
What if the new SSD is smaller than the old one?
Partitions can be scaled when the used space fits. The recovery partition still has to be included in the layout.
For the full migration procedure, see cloning Windows 11 to a smaller SSD.
Related Articles
- Clone Windows 11 to a Smaller SSD
- Copy the Recovery Partition to a New Hard Drive
- Recovery Partition Too Small for Updates
- 4K Alignment When Cloning an SSD
- Recover Files After a Failed Disk Clone
Products
Articles & Tutorials
- Data Recovery
- Data Backup
- File Recovery
- File Backup
- System Backup and Restore
- Disk and Partition Clone
- Technical articles
- Mobile articles
- Disk Master Help
- Windows Data Recovery Tutorials
- Windows Secure Delete Tutorials
- Windows Partition Management Tutorials
- Windows File Backup and Restore Tutorials
- Windows System Backup and Restore Tutorials
- Windows Disk Backup and Restore Tutorials
- Windows Clone Tutorials