[Solved]Could Not Activate iPhone on iPhone X? Fixes Here!
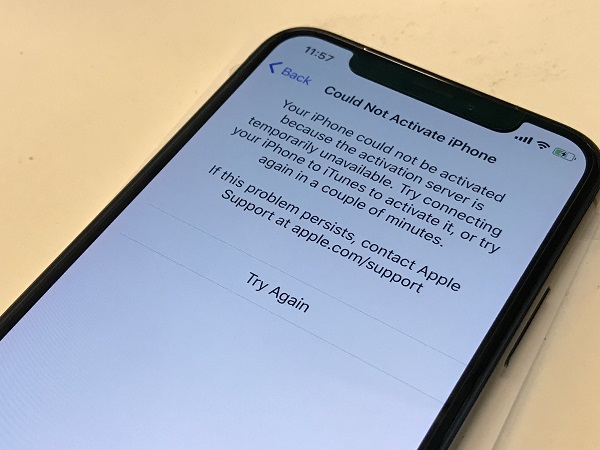
"You iPhone could not be activated because the activation server is temporarily unavailable. Try connecting your iPhone to iTunes to activate it, or try again in a couple of minutes." If you see this notification on your iPhone X, you are facing the "Could Not Activate iPhone" error on your device. Recently, many iPhone users have reported this iPhone activation error on their iPhone X. Given that, this article is written to provide the potential fixes to the issue. For more solutions to common iPhone problems, you can go to the page covering tips for iDevice to find what you need.
Fixes to Could Not Activate iPhone error on iPhone X
Tip 1: Restart your iPhone X
The first solution you can try to fix the "Could Not Activate iPhone" error on iPhone X is to restart your device. There are two ways to restart iPhone X which are shown below.
Method 1: Press and hold Side button and Volume Down or Volume Up button at the same time until the slider appears. Drag the slider to shut down your iPhone X and then press and hold the Side button to turn on your iPhone X later.
Method 2: Go to Settings > General > Shut Down and then you will see the slider. Move the slider to turn off your iPhone X. Press and hold the side button until you see the Apple logo to turn on your iPhone.
Tip 2: Use WiFi network connection
If you are using the cellular data, you need to connect to a WiFi network to activate your iPhone X. Swipe down from the top right corner of your iPhone screen to open Control Center, tap on WLAN to turn on WiFi and then connect your iPhone X to a stable WiFi network. (WiFi not working in iOS 11? No worry. The solutions are provided.)
Tip 3: Activate iPhone with iTunes
As mentioned in the notification, you can try to activate your iPhone with the help of iTunes when you encounter the error "Could Not Activate iPhone". Before you do that, make sure you have installed the latest version of iTunes on your computer to avoid problems like "iPhone not connecting to iTunes". Then follow the steps below to activate your iPhone X with iTunes.
Step 1: Connect your computer to the Internet and run iTunes.
Step 2: Connect your iPhone X to the computer with the official USB cable and wait for iTunes to detect and activate your iPhone.
Step 3: If you see "Set up as New" or "Restore from Backup" on iTunes, your iPhone X is successfully activated by iTunes.
Tip 4: Re-insert SIM card to your iPhone X
If you have inserted a SIM card into your iPhone X, you need to check whether the card is supported and correctly inserted. Turn off your iPhone using the method introduced in Tip 1 1, take out the card, carefully insert the card into your iPhone and then turn on your iPhone X again.
Tip 5: Contact Apple for help
If the "Could Not Activate iPhone" error still exists after trying all the solutions above, maybe it's time to contact Apple for help. Go to https://support.apple.com/ and seek help.
Notes:
I'm sure you need to copy contents to your new iPhone X either from the computer or another iPhone. That's why I recommend a totally free tool to help you make it here. With Qiling MobiMover Free installed on your PC running Windows 7 or later, you can transfer photos, videos, audio, contacts, messages, notes and more between two iOS devices (iPhone/iPad in iOS 8 or later) or between an iOS device and computer. For example, you can transfer all data from old iPhone to new iPhone X, back up iPhone 7 contacts to computer and transfer photos from computer to iPad without any cost. Sounds great? Equip your PC with MobiMover and begin to back up data on iPhone X to the computer in a simple way.
Step 1. Connect your new iPhone X or iPhone 8 to your computer with a USB cable. Tap "Trust This Computer" on your iPhone screen if a pop-up asks. Run Qiling MobiMover and go to the "Backup Manager" mode. Click "Backup" to start backing up iPhone X or iPhone 8 to your Window PC.
Step 2. MobiMover enables you to backup all files with a single click. Before getting started, you can change the default backup location by clicking on the "Select" at the bottom of the screen. After that, tick the box next to the "Select All" to start backing up.
Step 3. During the process of backup, don't disconnect your iPhone. Otherwise, you need to start it again.
Note: If you want to restore the backup to your iPhone, note that this will wipe out all the content, settings, and preference on your device and then replace it with what's in the backup. If this is not what you want, just use "Phone to PC" mode to transfer what you want to the PC for safekeeping.
Related Articles
- How to Fix iPhone Contacts Not Syncing with Mac
- How to Put iPhone X/iPhone 8/iPhone 7 on Silent/Vibrate with Simple Steps
- iPhone 8/iPhone X Stuck in Recovery Mode in iOS 11? Fixes Here!
- How to Turn Off Find My iPhone on iPhone 8/iPhone X in iOS 11