How to Turn Off Find My iPhone on iPhone 8/iPhone X in iOS 11
Turning off Find My iPhone is required when you want to use some third-party software or want to restore your iPhone with iTunes. If you are encountering one of these situations and want to disable that feature, you can learn how to get things done following one of the steps below. Part 1 will show you how to turn off Find My iPhone on your iPhone 8, iPhone 8 Plus or iPhone X in iOS 11 from your iPhone directly, while Part 2 will introduce the way to remove a device from Find My iPhone on computer using iCloud. Read on to get more details.
How to turn off Find My iPhone on iPhone 8/iPhone X in iOS 11
Part 1: Disable Find My iPhone on iPhone
Like restoring iPhone to factory settings to set up your iPhone as new and turning off Location Services on your iPhone to protect your privacy, turning off Find My iPhone can be done in Settings.
Step 1: Open Settings App on your iPhone 8/iPhone X in iOS 11.
Step 2: Tap on [your name] and click iCloud.
Step 3: Scroll down to choose to Find My iPhone.
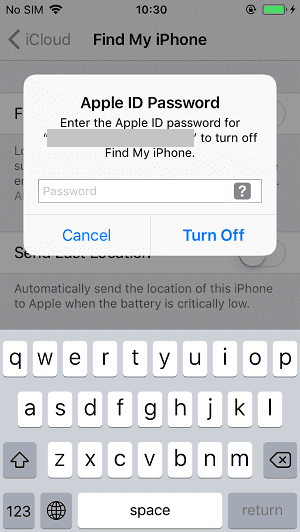
Step 4: Toggle off Find My iPhone, enter our Apple ID password and click Turn Off. (Forget your Apple ID password? Learn how to reset Apple ID password here.)
Part 2: Remove the device from Find My iPhone
After you turn off Find My iPhone feature from your iPhone 8, iPhone 8 Plus or iPhone X in iOS 11, you can remove the device from Find My iPhone using iCloud on computer.
Step 1: Open a browser on your computer and visit iCloud.com.
Step 2: Enter your Apple ID and Password to log into iCloud.
Step 3: Among the options, choose Find iPhone.
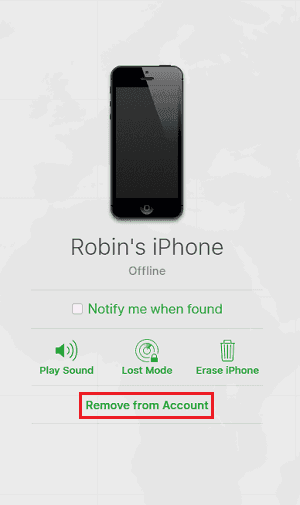
Step 4: Click All Devices in the top middle of the screen and click the iPhone you want to remove.
Step 5: Tap on Remove from Account to remove your device from Find My iPhone.
Notes:
The Find My iPhone feature helps to get your device back if your device is stolen. You can not completely prevent your iPhone from being stolen, but you can avoid your iPhone data being lost by backing up your iPhone to computer. The totally free iOS data transfer tool that can help you make it is Qiling MobiMover Free. With MobiMover installed on your PC, you can transfer files like photos, videos, audios, contacts, messages, notes and more between iOS devices (iPhone/iPad in iOS 8 or later) or between iOS device and computer. Besides, MobiMover can also serve as a free iPhone content manager with its file management features. Follow the steps below to learn how to back up your iPhone 8/iPhone X for FREE.
Step 1. Connect your new iPhone X or iPhone 8 to your computer with a USB cable. Tap "Trust This Computer" on your iPhone screen if a pop-up asks. Run Qiling MobiMover and go to the "Backup Manager" mode. Click "Backup" to start backing up iPhone X or iPhone 8 to your Window PC.
Step 2. MobiMover enables you to backup all files with a single click. Before getting started, you can change the default backup location by clicking on the "Select" at the bottom of the screen. After that, tick the box next to the "Select All" to start backing up.
Step 3. During the process of backup, don't disconnect your iPhone. Otherwise, you need to start it again.
Note: If you want to restore the backup to your iPhone, note that this will wipe out all the content, settings, and preference on your device and then replace it with what's in the backup. If this is not what you want, just use "Phone to PC" mode to transfer what you want to the PC for safekeeping.
Related Articles
- How to Export and Read iPhone Messages on PC
- How to Change Ringtones on iPhone 8/8 Plus/X in iOS 11
- How to Lock Apps on iPhone X/iPhone 8/iPhone 7 in iOS 11
- How to Access iCloud Backup on iPhone, Mac, and PC