5 Tips | How to Save a HEIC File as a JPEG on a PC/Mac/iPhone
If you've transferred iPhone photos to a PC or a Mac, you should know that the format of your photos would be the original HEIC format (short for High-Efficiency Image Containers). This format is great for users who rely on the iPhone or iPad in their daily life because it can save much storage space.
But sadly, such a format hasn't been widely used on other devices and platforms. Thus, if you want to open them, you'll need to save them as JPEG first. And this post will tell you how to save a HEIC file as a JPEG, plus a bonus tip to disable HEIC photos on iPhone and iPad.
Part 1. How to Save a HEIC File as JPEG on a PC
There are three ways to save a HEIC file as JPEG on a PC. The first (and the quickest) is to use some third-party converters. Such tools have become a must for users who need to convert HEIC photos into JPEG in their daily lives or work because they offer a pretty fast conversion speed.
Another way is to use an online converter, which is easy to use and accessible on almost all platforms. But on the downside, the conversion speed is relatively slow. The last way is by uploading photos to cloud services like OneDrive and Dropbox and then downloading them on your computer in JPG format.
Which way you choose to use depends on your specific requirements. Now, choose the way you like best.
Tip 1. Using Qiling MobiMover
As we mentioned earlier, having an image converter installed on your computer makes it relatively easy and convenient to convert HEIC images. There are many image converters available in the market, and this iPhone data transfer tool - Qiling MobiMover is one of the best options you can have. With it, you can convert one or multiple HEIC pictures quickly. In addition to being an image converter, it also works as an iPhone data transfer tool, backup manager, WhatsApp manager, and video downloader. With these features, you can:
- Transfer files between two iOS devices or between an iPhone and a computer
- Manage your iPhone data by deleting, editing, or adding new files
- Back up your device
- Transfer WhatsApp messages to a new iPhone
- Download videos from any video-sharing site
To save a HEIC file as a JPG:
Step 1. Connect your iPhone to your computer via a USB cable and launch Qiling MobiMover. Next, choose the "HEIC to JPG" option from the left panel.
Step 2. Then, you can drag and drop HEIC files from your computer to Qiling MobiMover. Or you can also click "Browse" to locate and add the HEIC files.
Step 3. Click "Convert" or "Start All" to convert HEIC photos to JPG. After the HEIC to JPG conversion completes, you can click "View" button to check the converted JPG photo on your computer. Or you can also push the converted items to your iPhone with the "PC to Phone" feature.
Tip 2. Using Online Converters
Using online image converters to save your HEIC file in JPEG is also a good option. Such converters are free and easy to use. They don't require any registration or installation.
However, some problems may arise while using such tools. Some of them are:
- Privacy concern - the pictures you upload will be backed up to the online converters' server, and you won't know what they will do with these pictures.
- Slow download speed - if you wish to convert many pictures, it may take a lot of your time as the conversion process is internet-based. Even worse, some of such tools don't support batch conversions.
- Malware attack - when you download the converted pictures to your computer, it's possible to download some viruses as well.
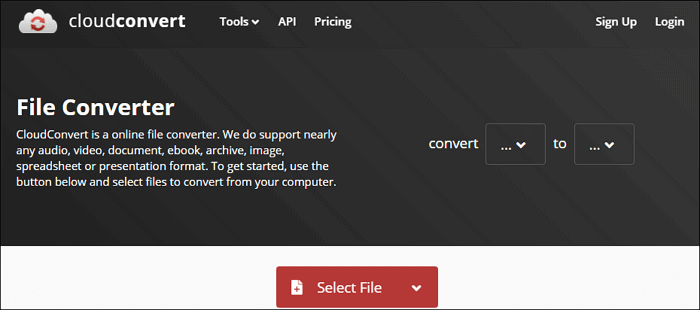
Considering all these factors, we don't recommend using any online image converters. But if you insist on such tools, you can try CloudConverter. Here's how it works.
Step 1. Head to the CloudCoverter website.
Step 2. Click "Select File" to upload the HEIC pictures you wish to convert.
Step 3. Next to "Convert to," choose "JPG" as the destination format.
Step 4. Click "Convert" to start the conversion process.
Step 5. Then, a converted picture will display with a download button. Click "Download" to save the converted image on your computer.
Tip 3. Using Dropbox
Dropbox allows you to upload photos from your iPhone or iPad and save them in HEIC or JPG format. The conversion will happen during the process of uploading. To do this, you can:
Step 1. On your iPhone or iPad, open the Dropbox app.
Step 2. Tap the person icon, and then tap the gear icon.
Step 3. Tap "Camera Uploads."
Step 4. Tap "Save HEIC Photos as" and choose "JPG" as the upload format.
Step 5. From now on, all photos you upload from your iPhone can be downloaded in JPG format.
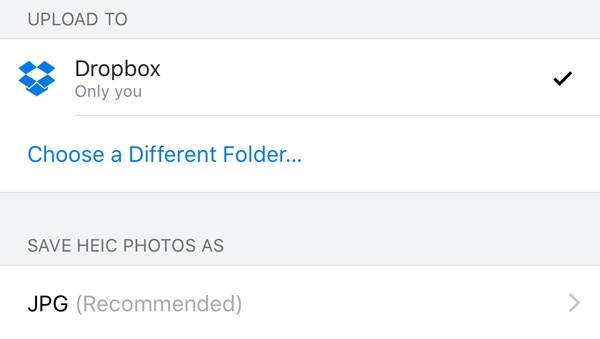
Tips: You can also do the same thing with OneDrive.
Part 2. How to Turn a HEIC Photo into JPG on an iPhone or iPad
On an iPhone or iPad, the simplest way to save HEIC files as JPG on an iPhone or iPad is to use the File app, a built-in app designed to help iOS users manage their iOS data. Also, it can help you turn a HEIC photo into JPG with ease. Here're the steps.
Step 1. Open the File app on your iPhone or iPad. Choose the "On My iPhone/iPad" option or cloud storage from the main screen.
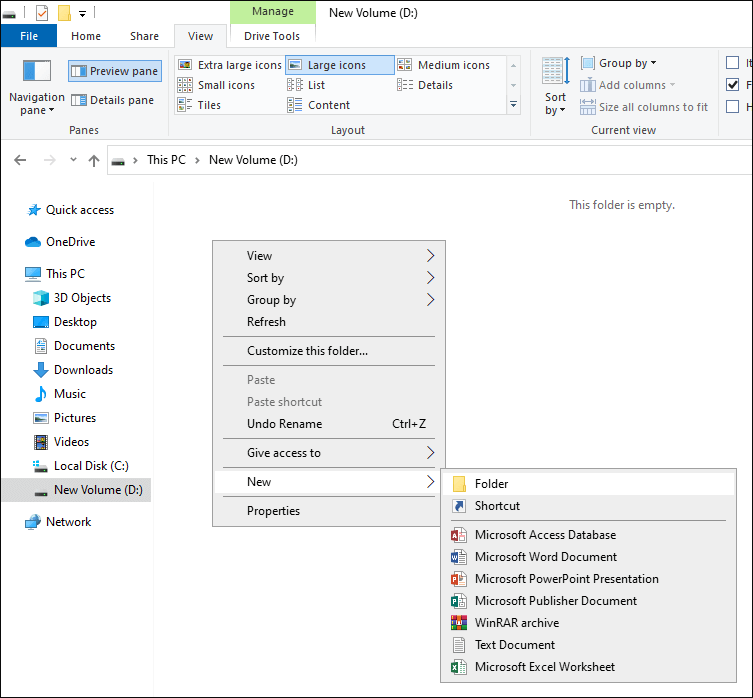
Step 2. Tap and hold the blank area, and choose "New Folder" from the popup options.
Step 3. Give the new folder a name, and tap "Done."
Step 4. Open your Photos app, tap the "Select" button from the top toolbar. Select the photos you wish to convert.
Step 5. Tap "Share" from the bottom-left corner, and then choose "Copy Photos."
Step 6. Return to the File app, open the folder you created, paste the copied photos in the empty area.
Step 7. Then, you'll see your HEIC photos here, in the JPG format.
Part 3. How to Save HEIC as JPG on a Mac
It is pretty simple to save HEIC files as JPG on a Mac. You don't have to download or use any extra software as you can directly do this job via the built-in app - the Preview app. Here're the steps to save HEIC as JPG on a Mac with the Preview app.
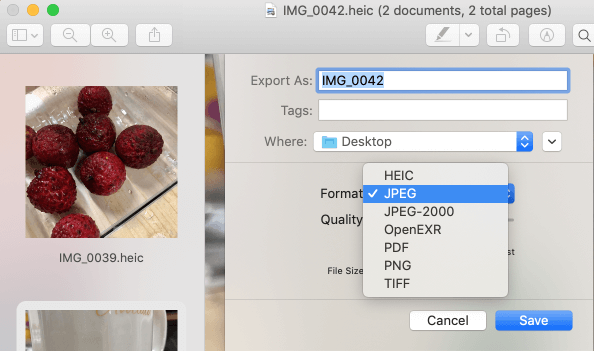
Step 1. Open the photos you wish to convert via the Preview app on your Mac.
Step 2. Click "File" > "Export."
Step 3. From the Format dropdown menu, choose "JPEG."
Step 4. Give your file a new name and set a file location. Then, click "Save" to save the photos on your Mac.
Part 4. How to Turn off HEIC on the iPhone
If you don't want to waste time converting HEIC pictures to JPEG, you can disable HEIC on your iPhone or iPad by following these steps.
Step 1. On your iPhone, go to the Settings.
Step 2. Please scroll down to find the camera option tap it.
Step 3. On the Camera page, tap "Formats."
Step 4. Switch on "Most Compatible."
The Final Words
As you can see, saving a HEIC file as a JPG is relatively easy on a PC, a Mac, or an iPhone. You can use these methods to change a HEIC picture into JPG. If you need to open HEIC files on different platforms or devices, it's better to disable HEIC photos on your iPhone or iPad. Thus, you don't have to waste too much time converting them to JPG.
Related Articles
- Top Best 5 YouTube Video Downloaders for Windows 10/8/7
- How to Convert Large YouTube Files to MP3
- [4 Ways] How to Copy Photos to iPhone from Windows 10
- Best Free File Manager for iPhone and iPad on Windows