How to Transfer Photo Albums from iPhone to Mac
Although there is more than one preinstalled app on Mac that allows you to transfer photos from an iPhone to a Mac, like Photos and Image Capture, none of them helps to transfer photo albums. Thus, when you need to transfer albums from an iPhone to a Mac, you will need to apply other alternative ways.
How to Transfer Photo Albums from iPhone to Mac Directly
Whether you want to transfer photos from your iPhone to a Mac by item or by album, the iPhone transfer software - Qiling MobiMover will fulfill your needs perfectly. With this tool, you will be able to view and transfer your iPhone photos by album, all at once or selectively. In addition to photos, it also supports videos, music, ringtones, contacts, books, and more. You can not only transfer files between an iPhone an a Mac but also share content from one iPhone to another.
To transfer photo albums from an iPhone to a Mac:
Step 1. Connect your iPhone or iPad to your Mac. Start Qiling MobiMover and go to "Content Management" > "Pictures" > "Albums."
Step 2. Select the albums you'd like to copy from your iPhone/iPad to Mac. You can select specific items or select all, depending on your needs. You can choose "Original" and "JPG" as the format of the transferred photos in "Preference".
Step 3. Click the "Transfer" button, and MobiMover will start transferring albums from your iPhone or iPad to your Mac automatically. When it has completed, go to the destination to check the files.
Have you ever wanted to transfer WhatsApp messages or convert HEIC to JPG on Mac? If you do, the WhatsApp management and file conversion features in Qiling MobiMover will get your needs met. Get it now to take more control over your iOS device.
Bonus Tip: How to Transfer Photos from iPhone to Mac
If you don't mind transferring iPhone photos all at once without putting them in different albums, there are two more convenient ways for you: Photos and Image Capture. Both apps are built-in programs on macOS and allow you to import photos from your iPhone to your Mac.
Option 1. Photos
With Photos, you can import all new photos or selected ones from an iPhone to a Mac. Here are the details.
Step 1. Connect the iPhone to the Mac and make sure your iPhone is recognized.
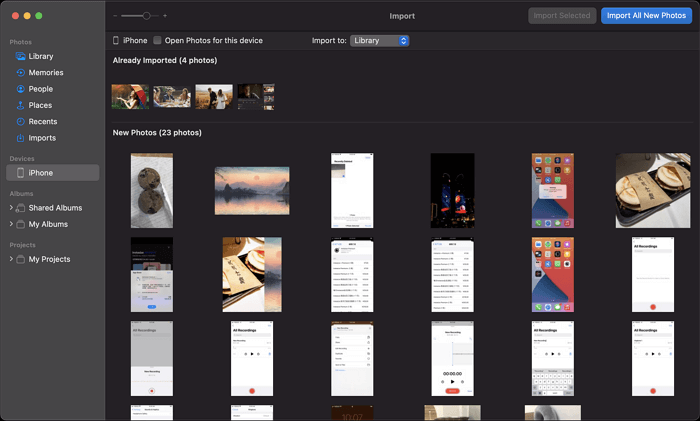
Step 2. Launch Photos on the Mac, then click your iPhone under "Devices."
Step 3. Click "Import to" to choose a folder to save the photos.
Step 4. Click "Import All New Photos" or select the items you want to transfer and then click "Import [number] Selected" to transfer photos from your iPhone to the Mac.
Option 2. Image Capture
This works quite similarly to Photos. You can choose either of them to import photos from an iPhone to a Mac.
Step 1. Connect your iPhone to the Mac.
Step 2. Make sure your iPhone is unlocked and click "Trust" in the prompt.
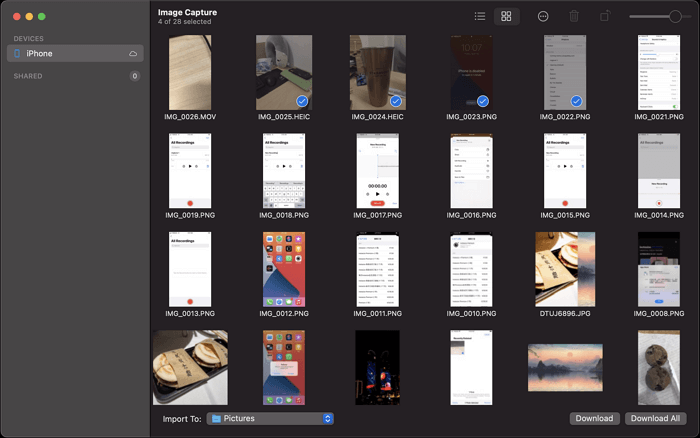
Step 3. Launch Image Capture and select your iPhone under "Devices."
Step 4. Click "Import to" and select a folder to save your iPhone photos.
Step 5. Select photos and click "Download" or click "Download All" to start importing photos from your iPhone to the Mac.
The Bottom Line
Transferring photo albums will keep your iPhone images well organized. Since neither Photos nor Image Capture allows you to transfer photos by album, you will need a professional iOS data transfer tool like Qiling MobiMover to help. Other than photo transfer, it is also useful in many other data transfer situations. Don't hesitate to give it a try.
Related Articles
- Easy Way to Extract iTunes/iPhone Backups with an iPhone Backup Extractor
- Free iPad to PC Transfer | Transfer Data From iPad to Windows PC
- Free Way to Download Videos from MySpace
- How to Transfer Music from Computer to iPhone 13/12/11 With/Without iTunes