How to Transfer Files Between iPhone and Mac in 7 Ways
Quick Navigation:
- Transfer Files between iPhone and Mac with iPhone Transfer Software
- Transfer Files Between Mac and iPhone Using iTunes File Sharing
- Transfer Files from Mac to iPhone or Vice Versa with AirDrop
- Send Files from Mac to iPhone or iPhone to Mac via Email
- Sync Files Between iPhone and Mac via iCloud Drive
- Transfer Files from Mac to iPhone or Conversely with Dropbox
- Transfer Files from Mac to iPhone via Syncing
- The Bottom Line
- FAQ
- 1. How do I transfer files from iPhone to Mac fast?
- 2. How can I transfer iPhone videos to my Mac?
- 3. How to transfer files from Mac to iPhone wirelessly?
Here are seven ways to transfer files between an iPhone and Mac: you can use AirDrop, iCloud, iTunes, Quick Look, File Explorer, Google Drive, or a USB cable to transfer files from Mac to iPhone or iPhone to Mac. Whether you want to transfer files from Mac to iPhone or send files from iPhone to Mac, these methods will help.
Transfer Files between iPhone and Mac with iPhone Transfer Software
This feature supports various file types, including photos, videos, audio files like music, ringtones, voice memos, and audiobooks, as well as books, contacts saved in HTML format, and messages sent from an iPhone to a Mac.
You can use Qiling MobiMover, a reliable iOS data transfer software, to transfer media like photos, videos, or music from your Mac to your iPhone or vice versa. With it, you can share files between a Mac and an iOS device, including sending a single file, multiple files, or all files with different types between your iPhone and Mac at once.
To transfer files from Mac to iPhone:
Step 1. Connect your new iPhone to your Mac via a USB cable and tap "Trust This Computer" on your device if a pop-up appears. Launch Qiling MobiMover, navigate to "Mac to Phone" on the main interface, and click "Select Files" to start transferring files from your Mac to your iPhone.
Step 2. You can browse files on your Mac, select the items you want to transfer, and then click "Open."
Step 3. To transfer data from your Mac to iPhone, select the files you want to transfer and preview them on the right panel. You can add new files to transfer by clicking "Add File" or dragging and dropping files into the designated area. Once you're ready, click "Transfer" to start the process, and avoid disconnecting your iPhone until it's finished. After the transfer is complete, open the corresponding app on your iPhone to access the synced data.
Besides sharing files between your Mac and iPhone/iPad, Qiling MobiMover can also be helpful in other situations, such as.
- Transfer files between PC and iPhone
- Copy data from iPhone to iPhone
- Download videos from YouTube and other sites directly to your computer or iPhone/iPad.
- View iPhone content on a computer
You can also download Twitch clips if you need to, and Qiling MobiMover can be your good helper for this task.
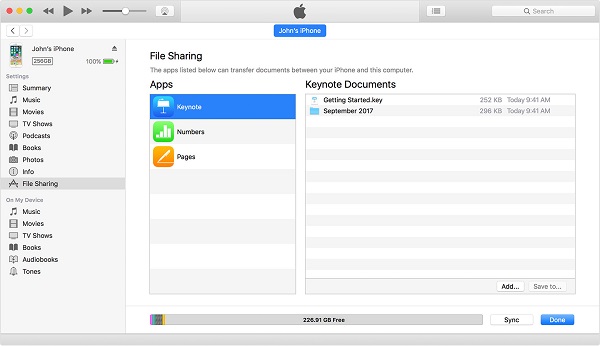
Transfer Files Between Mac and iPhone Using iTunes File Sharing
Supported Files: Files created by Keynote, Numbers, Pages
To share files between your Mac and iPhone, look for apps that support file sharing. Check the app's documentation to see if it has this feature, and you can share files between your devices.
Step 1. Connect your iPhone to your computer.
Step 2. To access the iTunes app on your Mac, click the "Device" button above the sidebar of the iTunes window.
Step 3. Choose "File Sharing".
Step 4. To transfer a file, select the app you want to transfer a file to from the list on the left.
Step 5. Start transferring files between the iPhone and Mac.
- To copy files from a Mac to an iPhone, click the "Add" button, select the desired file, and then click "Add" again.
- To send files from iPhone to Mac, select the desired file on the iPhone, click "Save to" and choose the desired location on the Mac to save the file. Click "Save To" again to initiate the transfer.
When the process is complete, you can verify the files in the designated app or location.
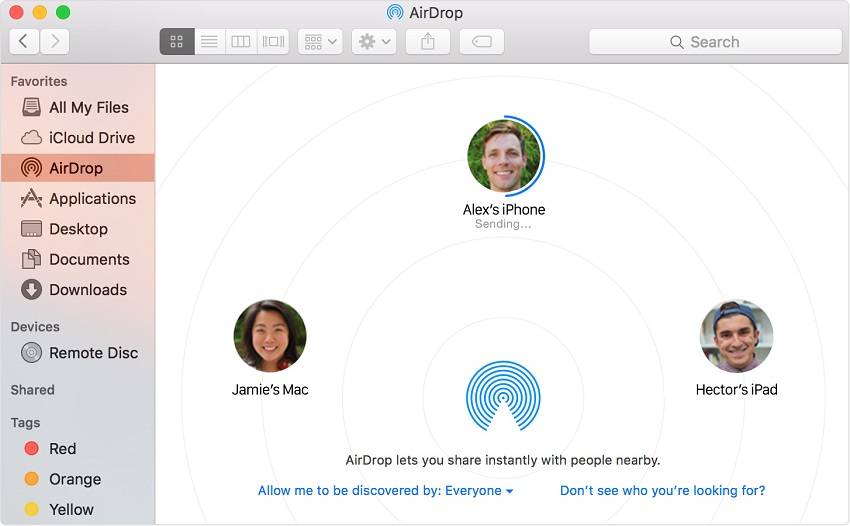
Transfer Files from Mac to iPhone or Vice Versa with AirDrop
Supported Files: Photos, Videos, Websites, Locations, and More
AirDrop is a built-in file-sharing utility that allows seamless transfers between iOS devices and Macs. With AirDrop enabled, you can send files between two iOS devices or between an iOS device and Mac using Bluetooth and Wi-Fi connections, making it easy to share contacts, photos, and more between iPhone and Mac. This makes AirDrop a practical solution for transferring files between the two devices.
To transfer files between iPhone and Mac via AirDrop:
Step 1. Turn on AirDrop on iPhone/iPad.
- Open "Control Center" on your iOS device.
- To share files using AirDrop, ensure that both Bluetooth and Wi-Fi are enabled on your iPhone, then tap on the AirDrop icon and select whether to share files with "Contacts Only" or "Everyone".
Step 2. Turn on AirDrop on Mac.
- To turn on AirDrop on your Mac, go to the Finder, select "Go" from the top menu, choose "AirDrop", and make sure that Bluetooth and WiFi are both turned on. This will enable AirDrop on your Mac.
- Set the option "Allow to be discovered by" as "Everyone" or "Contacts Only".
Step 3. Use AirDrop to share files between Mac and iPhone/iPad.
Now you can send files from Mac to iPhone or iPad using AirDrop without restrictions. There are two ways to transfer files from Mac to your iPhone with AirDrop, with transferring photos from Mac to iPhone/iPad being a common example.
To send photos from your Mac to an iPhone, simply drag the desired photos to the image of the recipient in the Messages app on your Mac, and then click "Send".
To share files using AirDrop, click the "Share" button in an App, choose "AirDrop" from the list of options, select the recipient's device from the list of nearby devices, and then click "Done" to complete the file transfer.
If AirDrop is not working on your iPhone, try restarting both devices, checking that Bluetooth and Wi-Fi are turned on, and ensuring that the receiving device has enough storage space. Also, make sure that the sender has the correct contact information for the receiving device and that AirDrop is enabled on both devices.
Send Files from Mac to iPhone or iPhone to Mac via Email
Supported Files: Photos, Videos, Documents...
Any file that can be attached to an email can be transferred between a Mac and iPhone.
To transfer files from a Mac to an iPhone, create a new email on your Mac, add the files you want to send as attachments, and send the email to your own account. Then, check the email on your iPhone, download the files, and they will be saved to your device. To transfer files from an iPhone to a Mac, create an email on your iPhone, add the files as attachments, and send it to your Mac via the Email app. The files will then be received and saved on your Mac.
Transferring files between devices can be a time-consuming process, especially if you have large files or a poor network connection. Methods like AirDrop or email may take a long time, making them suitable only for small files. For larger files, consider alternative solutions that can save you a significant amount of time.
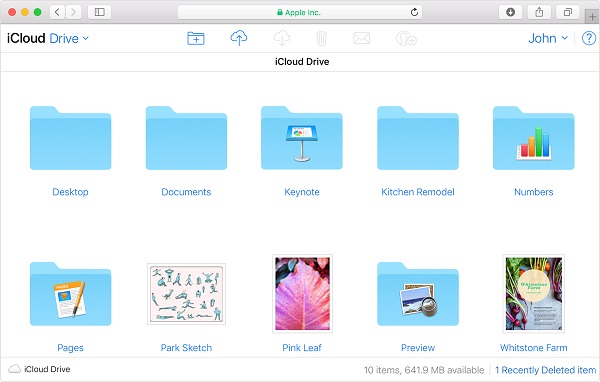
Sync Files Between iPhone and Mac via iCloud Drive
Supported Files: Word Documents, PPTs, Excel Files, and More
iCloud Drive allows users to store files in iCloud and access them from various devices, including iCloud.com, Macs, PCs, and iOS devices, by choosing which folders and files to save. With iCloud Drive enabled, users can access these files on all devices with the same Apple ID. If iCloud Drive is not syncing, users can refer to the article for troubleshooting.
To sync files between iPhone and Mac via iCloud Drive:
Step 1. Turn on iCloud Drive on your iPhone and Mac.
- To enable iCloud Drive on your iPhone, go to Settings, select your name, and then tap iCloud. Scroll down to turn on iCloud Drive.
- To access iCloud Drive on a Mac, go to the Apple menu, select "System Preferences", then choose "iCloud", and finally click on "iCloud Drive".
Step 2. To transfer files from the source device to iCloud Drive, upload the desired files in iCloud Drive on that device. This allows the files to be stored in the cloud and accessible from other devices with an iCloud account.
Step 3. Download the files in iCloud Drive in the target device.
If you're unsure about how to upload or download files from iCloud Drive, refer to the user guide on Apple Support for a comprehensive guide.
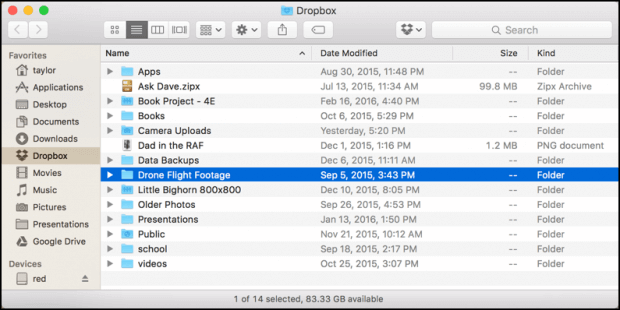
Transfer Files from Mac to iPhone or Conversely with Dropbox
The supported file types include photos, videos, word documents, excel files, PowerPoint presentations, text files, zip files, and audio files.
You can also transfer files between an iPhone and Mac using cloud storage services like Dropbox and Google Drive, in addition to iCloud. For example, with Dropbox, you can easily transfer files between your devices.
To share files between iPhone and Mac via Dropbox:
Step 1. To sync files across your devices, download and install Dropbox on both your Mac and iPhone. Then, log in to the app using the same Dropbox account on both devices. This will enable seamless file sharing and synchronization between your Mac and iPhone.
Step 2. To transfer files between a Mac and an iPhone, you can use Dropbox to upload files from the Mac to the iPhone and vice versa.
Step 3. To check and download shared files from Dropbox, open the Dropbox app on the target device and ensure it has a stable network connection. This will allow you to access and download the shared files.
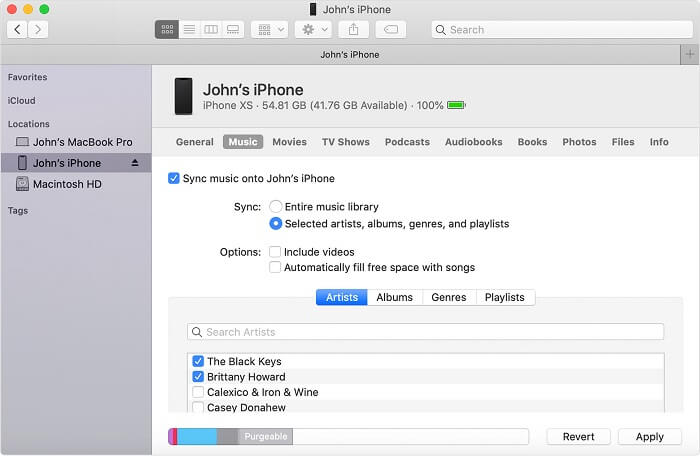
Transfer Files from Mac to iPhone via Syncing
The supported files include music, movies, TV shows, podcasts, audiobooks, books, photos, and documents.
On macOS Catalina, you can transfer files between your Mac and iPhone using a USB cable or by syncing over the same Wi-Fi connection.
To share files between iPhone and Mac via a USB cable:
Step 1. Use a USB cable to connect the devices.
Step 2. Go to "Finder" and select your iDevice.
Step 3. You can share specific types of content, such as music, movies, or files, and then see a list of compatible apps that allow you to share those items.
Step 4. To transfer files from your Mac to your iPhone, simply drag one or more files from the Finder window on your Mac onto the iPhone app on your Mac. This will initiate the file transfer process, allowing you to easily share files between your devices.
To send files between Mac and iPhone over Wi-Fi connection:
Step 1. Set up Wi-Fi syncing.
- Connect the iPhone to the Mac via a USB cable.
- Go to Finder and select your iDevice in the sidebar.
- Go to the device settings and select the "General" tab, then check the option to show the device when it's connected to Wi-Fi.
Step 2. Set the syncing settings based on your needs and click "Apply" to save your changes.
Step 3. When your iPhone and Mac are connected over Wi-Fi, you can select the iPhone in the sidebar and sync it.
The Bottom Line
Among the seven solutions, one will perfectly satisfy your need to transfer a file between Mac and iPhone, but be aware that syncing may replace existing files and cloud sharing may delete files on both devices if deleted on one. If not, consider other options.
When transferring files between your Mac and iPhone, choose a method that suits the type of file you want to transfer, such as documents, photos, or other data. This will help you transfer your files quickly and efficiently within minutes.
FAQ
1. How do I transfer files from iPhone to Mac fast?
Transferring files from an iPhone to a Mac can be done in various ways, but not all are effective and quick, often due to network restrictions. Since Apple doesn't provide a straightforward method for file transfer, using desktop-based transfer tools like Qiling MobiMover is a better option. These tools offer high-performance capabilities, supporting various iOS file transfers between an iPhone and a Mac/PC or between two iOS devices.
The Qiling MobiMover offers a high-speed file transfer solution, making it easier to transfer large files than ever before. With its fast transfer speed, you can quickly move files between devices, and it's a great option if you're looking for a reliable and efficient way to transfer files on the go.
2. How can I transfer iPhone videos to my Mac?
You can transfer iPhone videos to your Mac using either iCloud Photo Library or a USB. To use iCloud Photo Library, turn it on on both your iPhone and Mac: on iPhone, go to Settings > [your name] > iCloud > Photos, then turn it on; on Mac, click Preference > iCloud and check the box next to iCloud Photo Library. Alternatively, you can transfer videos using a USB.
To import all new videos from an iPhone to a Mac, plug the iPhone into the Mac using a USB, open the Photos app, click on the iPhone in the sidebar, and click "Import All New Videos".
3. How to transfer files from Mac to iPhone wirelessly?
We've discussed some wireless transfer solutions in our guide, including AirDrop and cloud services. If you have a better solution, you can share it with us.
Related Articles
- How to Transfer Photos from Windows 10 to iPad
- How to Transfer Data from iPhone to iPhone After Setup
- How to Transfer Photos from PC to iPhone 11/12/13 in 5 Ways
- How to Transfer Files from iPhone to PC in 6 Ways