How Do I Back Up My iPhone to the Cloud
Quick Navigation:
- When Do You Back Up an iPhone to a Cloud Service
- How Long Does iCloud Backup Take
- How to Back Up Your iPhone to Cloud
- Back Up iPhone to iCloud
- Back Up iPhone to Google Drive
- Back Up iPhone to OneDrive
- How to Back Up iPhone to Computer
- The Bottom Line
When Do You Back Up an iPhone to a Cloud Service
Backing up an iPhone can be done in three ways: to a PC, Mac, or cloud. Apple provides tools like iTunes and Finder for backing up to a computer, while iCloud is a convenient option for cloud backups. Alternatively, third-party services like Google Drive and OneDrive can also be used for cloud-based backups.
How Long Does iCloud Backup Take
To speed up your iPhone backup, connect your device to a stable and fast Wi-Fi network and delete any unnecessary files beforehand. This will help minimize the backup size and reduce the time it takes to complete the process.
How to Back Up Your iPhone to Cloud
In addition to iCloud, other cloud services can also be used to easily back up an iPhone by checking them in detail and selecting the one that suits you best.
Back Up iPhone to iCloud
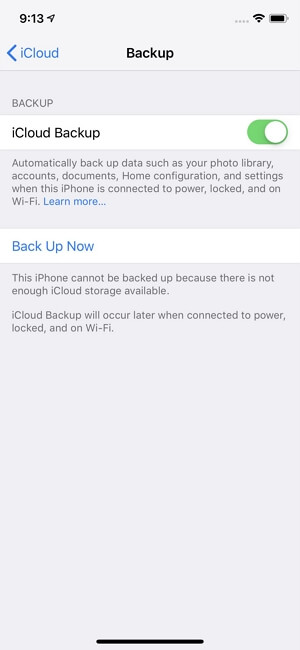
To back up your iPhone to iCloud, ensure you have enough space and connect to a reliable Wi-Fi network. Then, go to Settings, tap on your name, and select "iCloud" and "iCloud Backup". Turn on "iCloud Backup" and choose "Back Up Now" to start the backup process. This will automatically back up your iPhone to iCloud, keeping your data safe.
Step 1. Go to "Settings" and tap [your name].
Step 2. Scroll down to choose "iCloud" and tap "iCloud Backup."
Step 3. To enable automatic iCloud backups, go to Settings, then tap on your name at the top, followed by "iCloud" and select "iCloud Backup." Once enabled, your iPhone will automatically back up to iCloud when it's connected to a Wi-Fi network and charged. Alternatively, you can also initiate a manual backup by tapping "Back Up Now" in the iCloud Backup settings.
iCloud offers 5GB of free storage, and for more space, you can refer to the official guide for details.
Back Up iPhone to Google Drive
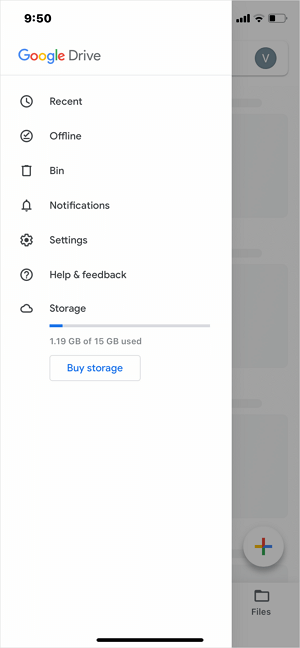
To back up your iPhone to the cloud with Google Drive, download and install the Google Drive app on your iPhone. After that, go to the app, tap on the menu icon, and select the "Settings" option. From there, toggle on the "Back up my data" switch to enable the feature. You can also choose what data to back up, such as contacts, photos, and more. Once you've set it up, your iPhone will automatically back up to your Google Drive account.
Step 1. Open the Google Drive app.
Step 2. Click the menu icon in the top left.
Step 3. Tap "Settings" > "Backup."
Step 4. Start a backup of your iPhone to Google Drive by tapping "Start Backup" to begin the process.
Back Up iPhone to OneDrive
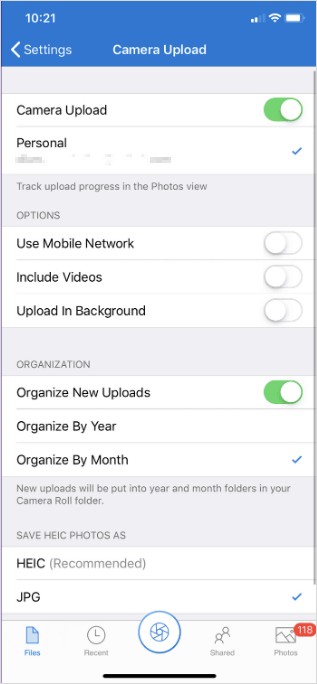
OneDrive can only back up iPhone photos and videos to the cloud, limiting its categories compared to iCloud, but it's still a viable option for backing up photos and videos.
Step 1. Download and install OneDrive on your iPhone.
Step 2. Sign in with your account.
Step 3. Click your image and then tap "Settings" > "Camera Upload."
Step 4. To enable automatic photo and video uploads from your device to OneDrive, toggle on "Camera Upload." If you also want to include videos in the backup, select the "Include Videos" option.
How to Back Up iPhone to Computer
Backing up an iPhone to Cloud requires a stable Wi-Fi network connection and sufficient cloud storage, but it's not always the best option. For situations where you prefer to back up your iPhone to a computer, you can use iTunes, Finder, or a data transfer tool like Qiling MobiMover, which allows you to transfer and backup data from your iPhone to your computer.
- To back up an iPhone or iPad, go to Settings > [your name] > iCloud > iCloud Backup and turn on iCloud Backup. You can also back up selectively by going to Settings > [your name] > iCloud > iCloud Backup and tapping on "Back Up Now" to back up your device, or by going to Settings > [your name] > iCloud > iCloud Backup and tapping on "Show All" to see a list of all your backups.
- View iPhone backups from a computer
- Restore backups to an iPhone or iPad
This feature allows you to customize the backup location, enabling you to choose any folder on your computer or an external storage device, such as an external hard drive, to back up your iPhone.
To back up your iPhone:
Step 1. Connect your iPhone to your computer running Windows system with a USB cable. Select the "Backup Manager" from the left panel, then select "Backup" to proceed.
Step 2. To back up all files from your iPhone to your computer, select the box next to "Select All" to choose all files, then set the destination on your computer to specify where you want the backup to be saved, and finally click on "One-Click Backup" to initiate the backup process.
Step 3. MobiMover will start immediately to back up iPhone files to your computer without requiring iTunes, and the process will complete once it's finished.
Qiling MobiMover is not only a PC to iPhone data transfer tool, but also a WhatsApp manager and HEIC converter, making it a versatile tool that allows you to transfer data, manage WhatsApp, and convert HEIC files.
- Transfer files between an iPhone and a computer
- Transfer data from one iPhone to another
- Transfer, back up, and restore WhatsApp messages
- Convert HEIC to JPG
You can improve your iPhone content management with this tool.
The Bottom Line
Backing up your iPhone to the cloud is a convenient way to keep your data safe. Whether you choose iCloud, Google Drive, or OneDrive, each service has its own advantages. For a more comprehensive backup that includes all file types, using a computer-based tool like Qiling MobiMover is recommended as it gives you full control over your backup files.
Related Articles
- How to Restore WhatsApp Messages on a New Android and iPhone
- Convert GPT to MBR During Windows 7 Install Without Data Loss
Do you have any idea about how to convert GPT to MBR during Windows 7 install? This post will show you how to do it. - How to Create New Partition from C Drive in Windows 7 Home?
This tutorial will introduce how to create partition from C drive in Windows 7 Home Basic using Disk Management and freeware Qiling Disk Master. - 4 Ways to Create Dell Windows 7 Recovery Media (Disk/USB)
Want to create a Dell recovery disk or USB drive in Windows 7? There are 4 effective ways you can try to create a Dell recovery media for system issues troubleshooting. Just keep reading and pick a method to perform.